Do you want to paint something delicate and stylish with just a pencil and a few watercolor paints?
In this post, I’ll show you exactly how I draw and paint a minimalistic single flower with a stem—step by step.
It’s simple, relaxing, and perfect for anyone who loves clean, elegant botanical artwork. Let’s get started!
Contents
Step 1: Sketching the Flower Structure in Pencil
Let’s begin with a pencil sketch. This step lays the foundation for your watercolor flower, so take your time and enjoy the process.
I always start by placing the flower right in the middle of the paper. This gives a clean and balanced look to the composition.
Next, I draw a stem. Instead of a straight line, I make it slightly curved — the shape looks a little like the letter “S.”
This adds a natural and gentle movement to the flower.

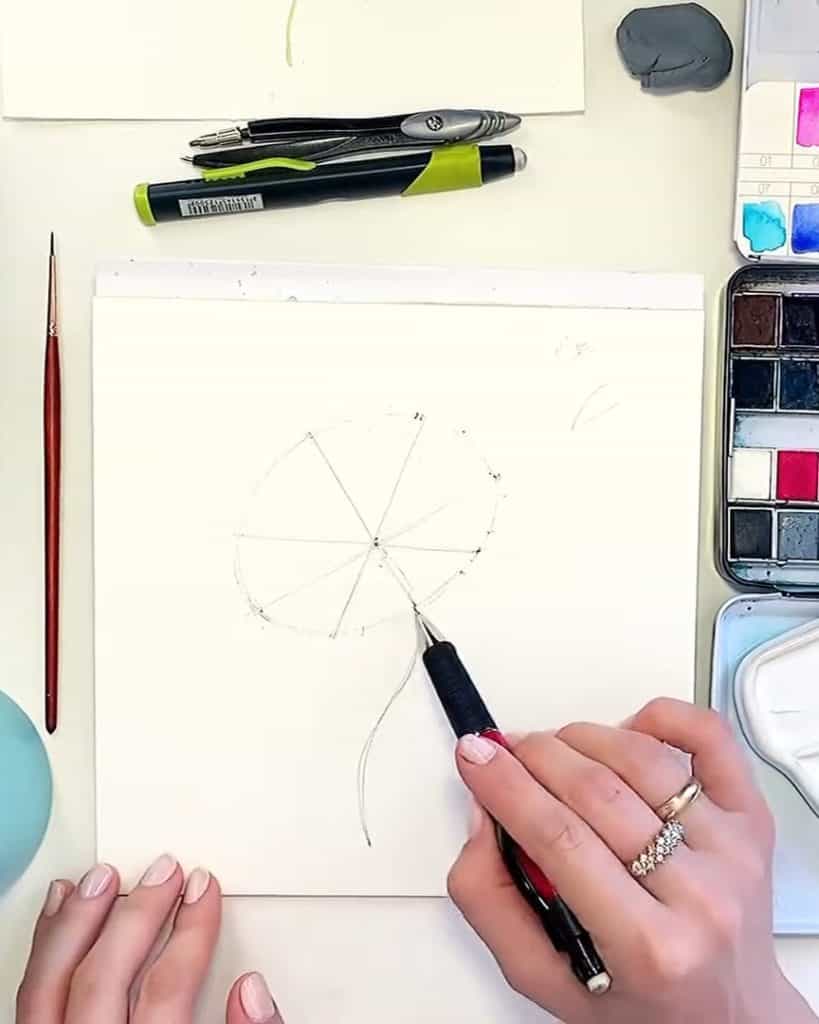
Once the stem is in place, I mark the exact point from which all the petals will grow.
This step is essential because every petal must start from the same spot to make the flower look real. Think of this point as the heart of the flower.

Now, I sketch the flower cup. First, I decide on the direction it tilts. In this case, I tilt it slightly to the left. I draw a light tilt axis to guide me.
Then, I draw the base of the flower cup as an oval. Since we’re viewing the flower at an angle, the oval isn’t even — the bottom part is smaller than the top.
This simple trick gives the flower a nice perspective. I divide this oval into eight equal parts. These marks will help me place the petals evenly later on.
Step 2: Sketching the Petals with Perspective
With the base in place, it’s time to bring the petals to life. In this part, we’ll look at shape, size and how perspective changes everything.
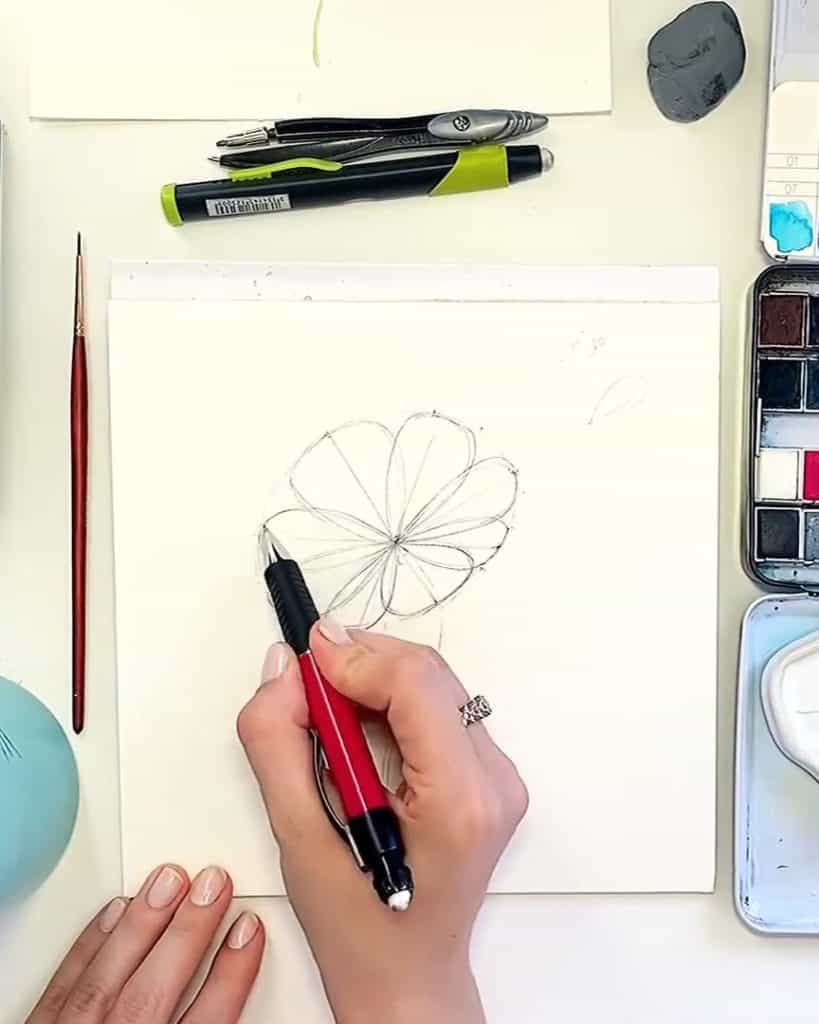
I start drawing each petal with a soft, oval shape. One end of the petal becomes thinner as it moves toward the center point of the flower.
This narrowing shape helps the petals feel like they belong to the same flower.
Because the flower is drawn in perspective, the petals that are closer to us appear larger. The ones farther away look smaller.
I pay attention to this detail to make the flower look more three-dimensional and natural. I continue sketching all eight petals, adjusting their sizes based on their position.
After I finish the full pencil sketch, I carefully erase any extra construction lines. This cleanup makes the drawing look neat and helps me prepare for the watercolor part. Now the pencil sketch is ready for painting!

Step 3: Painting the Petals with Watercolor
Now, the real fun begins. Let’s start painting the petals using soft, translucent watercolor layers. I use the same technique I’ve shared in previous tutorials.
I always paint the farthest petal first. I use a light pink watercolor solution to fill in the whole petal.

While the paint is still wet, I take a thin brush and add a stronger pink color around the edges. This soft blending technique helps the petal look delicate and natural.
You don’t have to make the petal edges perfectly smooth. Let them be a little uneven. It makes the flower look more realistic.

While the petal is still wet, I dip my brush in a light yellow watercolor solution. Then, I make a few yellow dots right in the middle of the petal and along its edges.
This adds more depth and a natural touch of warmth.

Now, I repeat the same process with the rest of the petals — always starting with the ones farther away and working my way toward the front.
But there’s one crucial rule I always follow: wait for the petal to dry before painting the next one.
This prevents the colors from bleeding into each other and keeps the shapes clear. If the paper is too damp, I remove excess water with a cotton pad.
Each petal gets the same gentle treatment: a light pink wash, deeper pink at the edges, and a few yellow touches. The combination creates that soft, translucent effect that I love.

Step 4: Painting the Stem
Once the petals are done, I move on to the stem. It’s a simple step, but it completes the look of the flower.
I take a light green watercolor solution and a thin brush. Then, I carefully paint a thin line starting from the bottom of the flower cup and extending down to the end of the stem.
The shape follows the pencil sketch, keeping that soft S-curve we drew earlier. This part doesn’t take much time, but it ties everything together.

Finally, I check the whole flower. I make sure every petal is fully dry and the colors look balanced. I might go back and darken the edges a little if needed, but I keep it simple and clean.
If there is too much space between the petals, I will add some petals to make the flower look more natural. I always apply the wet-on-wet technique when painting them.

After that, I remove excessive sketches with an eraser. And just like that, our beautiful flower is complete. So minimalistic and yet so stylish.
I really love how it turned out — and I hope you do, too.
Wrapping Up
Why not give this simple flower a try the next time you pick up your brush?
With just a pencil and a few gentle watercolor washes, you can create something soft, elegant, and full of charm.
This step-by-step process is easy to follow and leaves room for your personal style to shine.
Keep practicing; you’ll see how even the most minimal designs can feel beautifully complete.