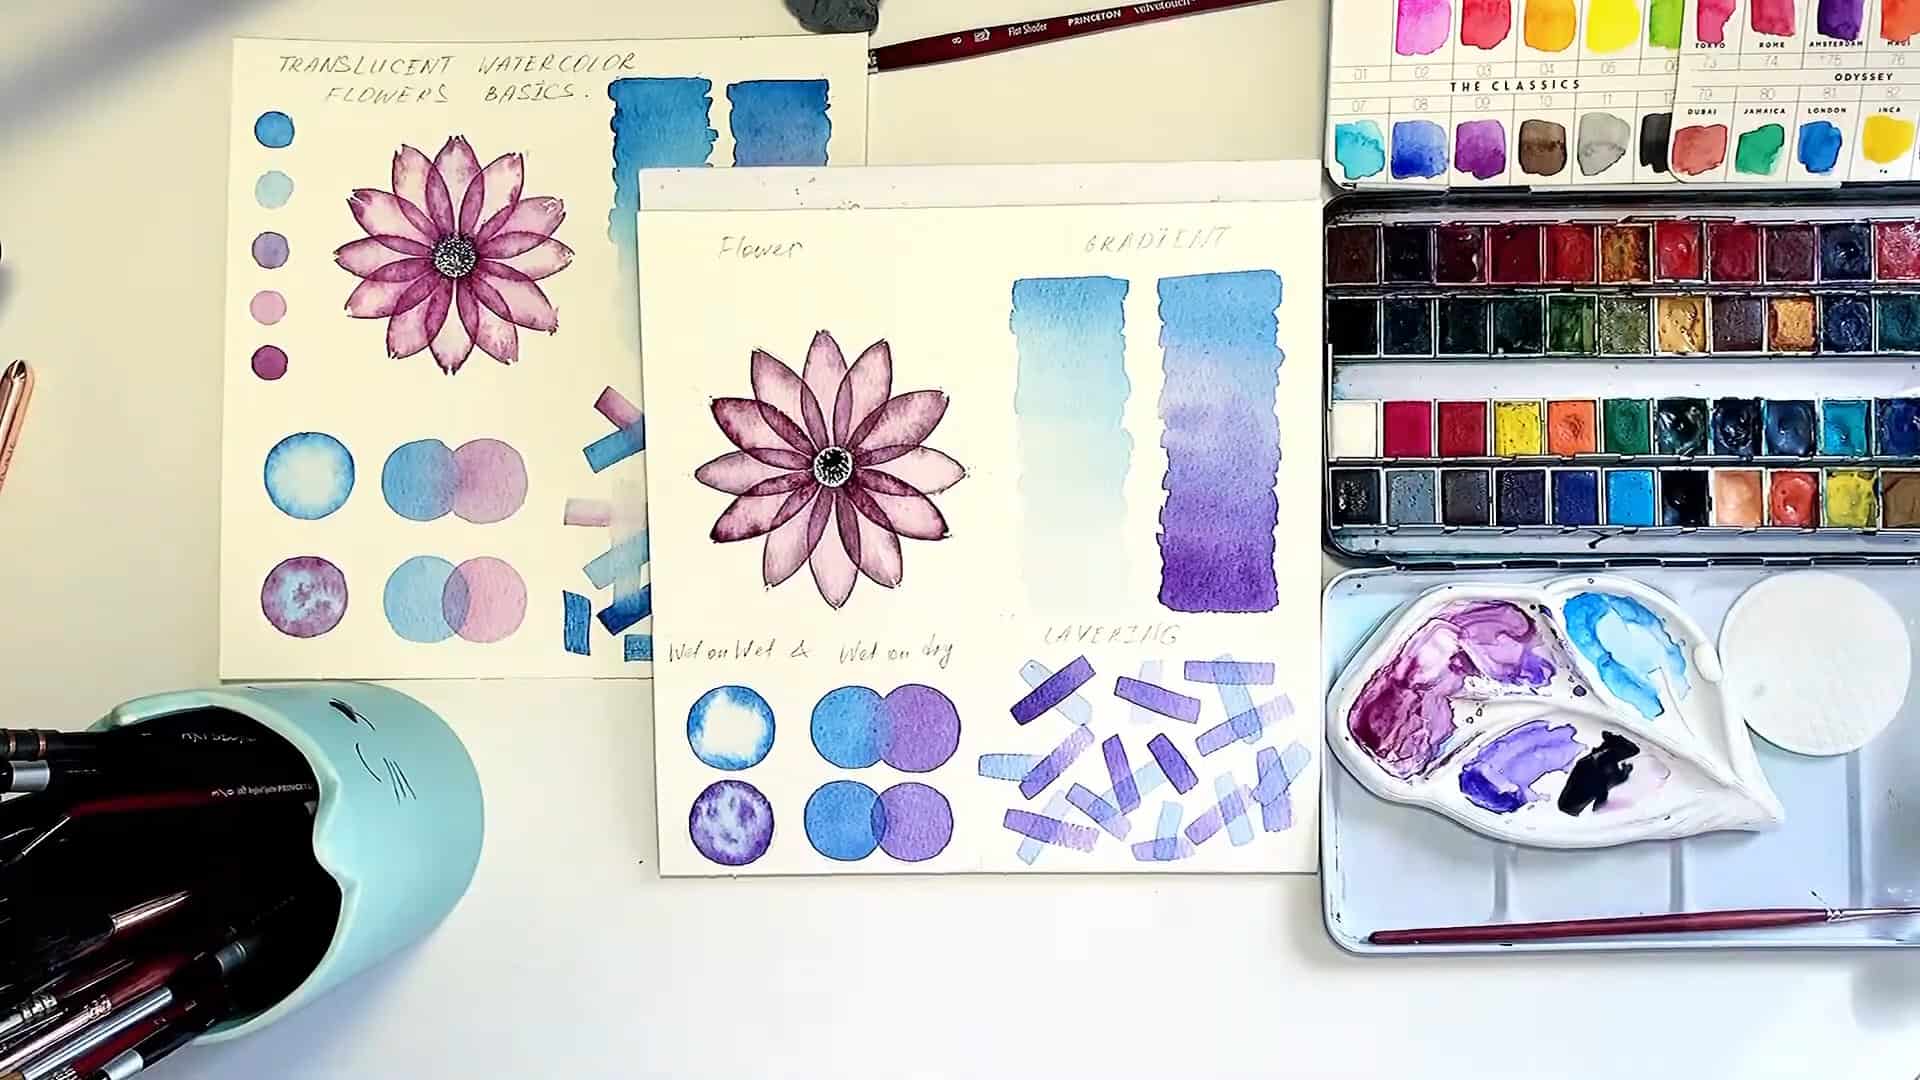
Are you ready to start your first translucent watercolor flower?
In this tutorial, I’ll walk you through each step—from sketching to painting with watercolor techniques like wet-on-wet and layering.
It’s time to put your basic skills into action and enjoy the flow of color and softness that only watercolor can offer.
Grab your brush, and let’s begin our first flower together!
Contents
Step 1: Sketching the Flower Foundation
Before we dive into painting, we need a simple sketch. This step will guide your brush and make sure everything stays in place.
Let’s begin with the main shape of the flower. I start by drawing a circle. You can use anything circular—like a cup, tape, or a round lid.
The circle represents the top view of the flower, often called the flower cup. It helps us keep the composition symmetrical and neat.

Next, I divide the circle into 12 equal parts. Think of it like a clock face. These 12 slices will help us place each petal evenly around the flower.
Just use light pencil strokes to make the lines visible enough to guide you.

Now, I draw oval-shaped petals along those 12 lines. Each petal should curve gently from the edge of the circle toward the center.
Don’t worry about making them perfect—this is just a guide for where the colors will go.

Once I’m happy with the petal shapes, I take an eraser and remove any extra pencil lines. This includes the main circle and the dividing lines.
Keeping your sketch clean helps your watercolor look light and soft, like real petals.

After tidying up the petal lines, I draw a small circle in the middle. This will be the center of our flower. Later on, we’ll add texture and depth here with darker paint.

Step 2: Painting the Petals with Translucent Watercolor Techniques
With the flower sketched and ready, it’s time for the fun part—painting with watercolors! Let’s start with the gradient fill technique using wet-on-wet.
To start painting, I load my brush with a very light solution of purple watercolor. I fill one petal completely with this soft color.

While the paint is still wet, I switch to a thinner brush and use a more saturated mix of the same color. If the water is too damp, I use a cotton pad to remove excess water.
Then, I gently touch the edges of the petal. This step is similar to what we practiced in the circle exercise earlier in the basic techniques.

For this process, I use brush number 6 to cover the larger areas smoothly. For the edges and smaller details, I go with the brush number 0.
This way, I can keep everything clean and soft.
The key here? Patience. Let the petal dry completely before painting the next one.
If you paint two wet petals next to each other, the colors might bleed and blur the details.
Once one petal is dry, it’s safe to move on. In this step, I’ll build out the rest of the petals using layering techniques.
To avoid paint bleeding, I fill in the petal that lies directly opposite the one I just painted.
I wait for each petal to dry thoroughly before moving on to the next. I repeat this method across all the petals.
A little tip: if you’re in a hurry, you can use a hairdryer to speed up drying.
Or, gently blot excess water with a napkin or cotton pad to help the paper dry faster.

Step 3: Working in Layers: Creating Depth and Transparency
Now that I’ve painted all the opposite petals, I begin filling in the remaining ones in between. This is where the layering technique we practiced earlier really shines.
I first apply a light wash of color while the petal is wet.

Then, I touch the edges again with a stronger, more saturated version of the same color. I let each petal dry before starting the next.
This step-by-step rhythm helps maintain clean, distinct shapes with soft transitions.
The secret to that glowing, translucent look is in the technique: combining wet-on-wet and wet-on-dry.
The wet-on-wet gives soft edges, and the wet-on-dry layering adds depth and dimension.

I keep repeating this process for every petal. Gradually, you’ll see your flower take shape—with soft blends, light-filled petals, and delicate layers that feel almost see-through.
That’s the magic of watercolor!

Step 4: Finishing Touches: Painting the Flower Center

Now, it’s time to bring attention to the middle of the flower. This small detail ties the whole painting together.
I load a dark color with a thin brush—either black or Payne’s gray. Using tiny dotted strokes, I cover the center of the flower.
These little dots give the illusion of texture and depth, just like you’d see in the middle of a real bloom.
After dotting the center, I let it dry completely. No smudging allowed!
Once dry, the middle stands out nicely against the soft petals and adds a perfect final touch to the flower.
Final Thoughts
There you have it—your very first translucent watercolor flower! Doesn’t it feel satisfying to use everything you’ve learned and see it come together in one project?
Take your time, enjoy the process, and try painting a few more with different colors.
What colors will you try next time? Let me know in the comments or tag me in your results—I’d love to see your floral creations bloom!

