Have you ever wanted to create layered, delicate watercolor flowers but struggled with depth?
Negative painting is the key! Instead of painting the flowers directly, you paint around them, making them stand out naturally.
This technique might seem tricky, but I’ll break it down into easy, step-by-step instructions. Grab your brushes, and let’s get started on a beautiful floral watercolor painting!
Contents
- 1 Essential Watercolor Supplies for Negative Painting
- 2 Step 1: Create the First Wash for a Smooth Watercolor Background
- 3 Step 2: Sketch the First Layer of Flowers for Negative Painting
- 4 Step 3: Negative Painting the Second Layer of Flowers
- 5 Step 4: Add a Third Layer for More Depth in Watercolor Flowers
- 6 Step 5: Refine Details with the Final Layer of Negative Painting
- 7 In A Nutshell
Essential Watercolor Supplies for Negative Painting
Before we dive into the technique, it’s essential to have the right materials. Good supplies make a huge difference in how well your layers blend and how vibrant your painting turns out.
Best Watercolor Paper for Negative Painting
For negative painting, I always use Arches watercolor paper. It absorbs water evenly and prevents unwanted warping.
Cold-pressed paper works best because it has just the right amount of texture to hold the paint while allowing smooth blending.
If you use lower-quality paper, your washes might not blend well, and the paper could tear after multiple layers.
Trust me—using good paper will make this process much easier!

Best Watercolor Paints and Brushes for Layering
For paints, I use Winsor & Newton watercolors because they have rich pigments and blend smoothly.
Any professional-grade watercolors will work, but avoid student-grade paints, as they tend to be chalky and dull.
Brushes are just as important. A fine-point brush is essential for painting around the flowers. I use:
- A number 9 brush for larger washes
- A number 4 brush for small details
A brush with a sharp point makes it easier to control edges and define details in your negative painting.

How to Prepare Your Workspace for Watercolor Painting
Having a clean and organized workspace makes the painting process smoother. Here’s what I do before I start:
- Fill two jars with clean water (one for rinsing, one for clean washes).
- Cut my Arches watercolor paper to a smaller, more manageable size.
- Keep a kneaded eraser nearby to lighten sketch lines.
- Have my paints and brushes arranged for easy access.
Now that we have everything ready, let’s start painting!

Step 1: Create the First Wash for a Smooth Watercolor Background
The first wash will be the base for our painting. It should be soft, even, and light enough for later layers to stand out.
How to Properly Wet Your Paper Before Painting
I start by wetting the entire paper with a clean brush and clear water. This helps the paint spread smoothly without harsh edges.
Be careful not to oversaturate—too much water can cause uneven drying.

Best Color Combinations for a Warm Watercolor Base Layer
For this floral piece, I use a soft peachy-orange wash. I mix a tiny bit of orange and pink to create a warm, glowing background.
I apply it lightly, making sure not to go too dark—this layer should stay delicate to support future layers.
Once the first wash is completely dry, we move on to sketching the first layer of flowers.

Step 2: Sketch the First Layer of Flowers for Negative Painting
Now, it’s time to add the first floral elements. These flowers will stay the lightest in the painting.
How to Draw Simple Five-Petal Flowers for Layering
I use a mechanical pencil to sketch simple five-petal flowers across the paper. I make sure to vary the sizes and positions for a more natural look.
These shapes will remain unpainted in later steps, so they need to be well-defined.

Why You Should Lighten Pencil Marks Before Painting
Before moving on, I gently use a kneaded eraser to lift any dark pencil lines. This prevents them from showing through the final painting.
Keeping the marks light and subtle ensures the flowers blend beautifully with the layers.
Now, we’re ready for our first round of negative painting!

Step 3: Negative Painting the Second Layer of Flowers
Negative painting means painting around the flowers instead of inside them. This helps the shapes stand out while adding depth.
How to Paint Around the First Layer of Flowers
For this step, I use a mix of Cadmium yellow and pink. I carefully paint around the edges of the first-layer flowers, leaving them untouched.
This creates contrast and makes them pop against the background.

How to Add Tonal Variations Without Making Muddy Colors
I keep the second layer slightly darker than the first but still soft. To avoid muddy colors, I let the washes blend naturally and don’t overwork the paint.
A few subtle dabs of extra yellow and pink help create a smooth, organic look.
Once this layer dries, it’s time to add even more depth.

Step 4: Add a Third Layer for More Depth in Watercolor Flowers
Now, we build on the previous layers by adding more flowers and deeper shadows.
How to Sketch Over the Second Layer for a 3D Effect
I lightly sketch new five-petal flowers, placing some underneath the first ones. This gives the illusion of depth and layering.
The key is to fill empty spaces while keeping a balanced composition.

The Best Way to Introduce Darker Shades for More Contrast
To enhance contrast, I mix pink and purple for this wash. Painting around the new flowers deepens the background, making the first layers appear even brighter.
I take my time, ensuring each shape is well-defined. At this stage, the painting looks full and dynamic!

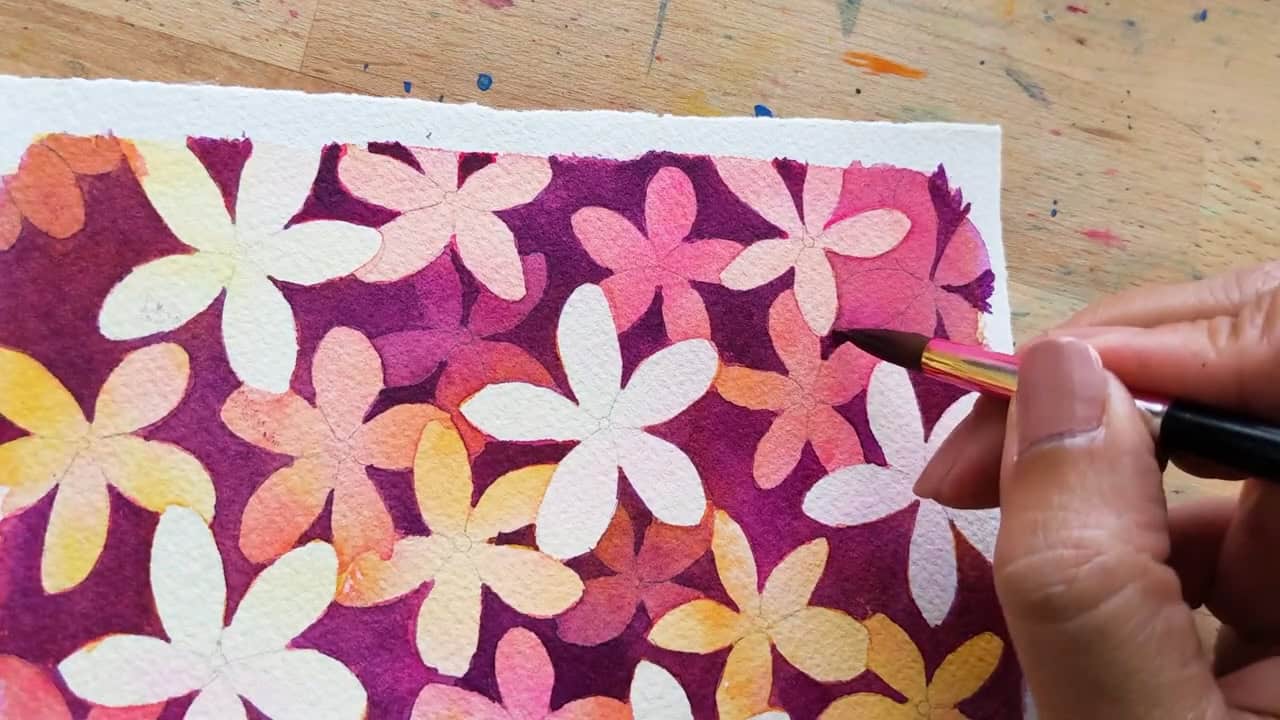
Step 5: Refine Details with the Final Layer of Negative Painting
This last step adds fine details and rich contrast, making the flowers look complete.
How to Paint the Smallest and Deepest Negative Spaces
Now, I switch to a number 4 brush to carefully paint the tiniest gaps between the petals. This creates sharp edges and refined details, making the flowers stand out beautifully.

Final Touches: How to Fix Mistakes and Enhance Petal Edges
This is also the time to fix any mistakes from earlier layers. If a petal edge looks too rough, I smooth it with a darker shade.
This tightens the composition and makes the painting look polished.

In A Nutshell
Negative painting is a fantastic way to create depth and beauty in watercolor art. By layering washes and painting around your subjects, you can achieve a stunning floral effect.
I hope this guide helped you feel more confident with this technique!
Have you tried negative painting before? Let me know in the comments—I’d love to hear about your experience!
And if you enjoyed this tutorial, don’t forget to share it with fellow artists.