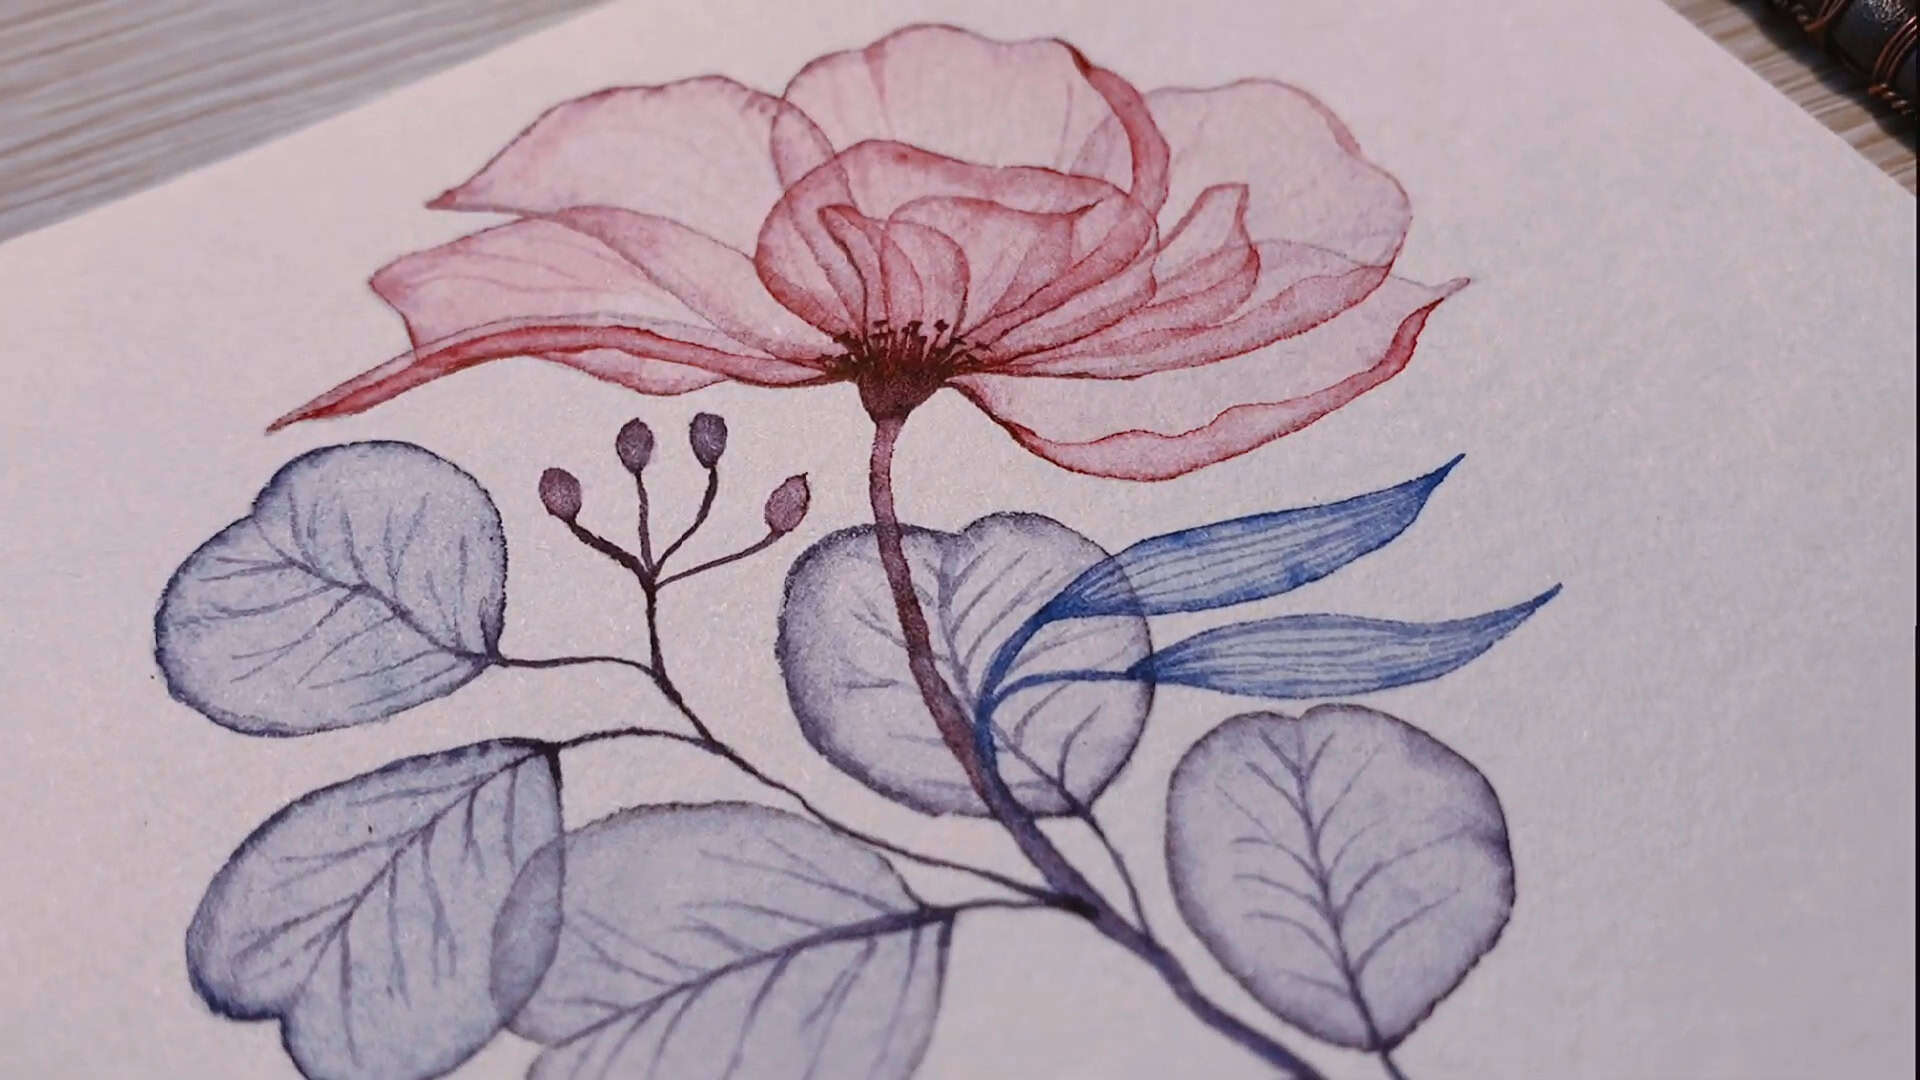
Have you ever struggled to create soft, transparent watercolor layers? If so, you’re not alone! Mastering the basics of watercolor painting is essential for achieving beautiful, luminous artwork.
In this guide, I’ll walk you through the fundamental transparent watercolor technique, from choosing materials to layering colors.
Whether you’re a beginner or looking to refine your skills, this step-by-step guide will help you improve your watercolor paintings effortlessly. Let’s get started!
Contents
Essential Materials for Transparent Watercolor Painting
Before we start painting, let’s talk about the materials. Choosing the right supplies makes a huge difference in your final artwork.
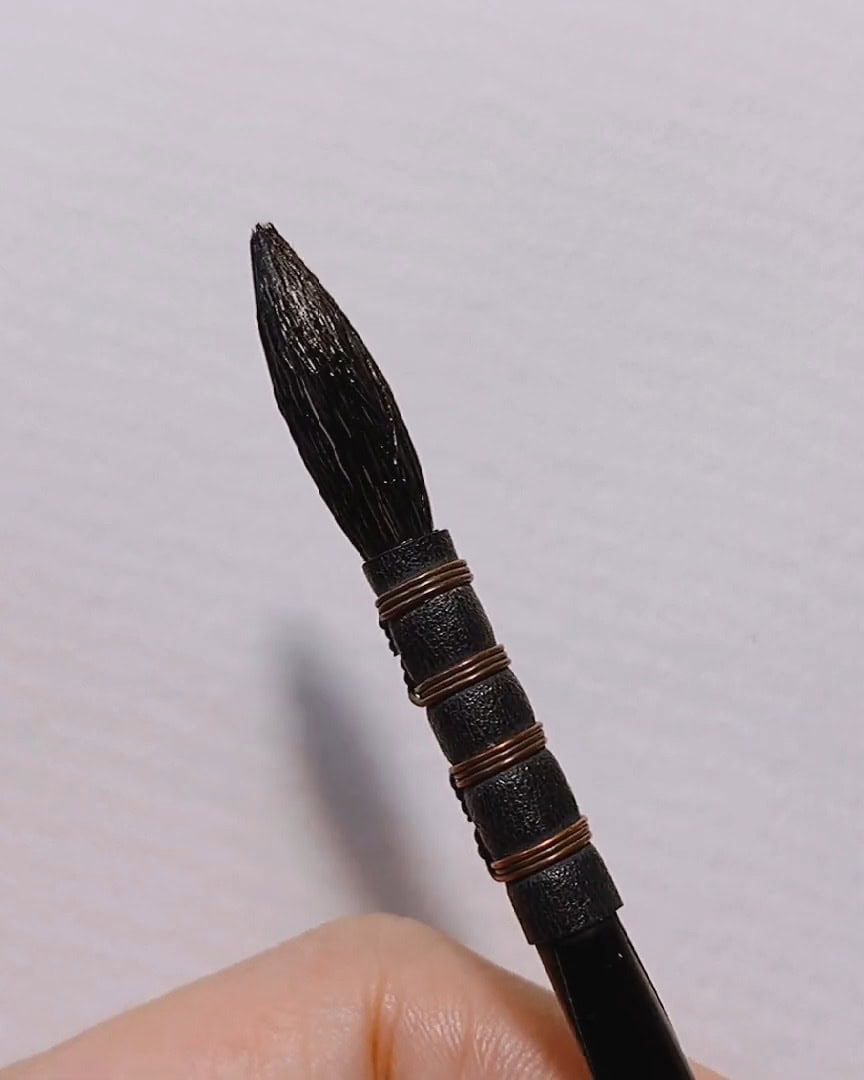
Choosing the Right Brushes
The brush you use can greatly impact your painting. For this technique, I recommend:
- Squirrel hair water brush (Art Secret) – This brush holds a lot of water, making it perfect for soft, fluid strokes.
- Detail brush – A must-have for adding fine details and sharp edges.
- Calligraphy brush (as an alternative to a round brush) – If you don’t have a round brush, a calligraphy brush works well for creating expressive strokes.
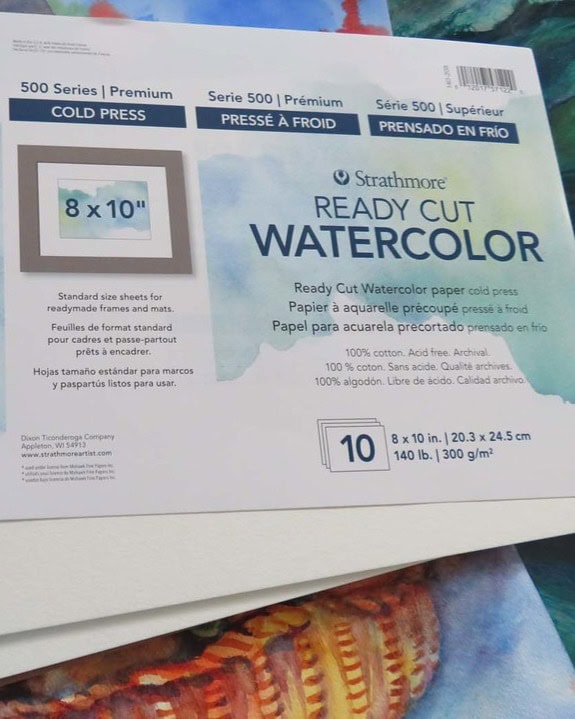
Selecting the Right Paper
Paper quality affects how watercolor behaves. Here are two great options:
- Hot press paper – Smooth and great for detailed work.
- Cold press paper – Slightly textured, allowing colors to blend beautifully.
Both types work well, so choose based on your preference!
Sketching the Flower Base
Now that we have our materials ready, it’s time to sketch the base of our flower. A good sketch provides a strong foundation for your painting.
Planning the Layers
When painting flowers with watercolor, layering is key. Start by sketching a flower with multiple layers:
- Draw the base layer with large petals.
- Add a second layer with slightly smaller petals.
- Finish with a third, very light layer to create depth.
Each layer should be painted separately, allowing the previous one to dry completely.

Adding Leaves and Stems
Once the flower is outlined, sketch a few leaves and stems to complete the composition. Keep the lines light so they don’t show through the watercolor.

Preparing and Mixing Watercolor Paints
Before applying color, we need to mix the right shades. This step ensures smooth transitions and vibrant results.
Creating Two Paint Mixtures
For this technique, I prepare two color mixtures:
- A diluted (light) wash – Used for the first layer.
- A more concentrated (darker) pigment – Used for defining edges and details.
I use White Nights watercolor paint, which has a slightly bright pink hue. To balance it, I mix the pink with a touch of blue for a softer, more natural tone.

Understanding Water-to-Paint Ratio
Water control is one of the most important aspects of watercolor painting. Too much water makes colors look weak, while too little prevents smooth blending.
For transparent effects:
- Use a high water-to-paint ratio for soft washes.
- Increase pigment concentration for darker areas and details.
Step-by-Step Guide to Painting the Flower
Now, let’s start painting! Follow these steps carefully to achieve soft, natural-looking petals.
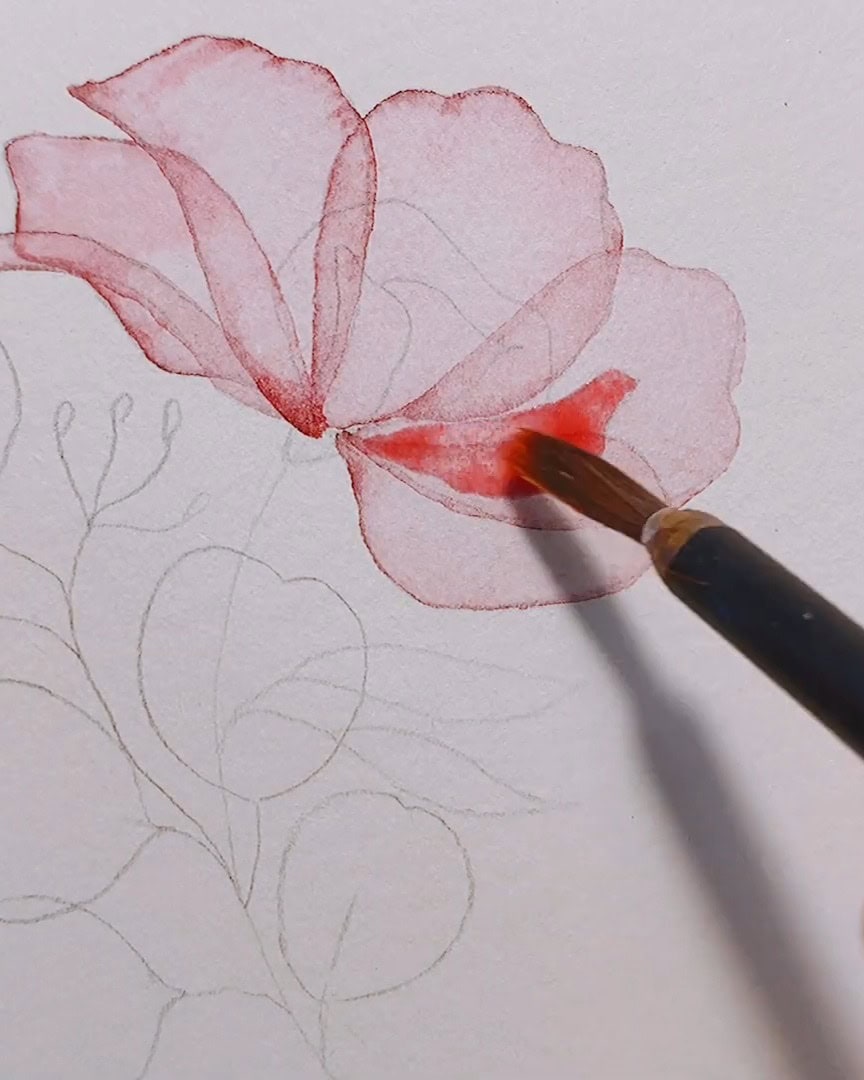
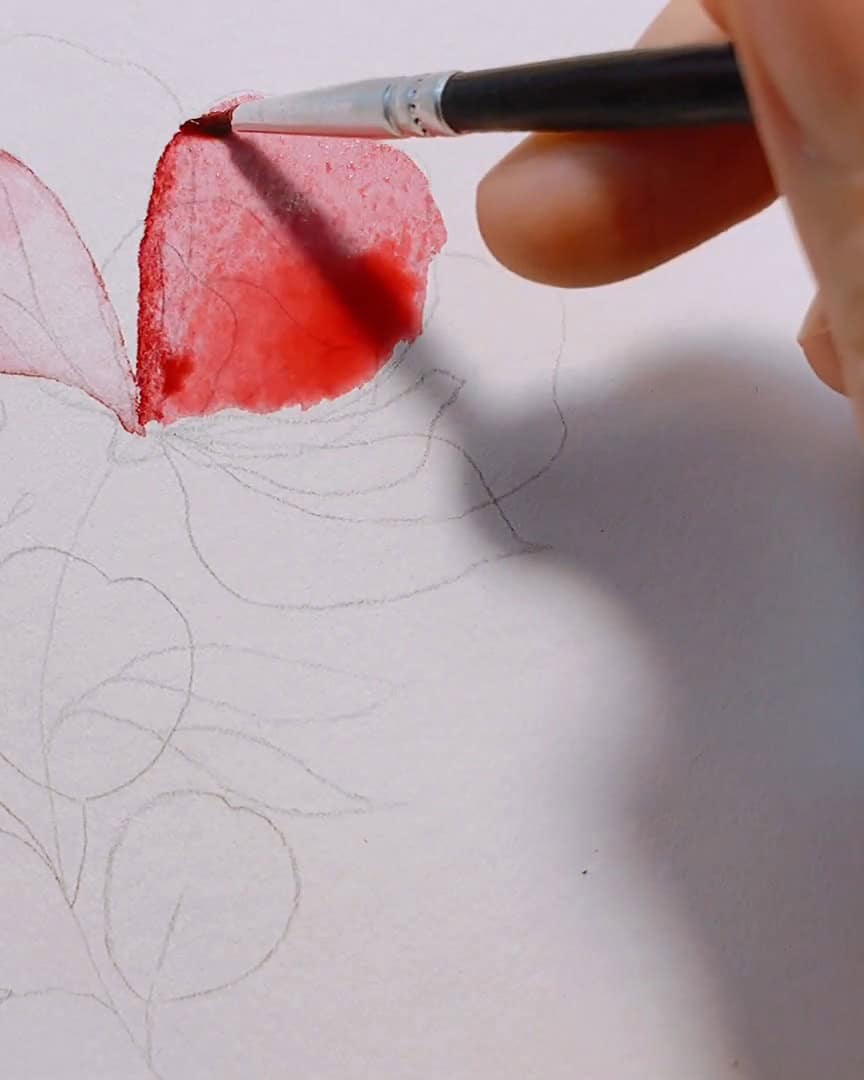
Step 1: Layering the First Petal
I begin with a soft pink wash for the first layer of petals. Using a round brush, I apply a very light stroke, ensuring that the paint spreads evenly.
A wet-on-wet technique works well here—simply apply water first and then add color for a smooth gradient.
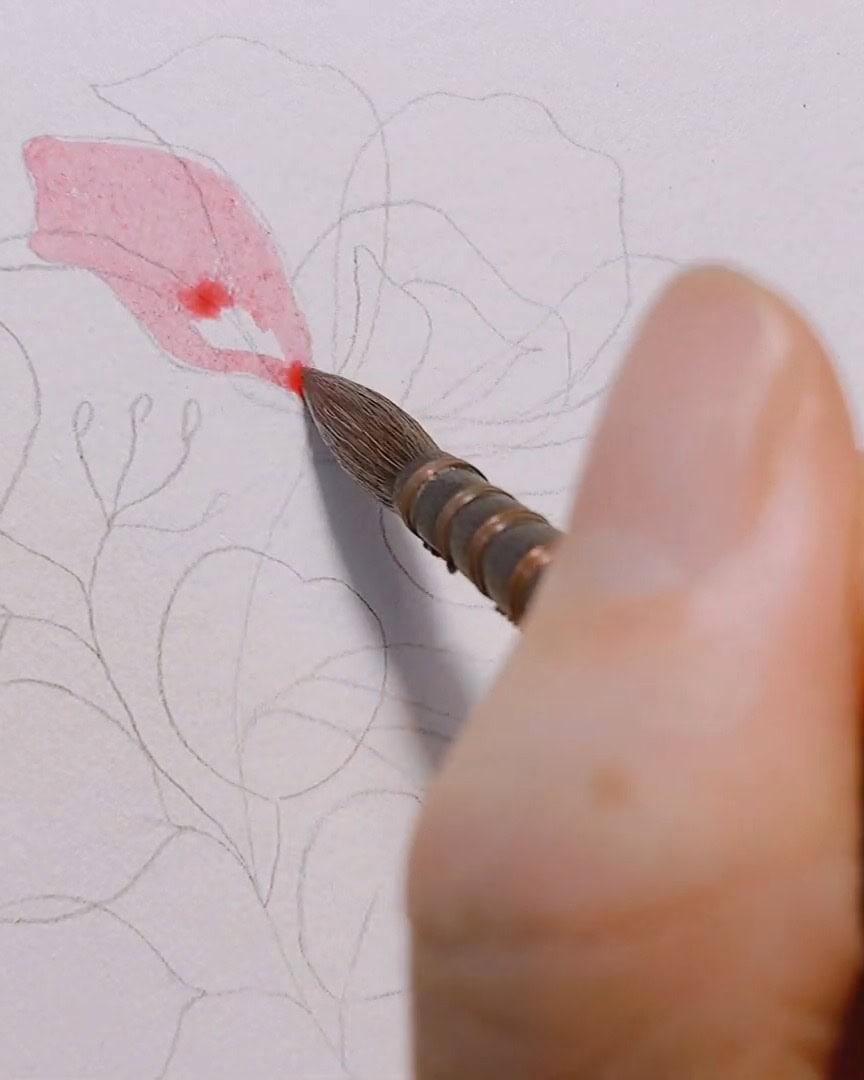
Step 2: Enhancing the Petal Edges
Once the first layer is slightly dry, I take my detail brush, dip it into the concentrated color mixture, and gently outline the petal edges.
This technique adds depth and definition to the flower.

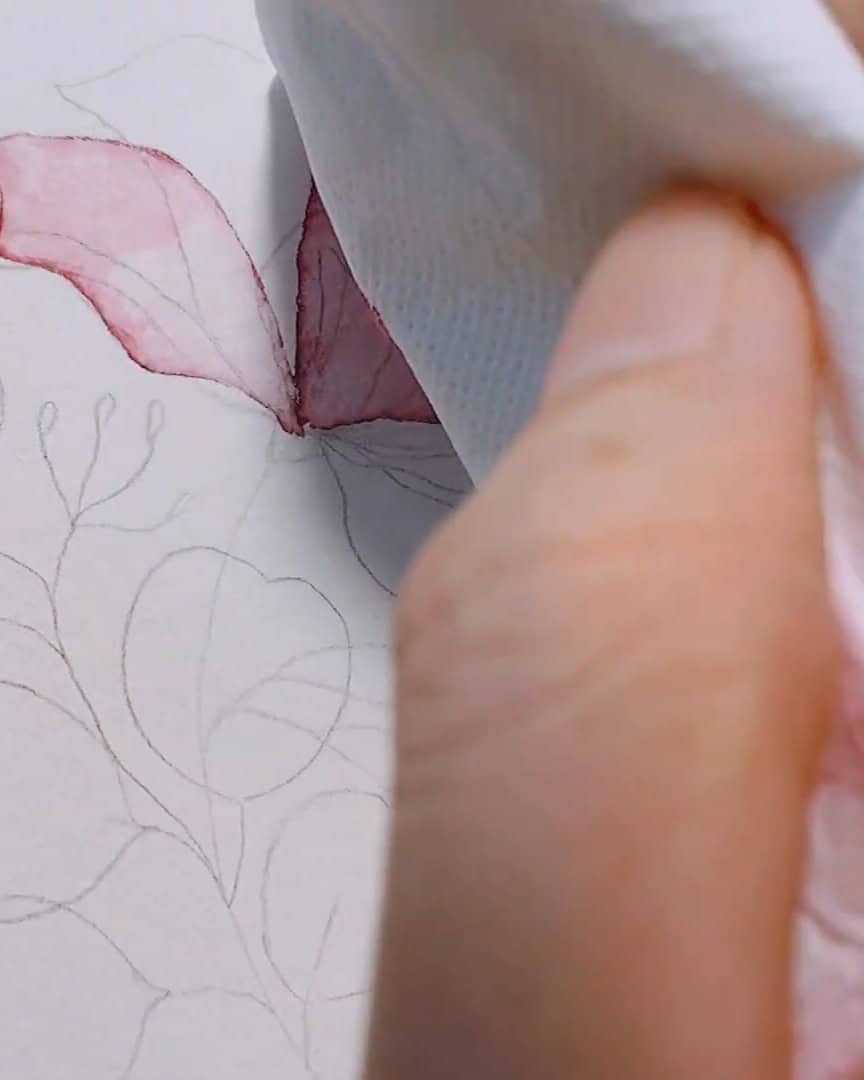
Step 3: Blending and Softening
To create a natural look:
- Dip a clean brush in water and blend the darker edges into the lighter areas.
- Use a tissue to gently lift excess water if needed.
This technique prevents harsh lines and keeps the petals looking soft and delicate.
Step 4: Drying and Adding the Second Layer
Once the first layer is completely dry, I begin painting the second layer of petals using the same technique.
Each new layer should be applied only after the previous one has dried to prevent colors from blending too much. This helps maintain crisp, realistic petals.
Painting Leaves and Stems
Now that the flower is complete, let’s move on to the leaves and stems. These details add contrast and balance to the composition.
Using the Same Transparent Technique
Start by applying a light wash for the base layer of the leaves. Just like with the petals, use soft strokes to maintain transparency.
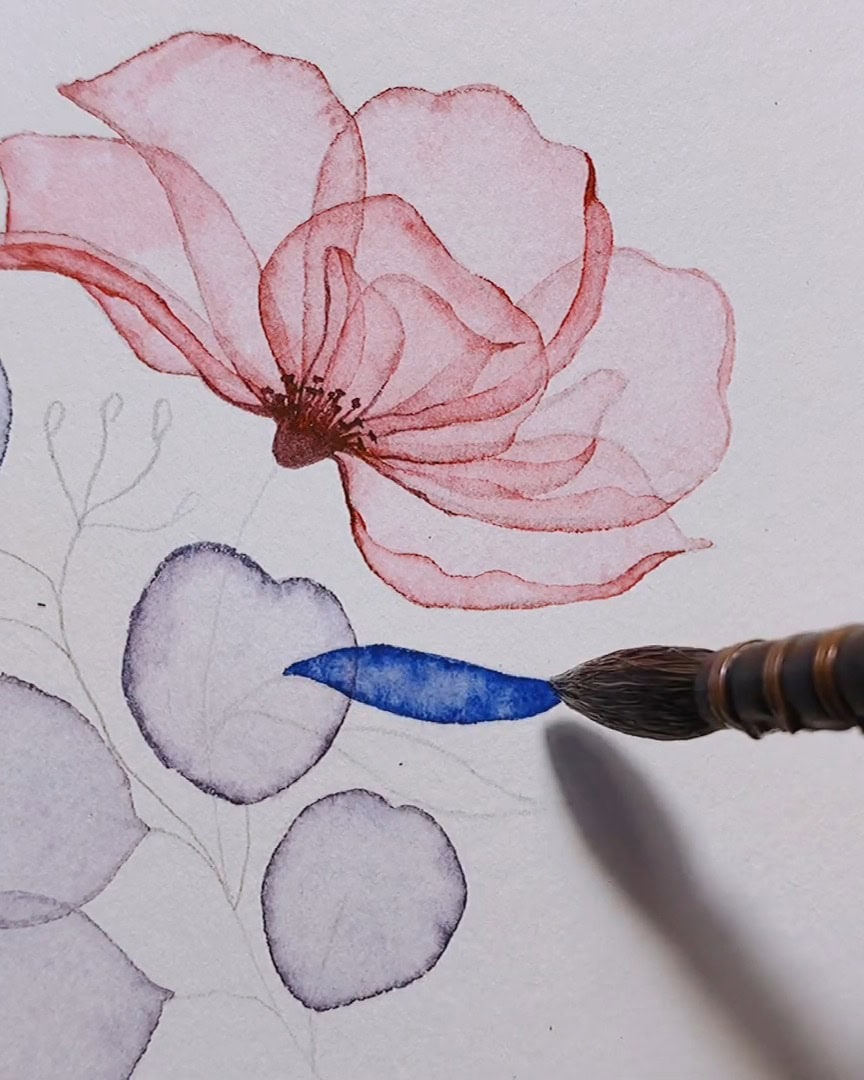
Fine-Tuning the Details
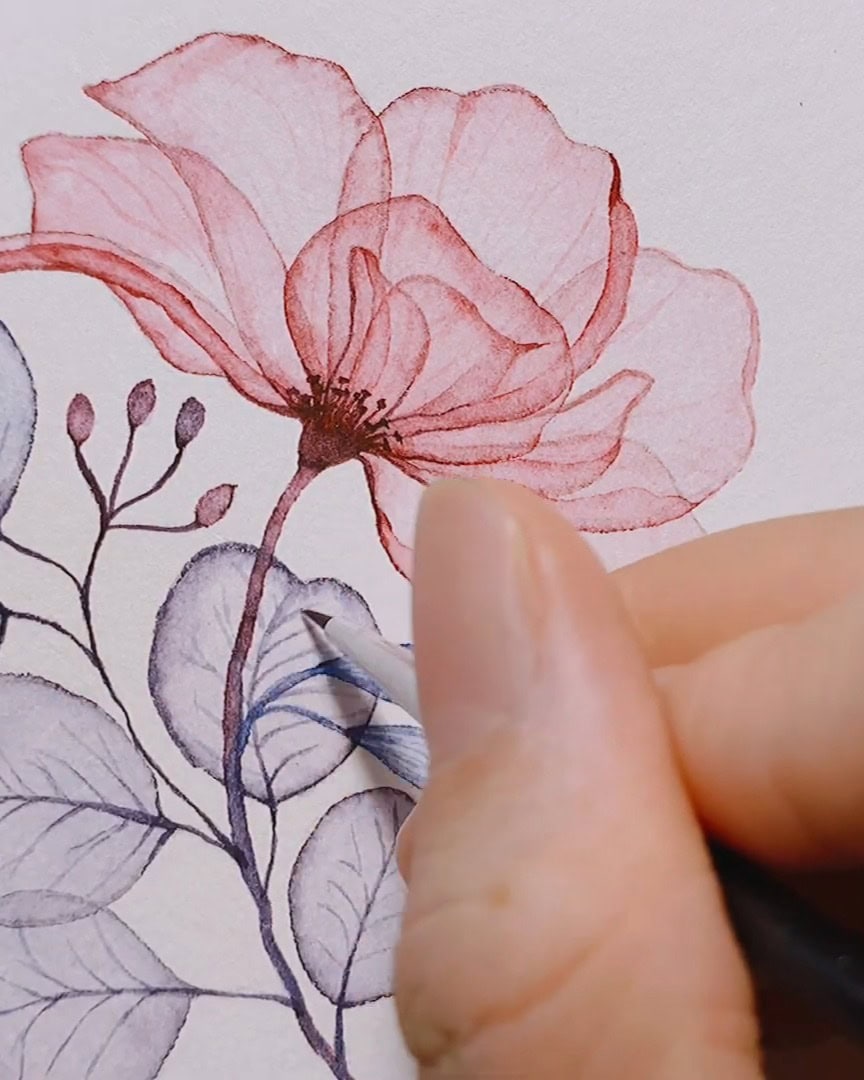
Once dry, use a darker shade to define the leaf veins and stems. A detail brush helps create thin, precise lines without overpowering the composition.

Final Touches and Enhancing the Artwork
At this stage, the painting is almost complete, but a few extra touches can make a big difference.
Refining the Flower’s Details
To make the flower more lifelike, add subtle variations in color within the petals. A little touch of blue or purple in the shadows can enhance realism.
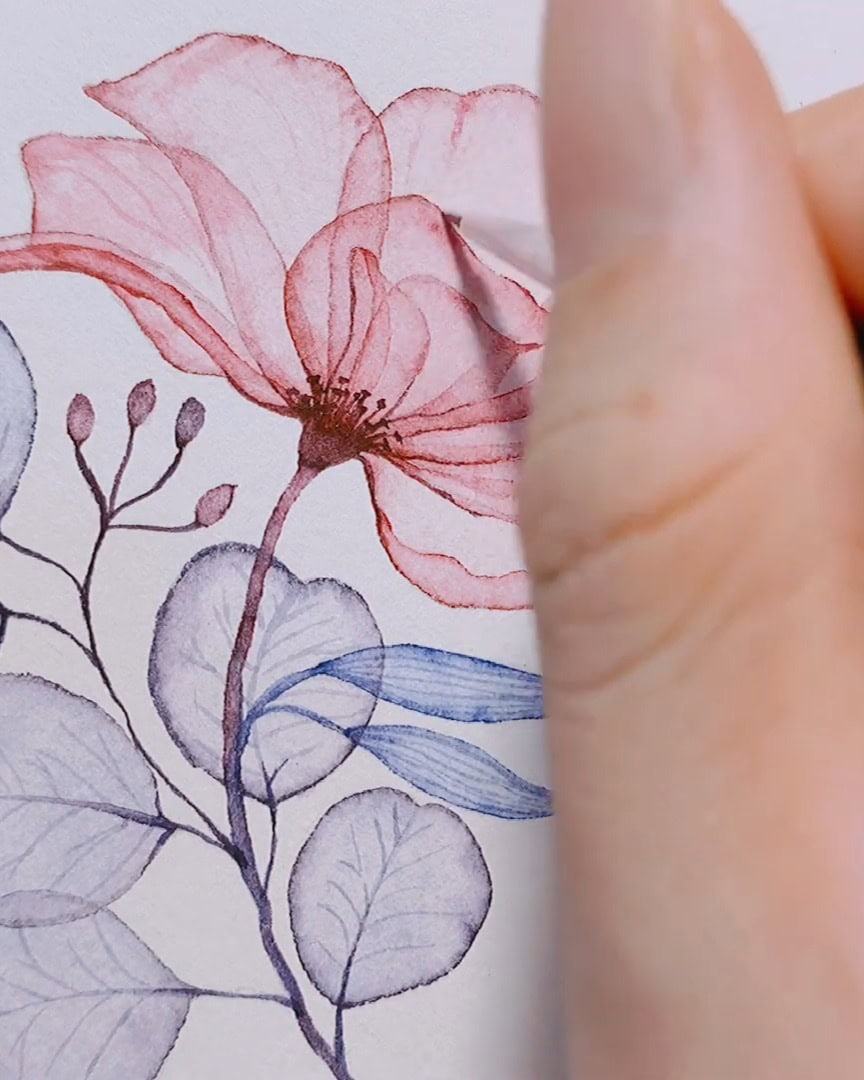
Painting the Flower’s Center and Sepals
Mix a darker shade (pink + a bit of black) for the flower’s center. Use a thin brush to draw fine lines extending outward, mimicking natural petal textures.
Common Mistakes and How to Avoid Them
While painting, I’ve encountered a few common mistakes that can be easily avoided:
- Using too much water – If the paint is pooling, blot it with a paper towel or use a dry brush.
- Not letting layers dry – Always wait for each layer to dry before applying the next to avoid muddy colors.
- Overworking the paper – If the surface starts pilling, stop adding more paint and let it dry completely before continuing.
By keeping these tips in mind, you’ll achieve a clean and vibrant watercolor painting.
In A Nutshell
Would you like to take your watercolor skills to the next level? By practicing these layering techniques, choosing the right materials, and controlling your water-to-paint ratio, you’ll create beautiful, transparent watercolor paintings with ease.
Don’t be afraid to experiment and make mistakes—every brushstroke brings you closer to mastery! Have you tried this technique?
Share your thoughts and artwork in the comments.