Are you ready to dive into the world of delicate, dreamy, translucent watercolor flowers?
In this blog post, I’ll walk you through the exact materials and techniques I use to paint translucent using watercolors.
Whether you’re just getting started or want to build more confidence with your brush, this step-by-step guide will help you feel more at ease and in control with watercolors.
Contents
Materials You Need for Painting Translucent in Watercolor
Before we paint anything, let’s get prepared.
Watercolor Paints
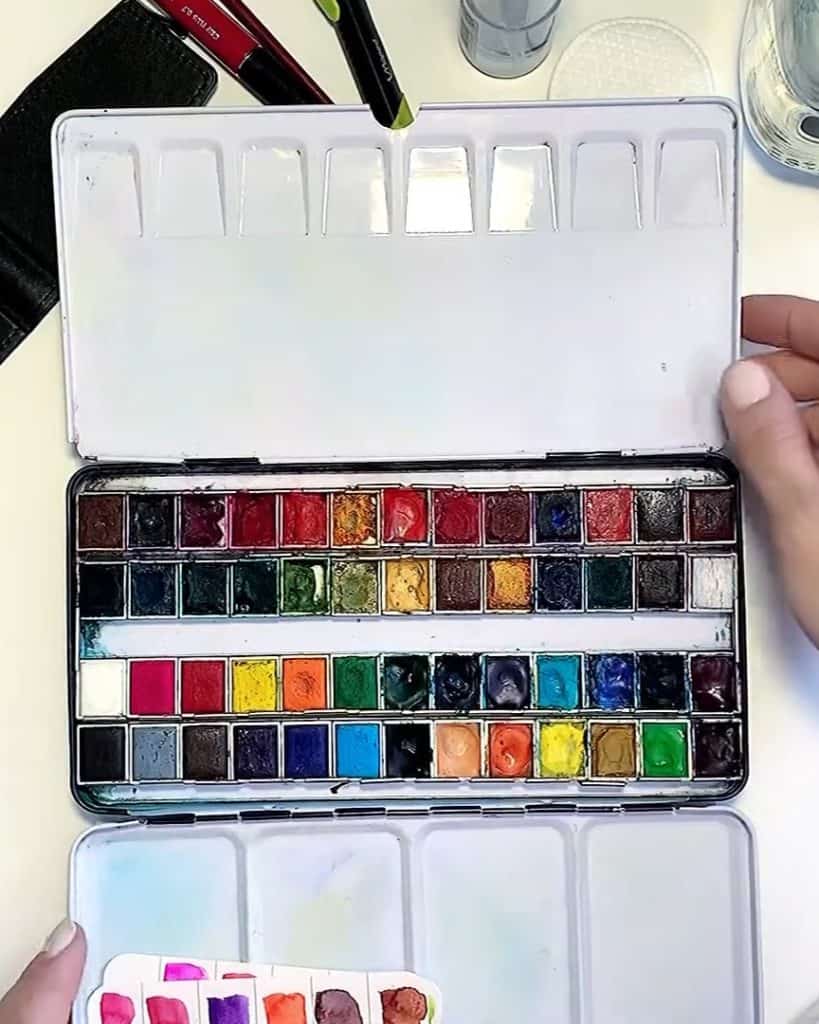
Let’s start with the most essential item—your paints. You can use either professional or student-grade watercolor sets.
I personally use Art Philosophy paints. These watercolors come in cuvettes (pans) or tubes; both are great options, depending on your preference.
Brushes
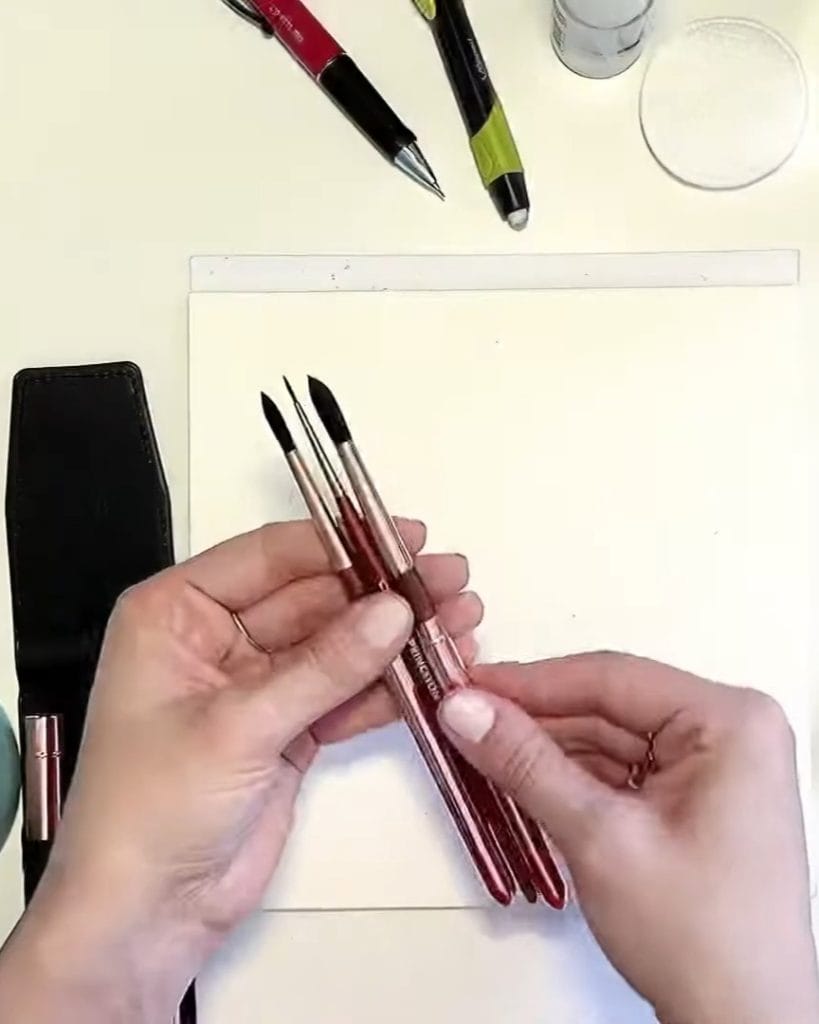
Next, you’ll need the right brushes. I recommend round brushes in sizes 8, 6, and 0. For me, I love using Princeton round brushes.
They hold water well and offer great control for large washes and tiny details.
Watercolor Paper

Your choice of paper can make or break your painting. I use watercolor paper that weighs at least 300 gsm. Heavier paper holds water without warping.
Today, I’ll work with Primo Marketing paper, and occasionally, I switch to Arches paper for specific pieces. Both have a nice visible texture, which helps achieve that translucent effect.
Other Essential Tools
There are a few more items you’ll need:
- A ceramic palette
- Clean water
- A pencil and an eraser
- A paper towel or a cotton pad
- A spray bottle
Prepare Your Practice Paper

Now that your materials are prepared, let’s begin painting with basic techniques.
I recommend using a square paper block for practice, or if you’re using a separate sheet, tape it to your workspace. Divide the paper into four sections:
- Top-right: Gradient fill practice
- Bottom-right: Layering practice
- Bottom-left: Wet-on-wet and wet-on-dry technique practice
- Top left: A place for painting the flower
For color, I’ll use blue and violet shades from the Odyssey watercolor set.
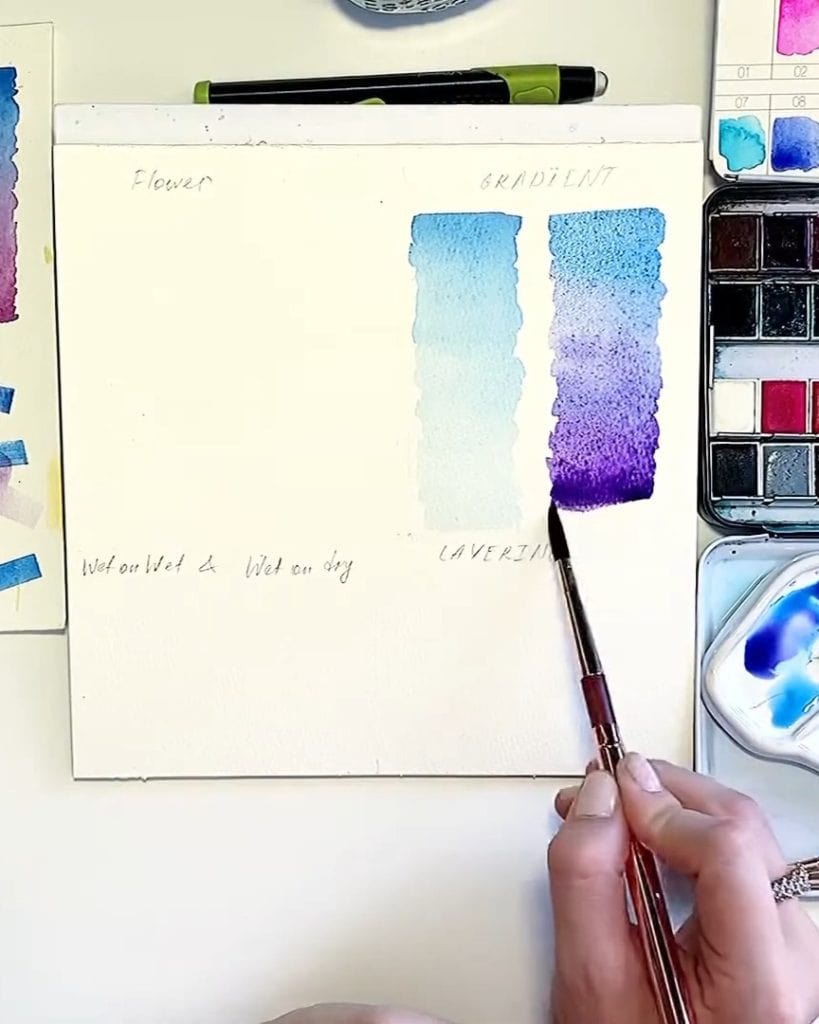
Technique 1: Gradient Fill
Let’s start with the gradient fill technique, which is essential for achieving smooth color transitions.
A gradient fill is a smooth transition from one color to another, usually starting from a darker shade and fading into a lighter one.
Step-by-Step Gradient Fill
To start, choose a color and mix it with a generous amount of pigment. I often begin with a vibrant blue.
With your brush loaded, paint the first part of your surface with a strong blue color.
Next, gradually add water to the mixture to dilute the pigment. The key is to ensure the paint is sufficiently wet, as this helps the colors blend smoothly.
You want to avoid dry spots that could disrupt the gradient flow.

For a smooth transition, you can tilt your paper slightly, allowing gravity to help the water and pigment mix naturally.
This will create a seamless gradient that shifts gently from a bold blue to a lighter shade.

Now, let’s take the gradient fill to the next level by adding a second color. Starting with blue, I introduce a hint of purple and blend it in as I move across the surface.
Gradually, I add more purple and less blue, creating a smooth blend from blue to purple.
This technique is perfect for capturing the subtlety and depth needed in translucent watercolor.
Practice Tips
It’s essential to keep the paper wet enough so the colors mix well.
I encourage you to experiment with different color combinations, which will help you become more confident in your watercolor technique.
The more you practice, the better you’ll get at creating smooth, flowing gradients.
Technique 2: Layering
Next, we’ll work on layering, another key technique for creating depth and texture in watercolor.
Layering in watercolor refers to the process of building up multiple thin, transparent layers of paint to create depth and texture.
This technique allows colors to blend seamlessly while maintaining transparency, which is key for achieving the soft, translucent look typical in watercolor
Step-by-Step Guide to Layering
I start with a light wash of blue watercolor paint. The key is to apply the paint in varied directions and positions to add texture and interest to the first layer.
This first layer should be light, providing a base for the richer colors.

Once the first layer is completely dry, I move on to the second layer. This time, I use a more vibrant and concentrated paint solution.
Again, I alternate the direction, position, and color of the brush strokes to ensure the layers interact organically.

The magic of layering comes from the transparency of the watercolor.
Even though the second layer is more intense, the underlying layers are still visible, creating a depth that makes the painting feel alive and multi-dimensional.
Technique 3: Wet-on-Wet and Wet-on-Dry
These techniques are essential when aiming for those soft, glowing effects that make watercolor so unique.
Wet-on-Wet Technique
Wet-on-wet is all about applying paint to wet paper, allowing colors to blend naturally and flow into each other.
I like to practice with a simple shape—usually a circle. First, I use a large brush to apply clean water inside the circle.
Then, while the surface is still damp, I switch to a thinner brush and drop in some blue pigment around the edges.
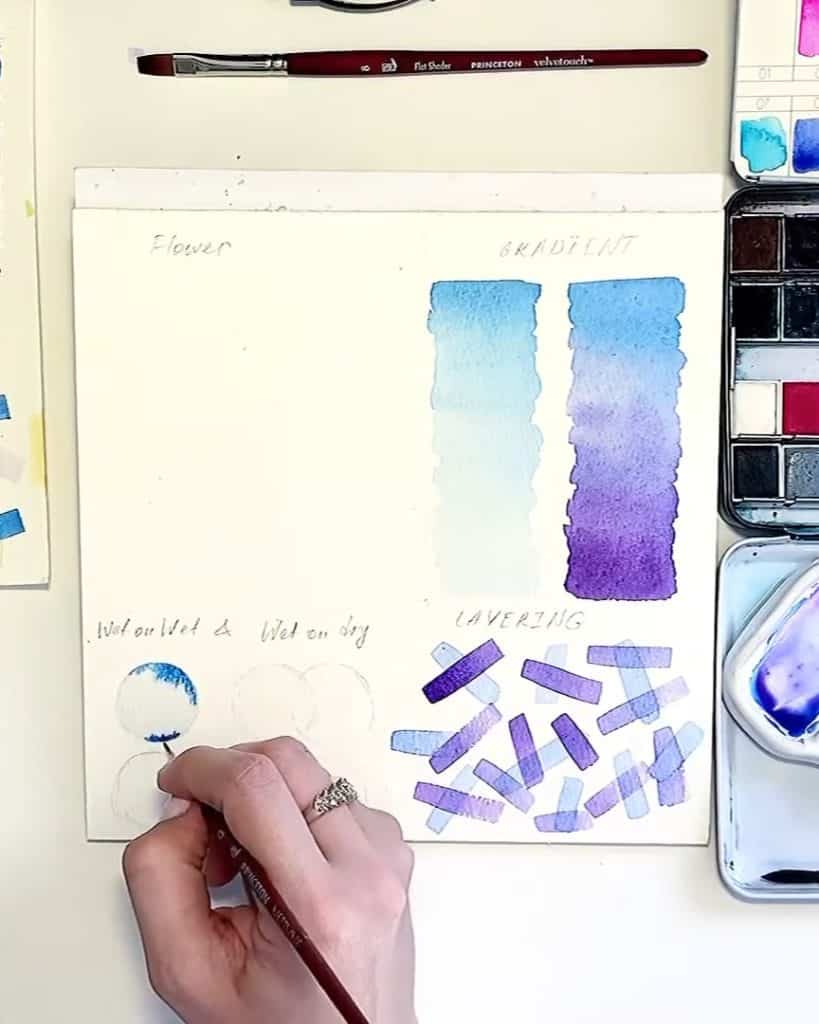
The paint gently spreads and fades inward, creating a soft, dreamy effect.
If I notice too much water pooling, I dab it with a cotton pad or paper towel.
This keeps things under control without ruining the blend.
For variation, I fill the next circle with a light blue wash. While the surface is still wet, I add purple to the edges and center.
The result? A soft, diffused edge with gorgeous color transitions.

You can also experiment with overlapping shapes. Try painting one circle with a light tone, and before it dries, add a different color in the overlapping area.
This produces a smooth transition between shades, making your effects appear even more ethereal and delicate.

Wet-on-Dry Technique

In contrast, the wet-on-dry technique is all about control and sharp definition. It’s used when you want to build up layers with more precision and retain clear outlines.
Here’s how I practice it: I begin by painting a circle with a blue solution and let it dry completely.
Once it’s dry, I paint another circle that overlaps the first, using a different shade. Since the bottom layer is dry, the colors won’t blend, and I get a crisp, multi-layered effect.
This technique adds depth and structure, just what you need for layering petals or adding final touches to your painting illustrations.
Closing Words
Now that you’ve learned the basic techniques of gradient fill, layering, wet-on-wet, and wet-on-dry, you’re ready to apply them to create stunning translucent watercolor.
Ready to take your watercolor skills to the next level? Let me know how your practice goes, or share your progress!