Starting your crochet journey feels exciting and a little overwhelming! That’s exactly how I felt when I first picked up my yarn and hook.
In this tutorial, I’m sharing how I make the single crochet stitch—one of the most critical and beginner-friendly stitches. Whether you’re planning to crochet a cute stuffed animal or a simple coaster, the single crochet is a must-learn!
Contents
- 1 Step 1: Create the Foundation Chain
- 2 Step 2: Add One Extra Chain for Height
- 3 Step 3: Learn the Basic Single Crochet Stitch
- 4 Step 4: Helpful Tips for Smooth Stitching
- 5 Step 5: Check Your Work
- 6 Step 6: Begin the Second Row
- 7 Step 7: Identifying Stitches in the New Row
- 8 Step 8: Proper Stitch Technique for the Second Row
- 9 Step 9: Review Your Work Again
- 10 Final Thoughts
Step 1: Create the Foundation Chain
Before we begin, let’s make the base for the single crochet. This part is easy and relaxing.
What Is a Foundation Chain?
A foundation chain is simply a row of loops. It’s the starting line for any crochet piece. I showed how to do this in my last tutorial. Today, we build on that!

Creating 10 Chains
To begin, I make 10 chain stitches. Follow the steps below:


I often count to ensure I’ve made enough chain stitches. That’s the base. But we’re not done just yet.

Step 2: Add One Extra Chain for Height
This little detail makes a big difference. Let me show you why.
Adding one more chain is essential because it counts as the height of the first single crochet stitch. Without it, the edge of your work will look uneven. So after making 10 chains, I chain one more.

Now I have 11 chains total. This extra chain doesn’t get stitched into it—it just helps lift the row.
Step 3: Learn the Basic Single Crochet Stitch
Here comes the fun part. I’ll show you how to make the single crochet stitch step by step.
Inserting the Hook into the Right Stitch
Hold your work and count two stitches down from the hook: 1… 2…

I insert my hook into that second chain from the hook. This is where we begin.

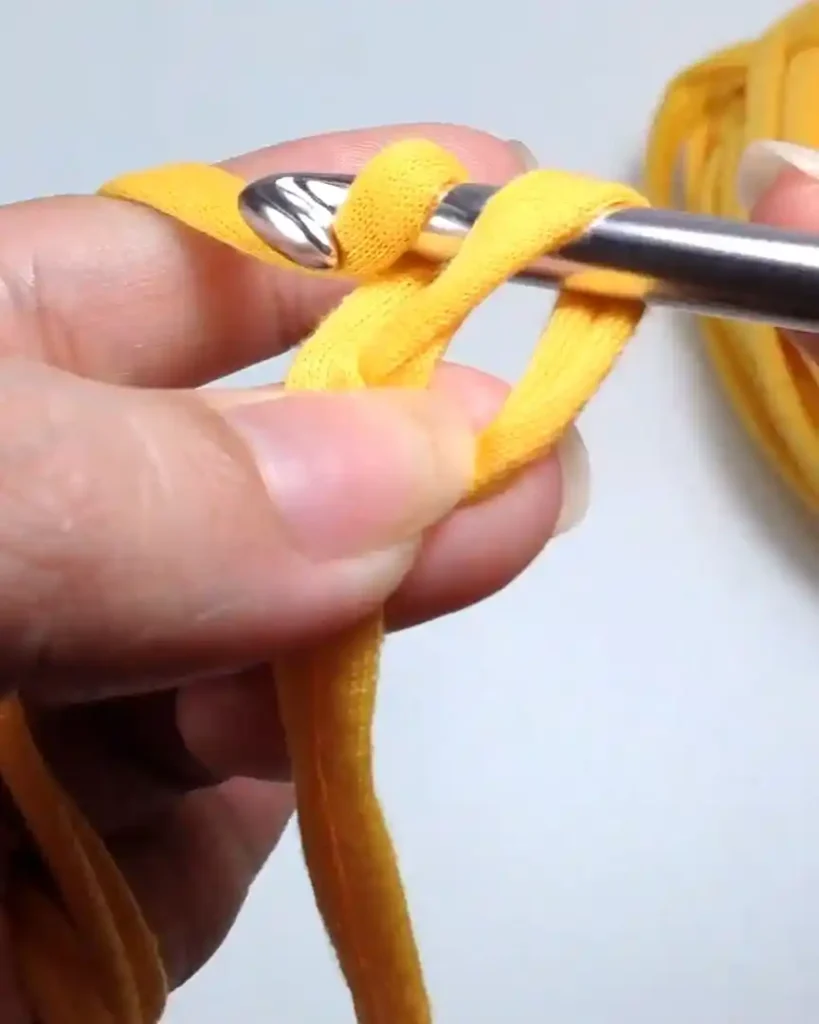
Making Your First Single Crochet
- Insert the hook into the chain

- Yarn over and pull up a loop (you now have two loops on your hook)


- Yarn over again and pull through two loops


That’s it! You’ve just made one single crochet stitch. Let’s keep going.

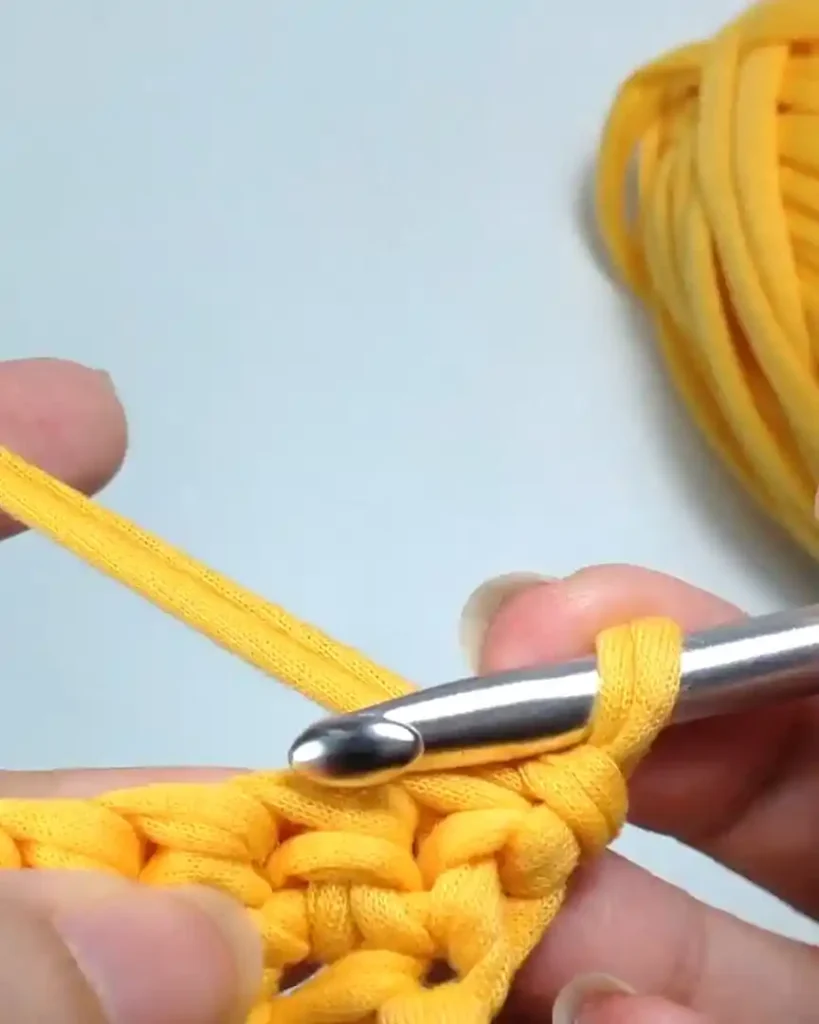
Practice More Stitches
Now, I move on to the next chain and repeat:
- Insert the hook

- Yarn over, pull up a loop


- Yarn over again, pull through both loops


I keep doing this until I reach the end of the row. It’s such a smooth rhythm once you get used to it.

Step 4: Helpful Tips for Smooth Stitching
Crocheting should feel relaxing. I always remind myself of these small tips as I go.
Keep a Relaxed Grip
When I work on my single crochets, I keep my fingers relaxed. If I pull the yarn too tight, the loops shrink, and it’s hard to push the hook through. Giving the yarn space lets it slide more easily, and my hands feel better, too.
Avoid Tension and Muscle Strain
Trust me, it’s easy to tense up—especially when I try to be precise. But staying relaxed helps me crochet for longer without hand pain. So take a breath, stretch your fingers, and enjoy each stitch.
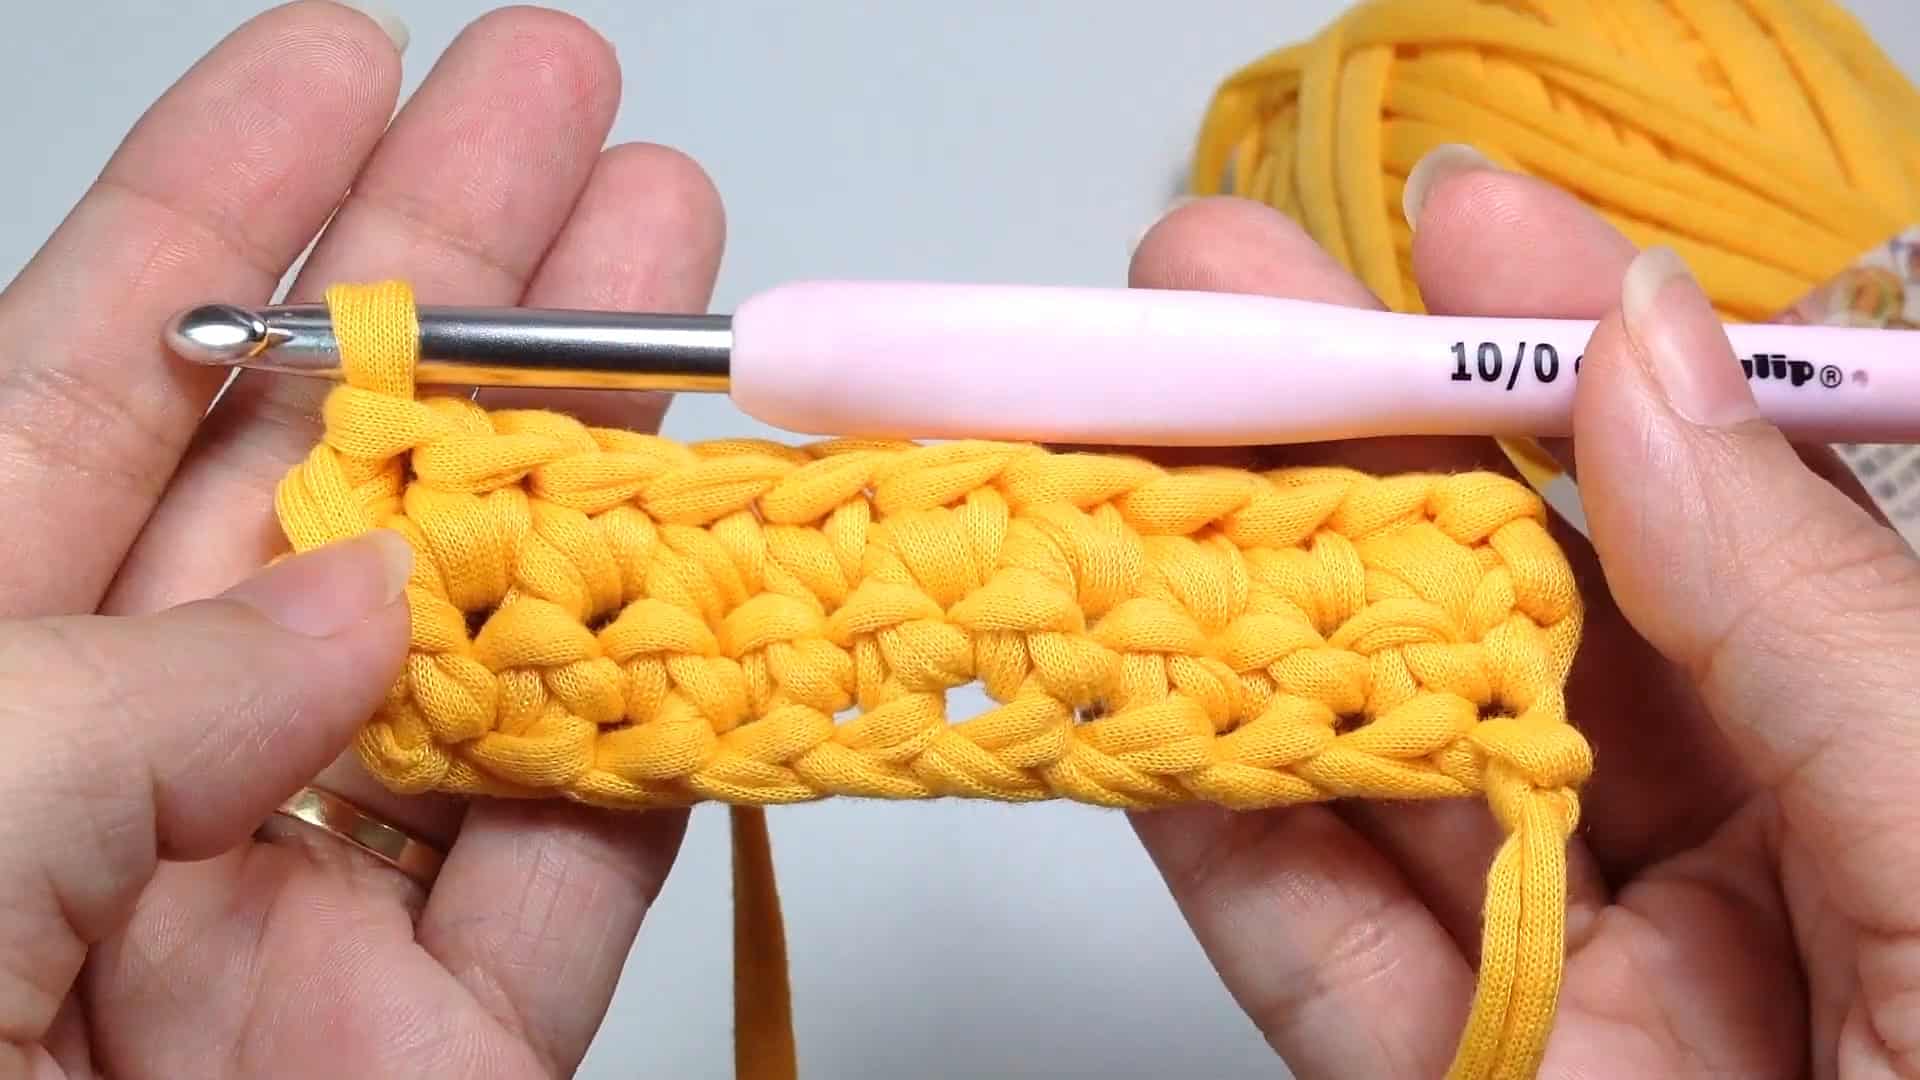
Step 5: Check Your Work
It’s time to see how we did! Checking your stitches helps keep everything even.
Count Your Completed Single Crochets
Each single crochet has a V shape on the top.

Yes! That matches the number of chains I started with (not counting the turning chain). That means everything is on track.
Step 6: Begin the Second Row
Ready for the next row? I’ll show you how I turn my work and keep the stitches looking clean.
Chain One and Turn Your Work
At the end of the row, I chain one. This chain gives the row its height.

Then I turn the work around so I can crochet back the other way.

Now, this new side is called the wrong side.

The one I started with is the right side.

Each new row will flip this around. As your piece grows, both sides will look nearly the same, so don’t stress too much about right vs. wrong.
Step 7: Identifying Stitches in the New Row
I take my time here to ensure I’m stitching into the correct place.
Spotting the First Stitch
Let’s look at the stitches in this new row. This is the first stitch.

Sometimes I get confused. When that happens, I count backward from the last stitch. Now, the tenth stitch is the first one.

This way, I know exactly where the first stitch is. It’s essential to start in the very first stitch of the row.
Common Mistake: Skipping the First Stitch
If I accidentally insert the hook into the second stitch, I’ll lose one stitch, and the row will slowly shrink. That’s why I double-check.
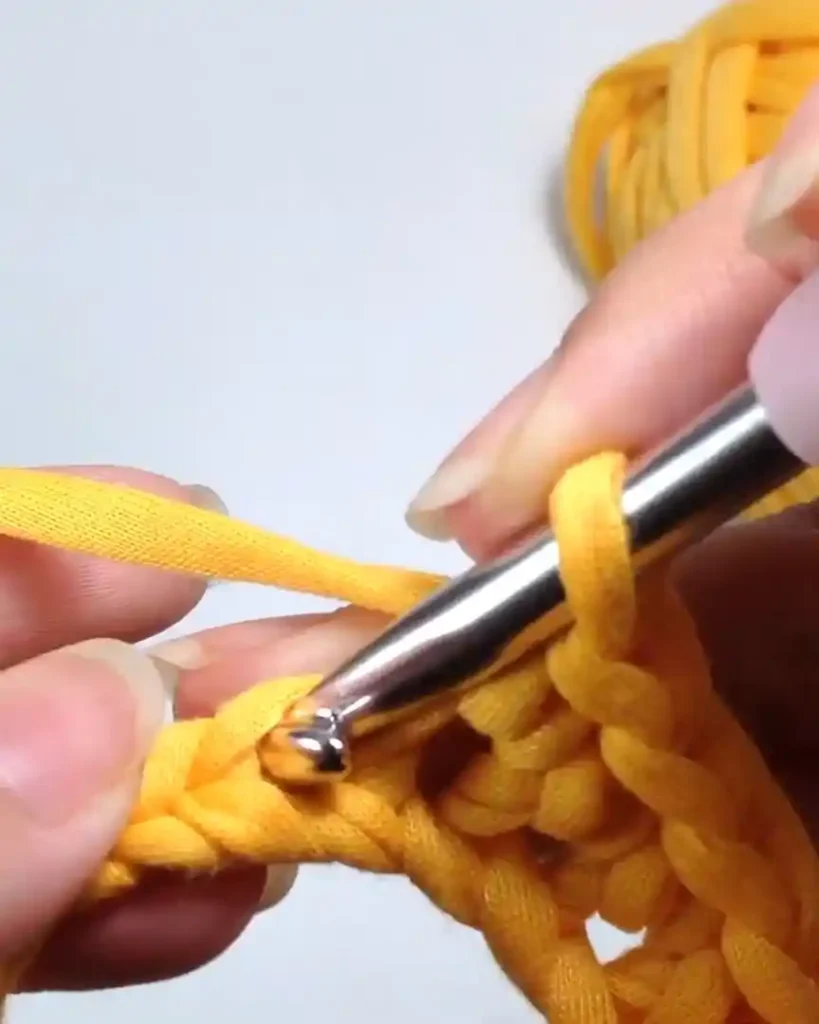
Step 8: Proper Stitch Technique for the Second Row
Let’s crochet row two! I always like to watch my hands closely here.
Correct Hook Insertion
I turn the hook slightly toward myself as I insert it. This makes the motion smoother.
The key here is to insert the hook under both loops of the V on top of the stitch.

If I go under only one loop, the stitch won’t be right, and my row might look uneven.
So again:
- Insert the hook under both loops of the V

- Yarn over and pull up a loop


- Yarn over again and pull through both loops


I repeat this all the way across the row. Remember to stay relaxed as you go. That makes everything easier and more comfortable.

Step 9: Review Your Work Again
Let’s take one final look at our progress. I love this part!
Double-Check Your Stitch Count
Once I finish the second row, I count the stitches again: 1… 2… 3… 4… 5… 6… 7… 8… 9… 10.

Perfect! That means I didn’t miss anything; the edges will stay nice and straight.

Final Thoughts
The single crochet stitch might seem small, but it builds the foundation for many fun projects! I hope this tutorial helps you feel more confident with your hook and yarn.
Keep practicing until it feels natural. Maybe try making a few swatches and turn them into something fun. I’d love to hear about your first project!