I’ve always found that the most delightful subjects to paint are the ones that don’t take themselves too seriously. Lately, I’ve been blending vibrant washes to bring out the quirky, hidden personalities of our tiny garden neighbors.
In this post, I’m sharing 25 Watercolor Funny Insect Ideas to spark your imagination and add a touch of whimsy to your palette. To make things even easier, I’ve turned these designs into printable coloring pages so you can start painting immediately.
Contents
- 1 25 Watercolor Funny Insects Ideas – Printable Coloring Pages Available
- 1.1 Wide-Eyed Emerald Cicada Buddy
- 1.2 Spotted Lanternfly Mosaic Charm
- 1.3 Golden Winged Evening Cicada
- 1.4 Prismatic Crystal Wing Butterfly
- 1.5 Vibrant Crimson Meadow Hopper
- 1.6 Rosy Moth’s Coffee Break
- 1.7 Little Worm Dreamer
- 1.8 Mischievous Colorful Spiders
- 1.9 The Virtuoso Grasshopper
- 1.10 The Golden Cicada’s Rest
- 1.11 The Lantern-Bearing Firefly
- 1.12 The Wide-Eyed Blue Dragonfly
- 1.13 The Cheerful Little Bee
- 1.14 The Stately Stag Beetle
- 1.15 The Symmetrical Prismatic Stag Beetle
- 1.16 The Radiant Rainbow Dragonfly
- 1.17 The Vibrant Jumping Spider
- 1.18 The Wide-Eyed Little Grasshopper
- 1.19 The Luminous Night Firefly
- 1.20 The Rainbow Rhinoceros Beetle
- 1.21 The Azure-Horned Beetle
- 1.22 The Wide-Eyed Tiny Ladybug
- 1.23 The Chill Little Roach
- 1.24 The Grumpy Little Bumblebee
- 1.25 The Radiant Little Ant
- 1.26 The Studious Little Caterpillar
- 1.27 The Determined Dung Beetle
- 1.28 The Gentleman Beetle’s Debut
- 1.29 The Rhinoceros Beetle Star-Gazer
- 2 Conclusion
25 Watercolor Funny Insects Ideas – Printable Coloring Pages Available
Wide-Eyed Emerald Cicada Buddy
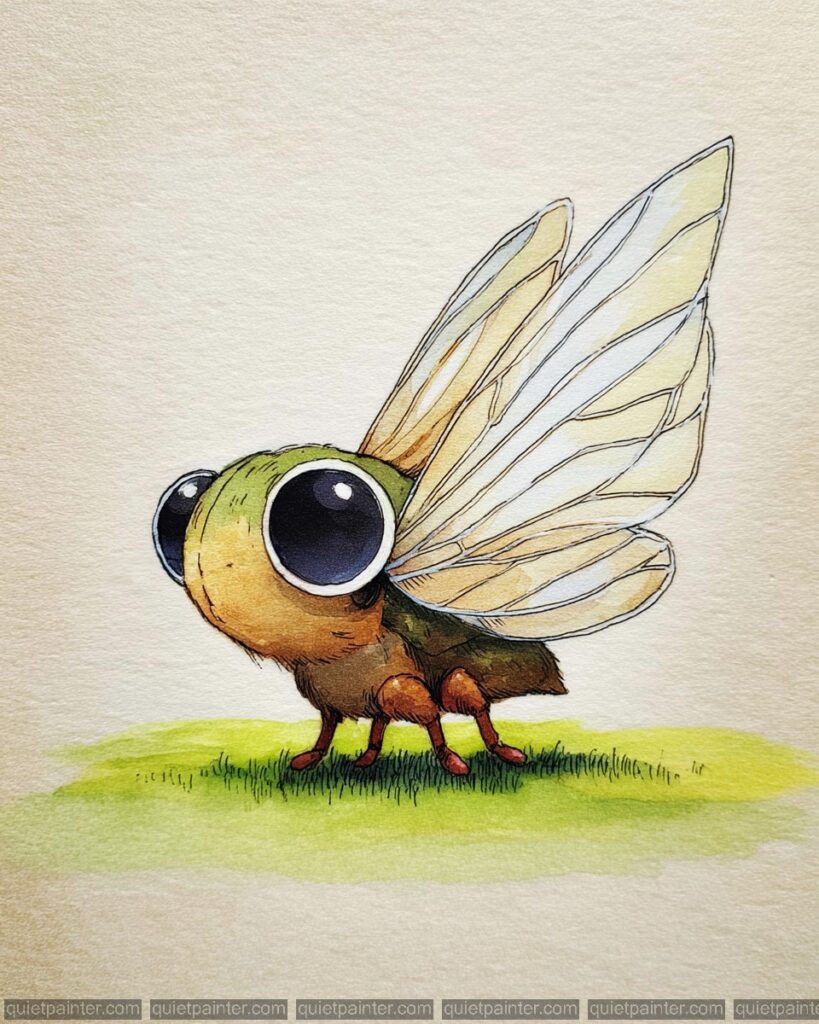
Start by sketching the character’s large, oversized eyes and compact body to emphasize its “chibi” proportions. Apply a soft “wet-on-wet” wash of olive green and ochre to the head and body, allowing the colors to blend smoothly to create a fuzzy, organic feel. For the wings, use a very diluted wash of pale cream, ensuring you keep the layers thin and transparent to suggest a delicate, gossamer texture. Be careful to preserve the large white reflections in the eyes as unpainted paper, as these are crucial for giving the character its soulful and curious expression.
Once the base layers are dry, use a “glazing” technique with a warmer brown to add shadows to the underside of the body and the joints of the legs, giving the insect a solid, rounded form. Use a fine-liner or a precision rigger brush to draw the intricate network of wing veins, using light, confident strokes to maintain their elegance. Enhance the eyes by applying a highly concentrated mix of indigo and black, leaving the edges slightly softer to mimic a glossy surface. Finally, add a small patch of “wet-on-dry” grass beneath the feet using short, flicking strokes of lime green to ground the character in its environment.
Recommended Watercolor Palette
- Sap Green: For the natural, mossy tones of the head and thorax.
- Yellow Ochre: To provide the warm, earthy base for the body and wing highlights.
- Raw Sienna: For the deeper shadows on the legs and underbelly.
- Burnt Umber: To define the wing veins and add warmth to the darker body parts.
- Indigo: Mixed with black for the deep, liquid-like intensity of the eyes.
- Lemon Yellow: To create the fresh, vibrant patch of grass at the base.
Spotted Lanternfly Mosaic Charm
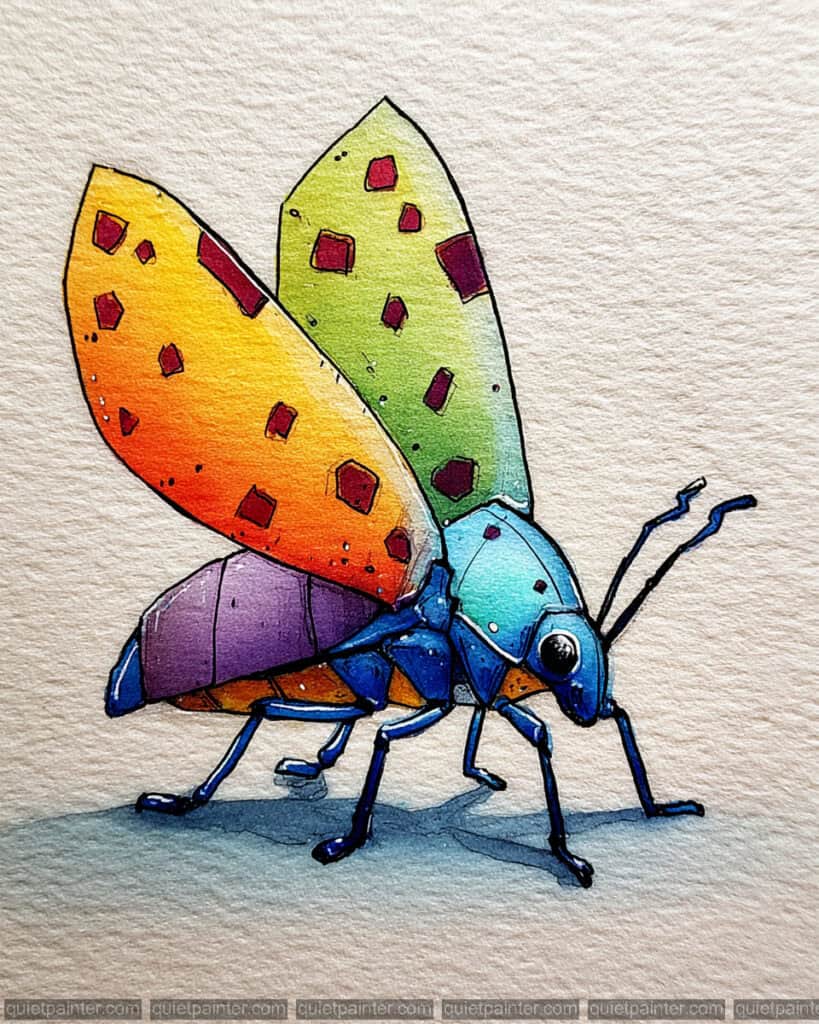
Begin by sketching the distinct, upright wing posture and the segmented blue body with a light pencil. Use a “wet-on-dry” technique to paint each wing individually, applying a vibrant gradient of lemon yellow to deep orange on the front wing, and a soft sap green on the back wing. While the wings are damp, drop in small, concentrated squares of burgundy to create the spotted pattern, allowing the edges to soften slightly into the base color. For the body, apply a luminous turquoise wash on the thorax and a deep violet on the abdomen, ensuring you leave the white highlight on the eye as untouched paper to maintain that glossy, alert look.
Once the initial washes are completely dry, use a “glazing” technique with a darker blue to add depth to the segments of the legs and the underside of the thorax, creating a solid, three-dimensional form. Use a fine-liner or a precision detail brush to draw the delicate, segmented antennae and the crisp, dark outlines that define the wing structure. To enhance the “spotted” effect, add tiny white dots of gouache or use a gel pen to create highlights on the burgundy spots and along the ridges of the blue legs. Finally, add a soft, cast shadow beneath the insect using a diluted mix of indigo and gray to ground the character firmly on the textured paper.
Recommended Watercolor Palette
- Lemon Yellow: For the bright, energetic base of the primary wing.
- Pyrrol Orange: To create the rich, warm gradient transition on the wing.
- Sap Green: For the fresh, translucent look of the secondary wing.
- Phthalo Blue: To achieve the vibrant, electric blue of the thorax and legs.
- Perylene Maroon: Perfect for the deep, brownish-red spotted patterns on the wings.
- Dioxazine Purple: For the rich, shadowed segments of the abdomen.
Golden Winged Evening Cicada
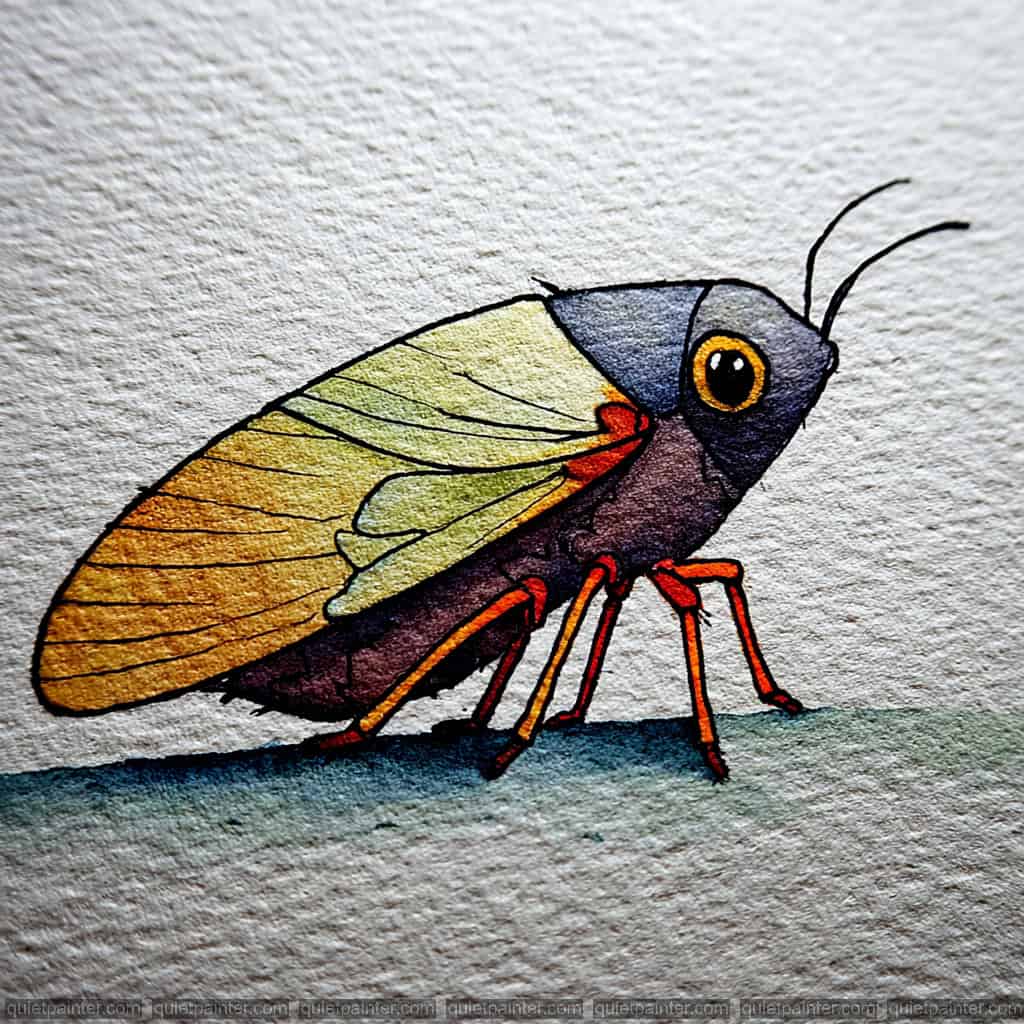
Start with a precise pencil sketch of the cicada’s heavy, rounded thorax and the long, sweeping curve of its wings. For the body, apply a “wet-on-wet” wash of deep violet mixed with a touch of indigo, allowing the colors to pool slightly at the bottom to create a natural sense of weight and shadow. Move to the wings while the body is drying, using a “variegated wash” that transitions from a pale, minty green at the top to a warm, golden ochre at the tips. Keep your brush strokes long and fluid to mimic the delicate, translucent nature of the wing membranes, being careful to leave the golden ring of the eye as a clean, dry circle of paper.
Once the initial washes are bone dry, use a “dry brush” technique with a highly concentrated dark pigment to add the subtle, stippled texture on the cicada’s head and thorax. For the wing venation, use a very fine detail brush or a technical pen to draw the thin, rhythmic lines that follow the curve of the wing, adding a light glaze of orange at the wing joints for a pop of contrast. Define the legs with sharp, thin strokes of bright orange-red, adding tiny “spurs” to give them a realistic, grippy appearance. Finally, fill the pupil with a deep, solid black, leaving a tiny dot of white gouache or unpainted paper to give the eye a glossy, reflective finish.
Recommended Watercolor Palette
- Dioxazine Purple: For the rich, dark base of the cicada’s body and thorax.
- Yellow Ochre: To create the warm, earthy golden tones at the ends of the wings.
- Cobalt Green: For the cool, translucent sections near the wing joints.
- Cadmium Orange: To paint the vibrant, energetic legs and the small accents on the wings.
- Indigo: To deepen the shadows on the body and provide a base for the dark head.
- Neutral Tint: Perfect for the fine line work of the wing veins and the solid pupil.
Prismatic Crystal Wing Butterfly
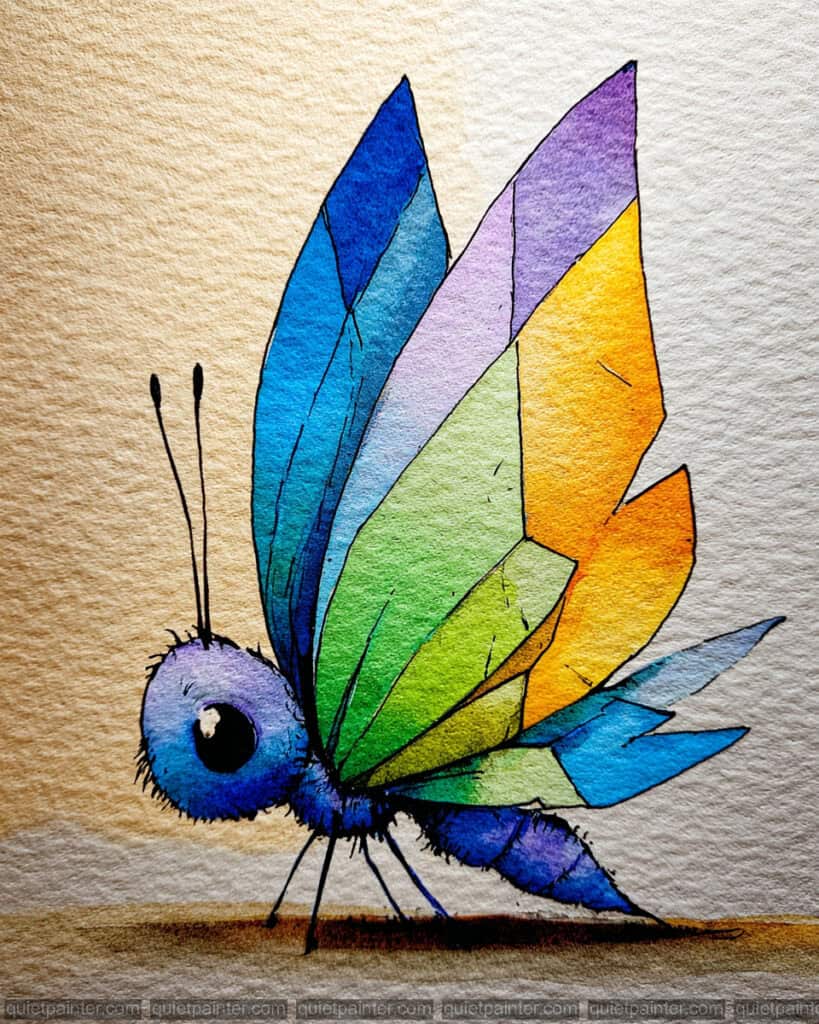
Begin by sketching the butterfly with a focus on the sharp, geometric facets of the wings and the soft, rounded head. Use a “wet-on-dry” technique to apply the primary colors to each individual wing segment, treating each shape like a stained-glass pane to prevent the colors from bleeding into one another prematurely. For the head and body, apply a soft “variegated wash” of lavender and deep blue, allowing the pigments to mingle while wet to create a fuzzy, organic texture that contrasts with the angular wings. Be sure to preserve a tiny speck of white paper in the center of the large eye to act as a natural, brilliant highlight.
Once the base segments are dry, apply a secondary “glaze” of a darker analogous color (like deep green over light green) to the base of each wing facet to create a sense of three-dimensional folding and shadow. Use a “dry brush” technique with very little water to add the fine, wispy hairs around the head and the segmented texture on the abdomen, giving the character its whimsical charm. Finally, use a fine-liner pen or a precision rigger brush to draw the long, delicate antennae and the crisp, dark outlines that define each geometric shard. A soft, horizontal wash of burnt sienna at the bottom will ground the butterfly and complete the composition.
Recommended Watercolor Palette
- Cobalt Blue: For the vibrant, cool tones in the upper wing segments and the body.
- Lemon Yellow: To create the bright, sunny facets on the outer edges of the wings.
- Phthalo Green: For the lush, emerald transitions in the middle wing sections.
- Dioxazine Purple: To provide the rich violet tones for the head and wing tips.
- Burnt Sienna: For the warm, earthy ground shadow and subtle depth.
- Lamp Black: For the bold, graphic outlines and the solid depth of the eye.
Vibrant Crimson Meadow Hopper
Start by sketching the grasshopper’s geometric body segments and long, angular hind legs with a light pencil touch. Use a “wet-on-dry” technique to apply the primary yellow wash on the face and underbelly, immediately dropping in a saturated “cadmium red” while the paper is still wet to create that striking sunset gradient. For the ground, use a “stippling” or “dabbing” motion with a damp brush and cool blue pigments to create the pebbled, textured surface shown in the illustration. Ensure you leave a small white speckle in the eye to represent a catchlight, which gives the character an immediate sense of life.
After the first layers have dried, add a secondary glaze of deep red to the overlapping segments of the legs and thorax to create clear separation and depth. To achieve the speckled “salt-like” texture on the head and back, you can use a “splatter” technique with a toothbrush or flick white gouache once the watercolor is dry. Use a fine-liner or a very thin rigger brush with black ink to define the sharp, rhythmic outlines and the long, graceful antennae. Finally, deepen the large eye with a concentrated mix of indigo, ensuring the dark pigment contrasts sharply against the warm tones of the face.
Recommended Watercolor Palette
- Cadmium Yellow Light: For the brightest, sunniest parts of the face and belly.
- Cadmium Red Medium: To achieve the bold, solid red on the legs and back.
- Alizarin Crimson: For deep, cool shadows within the red segments.
- Cerulean Blue: To create the textured, gravel-like ground beneath the grasshopper.
- Indigo: For the deep, dark pupils and the strongest shadow accents.
- White Gouache: For adding the fine, bright speckles and highlights over the dry watercolor.
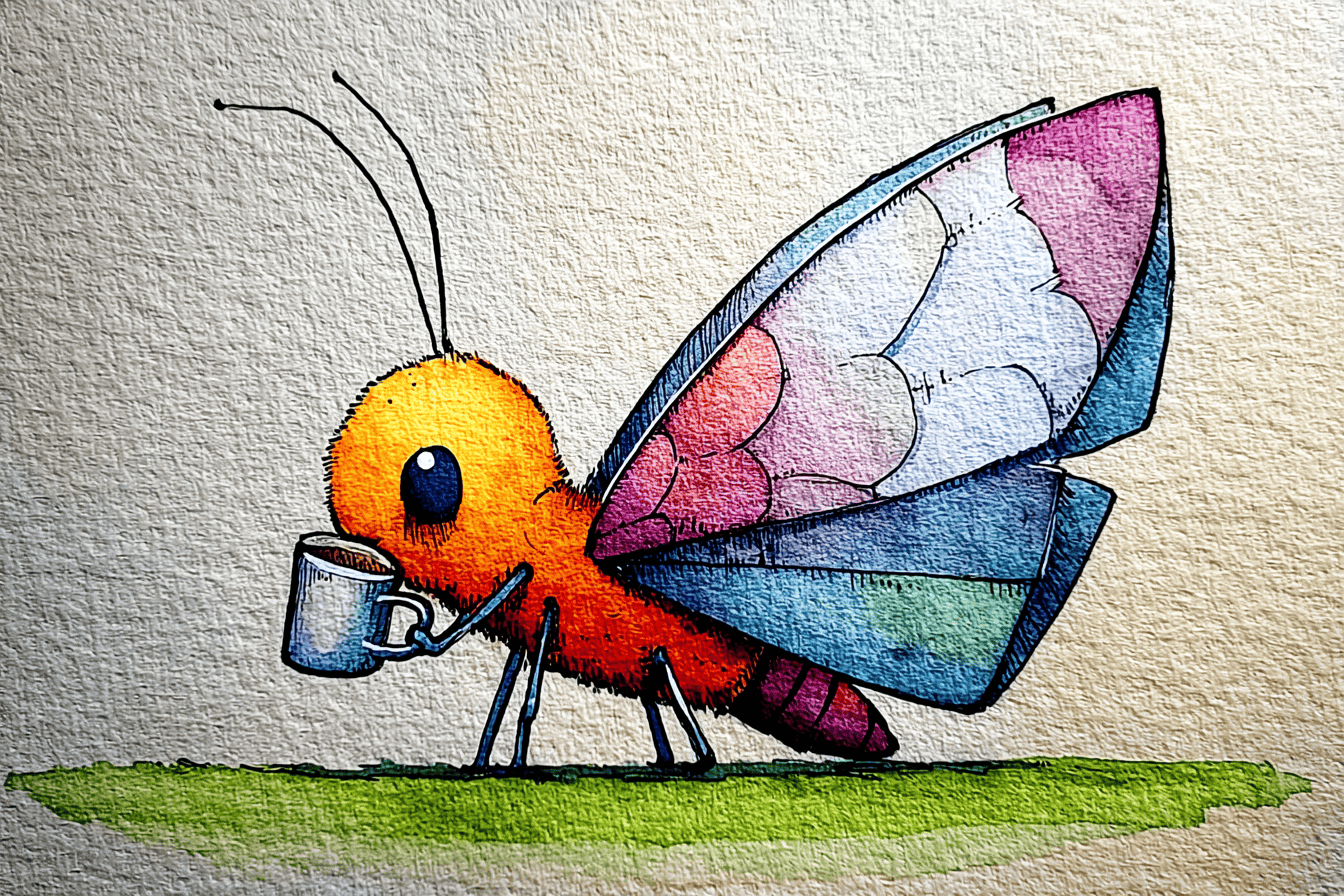
Rosy Moth’s Coffee Break

Begin by sketching the moth’s fluffy silhouette, paying close attention to the large, expressive eyes and the triangular segments of the wings. Use a “wet-on-wet” technique for the body, starting with a pale cream at the head and dropping in vibrant oranges and pinks toward the bottom to mimic the soft, fuzzy texture. For the wings, apply a graduated wash of rose pink, allowing it to blend into a soft violet at the base while the paper is still damp. Ensure you leave small, unpainted circles on the wings and eyes to serve as natural highlights, as this preserves the luminosity of the watercolor.
Once the base is dry, use a “dry brush” technique with a small detail brush to create the fine, prickly hairs along the body and antennae, giving the moth its characteristic fluffy appearance. For the eyes and the coffee mug, apply a concentrated glaze of cerulean blue, layering more pigment at the bottom to create a sense of curvature and weight. Use a fine-liner pen or a very dark mix of pigment to define the sharp outlines, the tiny legs, and the “eyespots” on the wings. Finally, add a soft horizontal shadow beneath the feet using a diluted gray wash to ground the character on the paper.
Recommended Watercolor Palette
- Opera Pink: For the brilliant, glowing pink tones on the wings and lower body.
- New Gamboge: To create the warm, golden-orange glow on the moth’s chest.
- Cerulean Blue: Perfect for the bright, cheerful eyes and the ceramic texture of the coffee mug.
- Cobalt Violet: For the transition areas on the wings and the shadows within the fluffy fur.
- Burnt Umber: To paint the coffee inside the mug and the darker tips of the antennae.
- Payne’s Gray: For the delicate line work, the tiny feet, and the grounding shadow.
Little Worm Dreamer
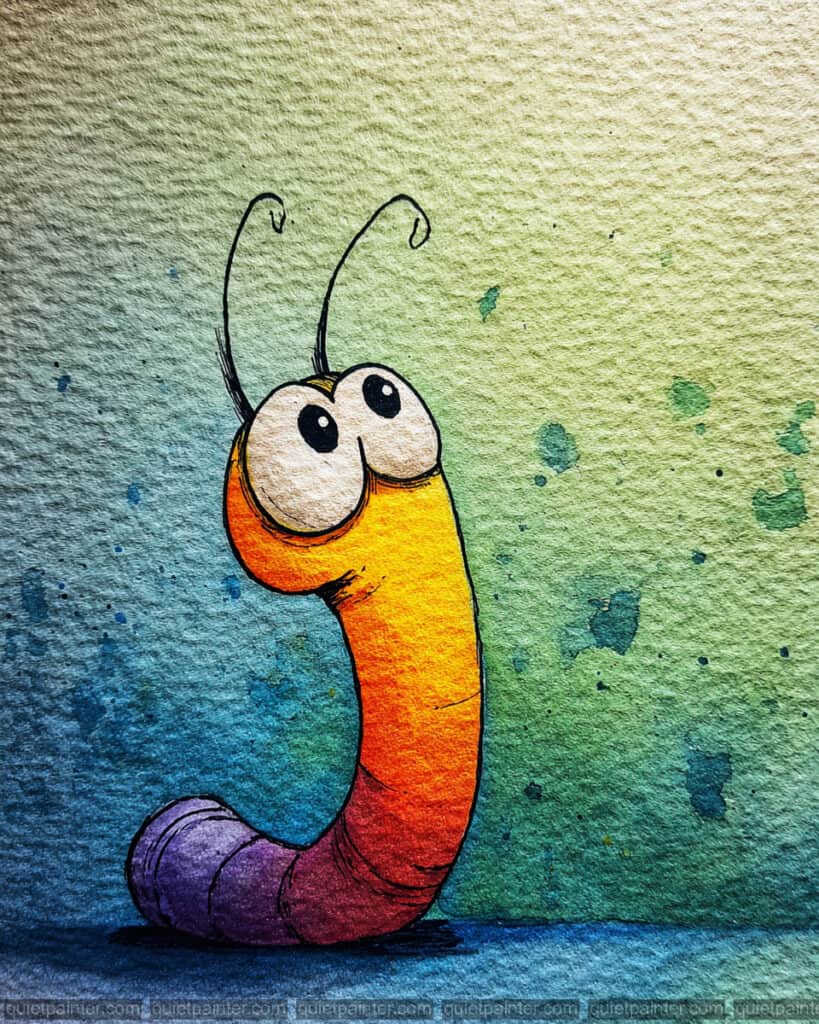
Begin with a clean pencil sketch, focusing on the worm’s elongated “J” curve and the exaggerated, bulging eyes that give it such an expressive look. Start the background using a “wet-on-wet” technique, dropping in soft greens and blues while the paper is damp to create a dreamy, diffused environment. For the worm itself, apply a vibrant “variegated wash” starting with a bright yellow at the top, transitioning into orange, then a deep magenta, and finishing with a cool purple at the base. This seamless blend is best achieved by working quickly while the paper remains saturated to ensure no harsh lines form between color shifts.
Once the initial layers are completely dry, use a “splatter” technique with a stiff brush to add the playful green and blue droplets in the background, adding texture and movement to the piece. Enhance the form of the worm by adding subtle glazes of a darker shade along the underside of its body to suggest volume and shadow. For the final touches, use a fine-liner or a small detail brush with black ink to define the eyes, the thin antennae, and the delicate segments of the body. The contrast between the bold, dark outlines and the luminous, blended watercolor gradients will make the character truly pop from the page.
Recommended Watercolor Palette
- Azo Yellow: For the brilliant, sun-drenched glow at the top of the worm’s head.
- Transparent Orange: To create the smooth, warm transition in the middle of the body.
- Quinacridone Rose: For the rich, pinkish-red segments that bridge the orange and purple.
- Dioxazine Purple: To provide a deep, regal finish for the lower tail segments.
- Phthalo Green (Yellow Shade): For the fresh, grassy background tones and textured splatters.
- Ultramarine Blue: To add depth to the background and define the grounding shadows at the base.
Mischievous Colorful Spiders
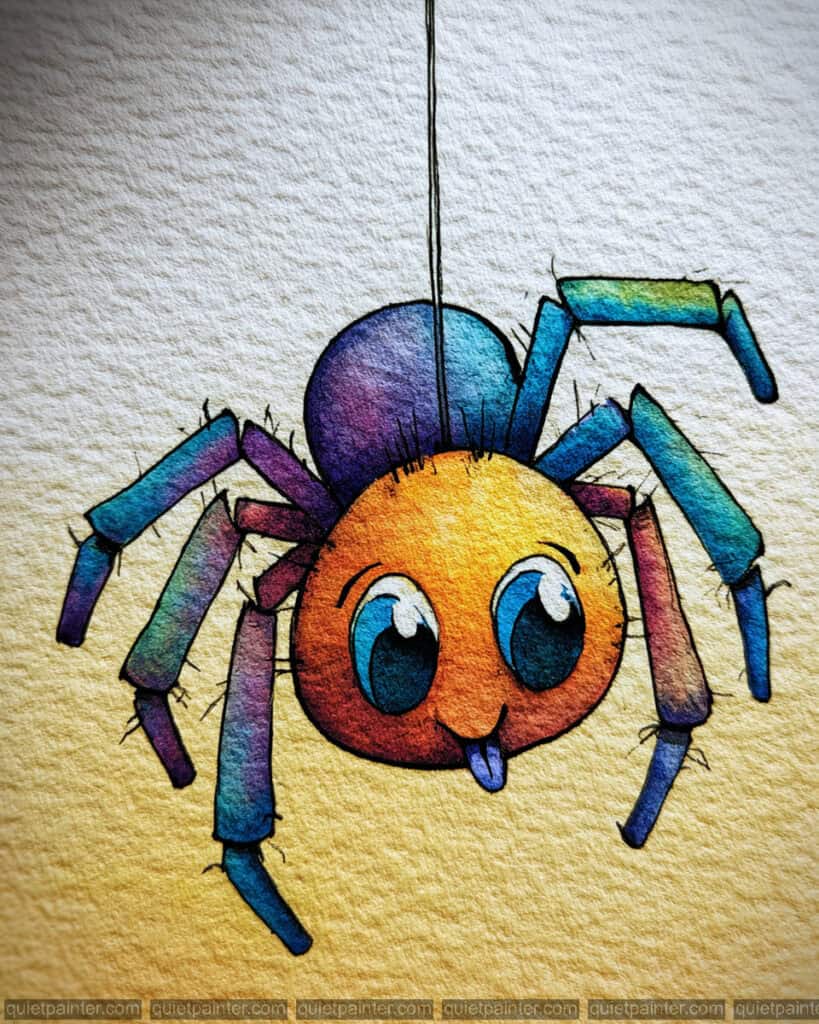
Start by lightly sketching the spider’s rounded body and segmented legs using a 2H pencil on cold-press paper to preserve the texture seen in the reference. Begin the underpainting with a “wet-on-dry” technique for the head, applying a luminous base of yellow and dropping in warm oranges while the pigment is still active to create a soft, rounded glow. For the legs and abdomen, apply a variegated wash, allowing cool blues and purples to mingle naturally on the paper to achieve those smooth, prismatic transitions. Keep your water control precise to ensure the white highlights in the eyes remain crisp and untouched by pigment.
Once the base layers are bone dry, use a small synthetic round brush to glaze deeper saturated tones onto the undersides of the legs, enhancing the 3D effect through localized contrast. The “dry brush” technique is essential here for adding the delicate, jittery hairs along the limbs and top of the head to give it that charming, fuzzy character. Use a fine-liner or a technical pen for the final bold outlines, ensuring the line weight varies to emphasize shadows. Finally, deepen the pupils with a concentrated mix of dark blue to make the expression pop against the vibrant warmth of the face.
Recommended Watercolor Palette
- Hansa Yellow Medium: For the bright, sunny glow on the spider’s face.
- Pyrrol Orange: To create the warm transition and depth on the rounded head.
- Phthalo Blue (Green Shade): Perfect for the vibrant teal and deep blue segments of the legs and eyes.
- Quinacridone Magenta: To mix with the blues for those rich, velvety purple transitions on the abdomen and joints.
- Cobalt Teal Blue: For the bright, electric highlights on the legs.
- Payne’s Gray or Neutral Tint: For the fine hairy textures and deep shadows without muddying the colors.
The Virtuoso Grasshopper
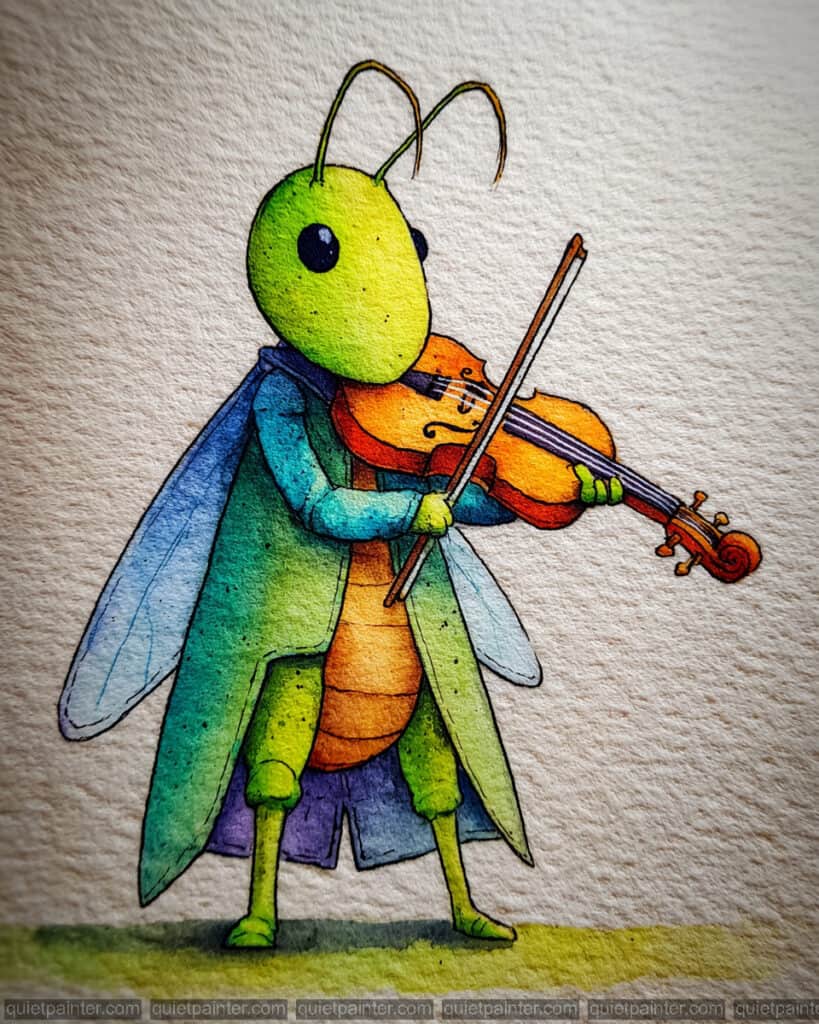
To begin this sophisticated composition, focus on the posture of the grasshopper and the correct holding of the violin. Use a wet-on-wet variegated wash for the head and the instrument simultaneously; apply a bright Lemon Yellow to the face and the violin’s body, dropping in Sap Green for the head and Burnt Sienna for the wood while the paper is still damp to create a harmonious glow between the musician and the instrument. For the long coat, use a gradient wash that transitions from a cool teal at the shoulders to a deep, regal violet at the hem, ensuring the layers stay thin to maintain the watercolor’s signature transparency.
Once the primary washes are dry, use glazing to build the form of the translucent wings and the segmented abdomen. Use a fine-liner or a size 00 rigger brush with highly concentrated Indanthrone Blue to define the strings, the bow, and the intricate scroll of the violin. Add the final character details—the dark, thoughtful eye and the delicate antennae—using a dry-brush technique to suggest fine hairs. A soft, horizontal green wash at the feet will provide a simple stage for your virtuoso, grounding the character without distracting from the complex color transitions of the clothing.
Watercolor Palette
- Lemon Yellow: For the radiant focal point of the face and the “varnish” glow on the violin.
- Sap Green: The primary mid-tone for the grasshopper’s head and hands.
- Burnt Sienna: To capture the rich, wooden texture of the violin and the bow.
- Cobalt Turquoise: For the vibrant, upper sections of the musician’s coat.
- Dioxazine Violet: To provide deep, colorful shadows in the folds of the coat and the abdomen.
- Indanthrone Blue: Essential for the sharpest details of the violin strings and the eye.
- Hooker’s Green: Diluted heavily for the soft, stage-like ground wash.
The Golden Cicada’s Rest

For this final piece, begin by focusing on the heavy, rounded form of the head and thorax. Use a wet-on-dry technique to apply a deep, velvety wash of dark violet or charcoal, leaving a sharp, unpainted sliver for the highlight on the glassy eyes to suggest volume. While the head is drying, transition to the wings by applying an extremely diluted variegated wash, dropping in warm ochres at the tips and a hint of turquoise near the base to suggest iridescence and transparency.
Once the primary forms are set, utilize glazing and fine linework to build depth. Use a fine-liner or a size 00 rigger brush to draw the delicate, branching veins across the wings, ensuring the lines are thin and crisp to maintain the feeling of lightness. Create a sense of environment by applying a warm, granulated yellow wash in the background, then finish by adding the spindly legs with concentrated orange pigment, grounding the character with a soft, cool-toned cast shadow to emphasize the bright sunlight.
Watercolor Palette
- Yellow Ochre: For the soft, warm glow of the background and the wing highlights.
- Burnt Sienna: To create the rich, warm mid-tones of the legs and wing tips.
- Payne’s Gray: The primary pigment for the dark, solid body and the depths of the eyes.
- Cobalt Turquoise: Used sparingly at the wing base for a touch of iridescent glow.
- Dioxazine Violet: To add color complexity and depth to the dark thorax and head.
- Indanthrone Blue: For the sharpest details in the pupils and the fine vein patterns.
- New Gamboge: To add a final “pop” of saturated light to the wings and legs.
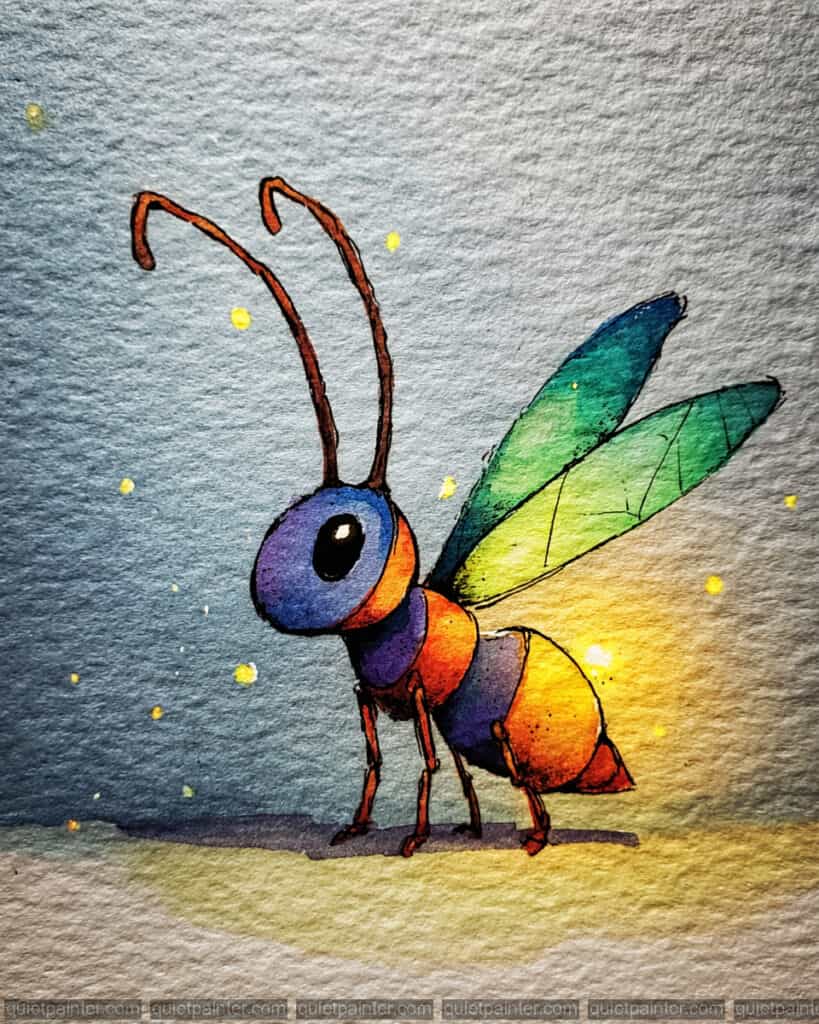
The Lantern-Bearing Firefly

To bring this glowing character to life, begin with a wet-on-wet underpainting to establish the primary light source. Apply a saturated circle of New Gamboge around the lantern, then immediately work outward with a soft, variegated wash of Sap Green and Phthalo Blue, allowing the warm yellow to bleed into the cool background to create a natural glow. For the firefly’s segmented body, use a variegated wash that transitions from a cool teal at the head to a fiery rainbow of oranges and purples at the tail, keeping the colors transparent to preserve the paper’s luminosity.
Once the background is completely dry, transition to the detail phase using a wet-on-dry technique to define the illustrative elements. Use a fine-liner or a size 0 rigger brush with a dark, concentrated pigment like Indanthrone Blue to draw the thin, delicate legs, the lantern frame, and the expressive facial features. Add character by flicking a loaded brush to create small, colorful “light particles” or splatters around the lantern, and finish with a crisp, dark pupil in the eye to give the firefly its curious and gentle gaze.
Watercolor Palette
- New Gamboge: For the intense, warm light emanating from the lantern.
- Hansa Yellow Light: To create the brightest highlights on the face and body segments.
- Sap Green: Used in the background wash to bridge the warm light and cool shadows.
- Phthalo Blue (Red Shade): For the moody, cool-toned upper background and head.
- Quinacridone Magenta: For the vibrant purple segments near the firefly’s tail.
- Indanthrone Blue: A deep, non-granulating blue for the lantern frame and anatomical outlines.
- Transparent Orange: To provide a glowing mid-tone for the lower body segments.
The Wide-Eyed Blue Dragonfly
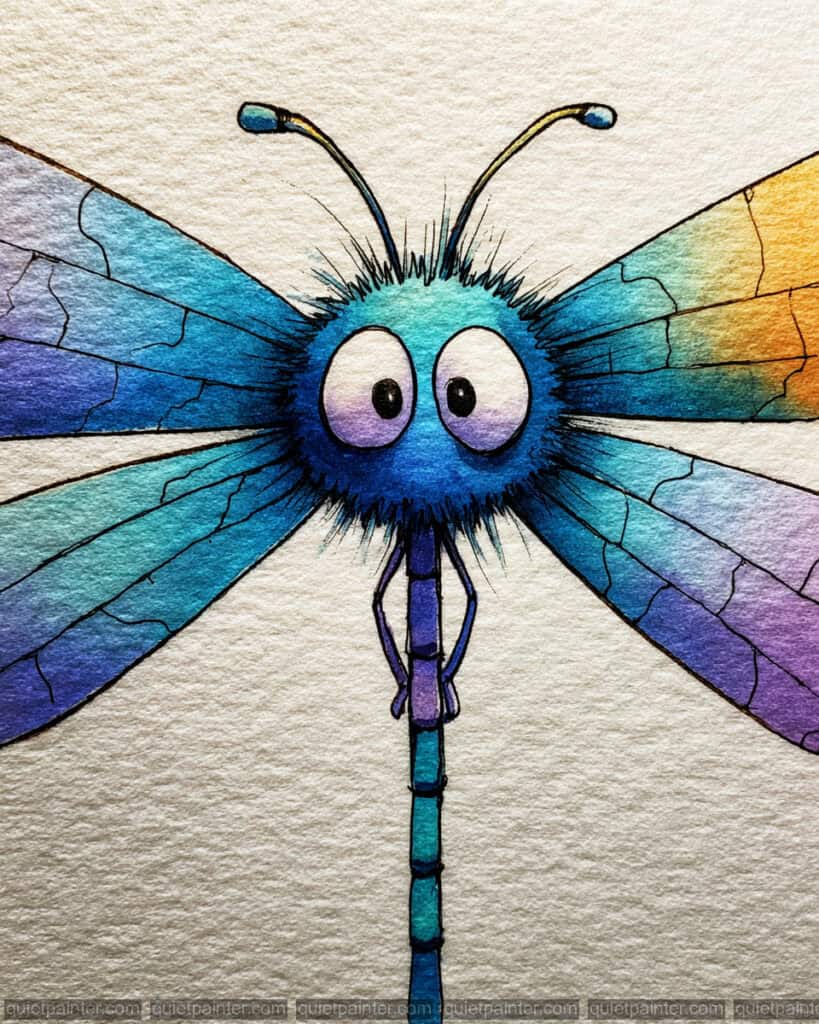
To begin this enchanting piece, focus on the symmetry of the wings and the circularity of the fuzzy head. Apply a wet-on-wet technique for the head, dropping in a saturated Phthalo Blue and allowing it to “bloom” outward into the damp paper to create that soft, fuzzy aura. For the wings, work in sections, applying variegated washes that transition from cool violets to warm, sun-kissed oranges at the tips, ensuring the colors mingle softly without losing their individual clarity.
Once the initial washes are bone dry, switch to a dry-brush or fine-liner approach for the illustrative details. Use a very fine technical pen or a size 000 rigger brush to create the intricate, fractured “vein” patterns across the wings and the delicate, spiky hairs radiating from the head. Finish by adding a deep Dioxazine Violet glaze to the segmented body to provide anatomical depth and use a concentrated black for the pupils to give the character its signature startled, yet endearing expression.
Watercolor Palette
- Phthalo Blue (Red Shade): For the intense, vibrant focal point of the fuzzy head.
- Dioxazine Violet: To create the rich, cool-toned segments of the long tail and wing bases.
- Cobalt Turquoise: For the refreshing blue-green transitions in the upper and lower wings.
- Hansa Yellow Deep: To provide the bright, glowing highlights at the very tips of the wings.
- Quinacridone Coral: For the warm, sunset-toned transitions between the yellow and blue wing sections.
- Indanthrone Blue: A deep, velvety blue for the sharpest details in the eyes and outlines.
- Payne’s Gray: For the subtle, cool shadows that ground the character’s long body.
The Cheerful Little Bee
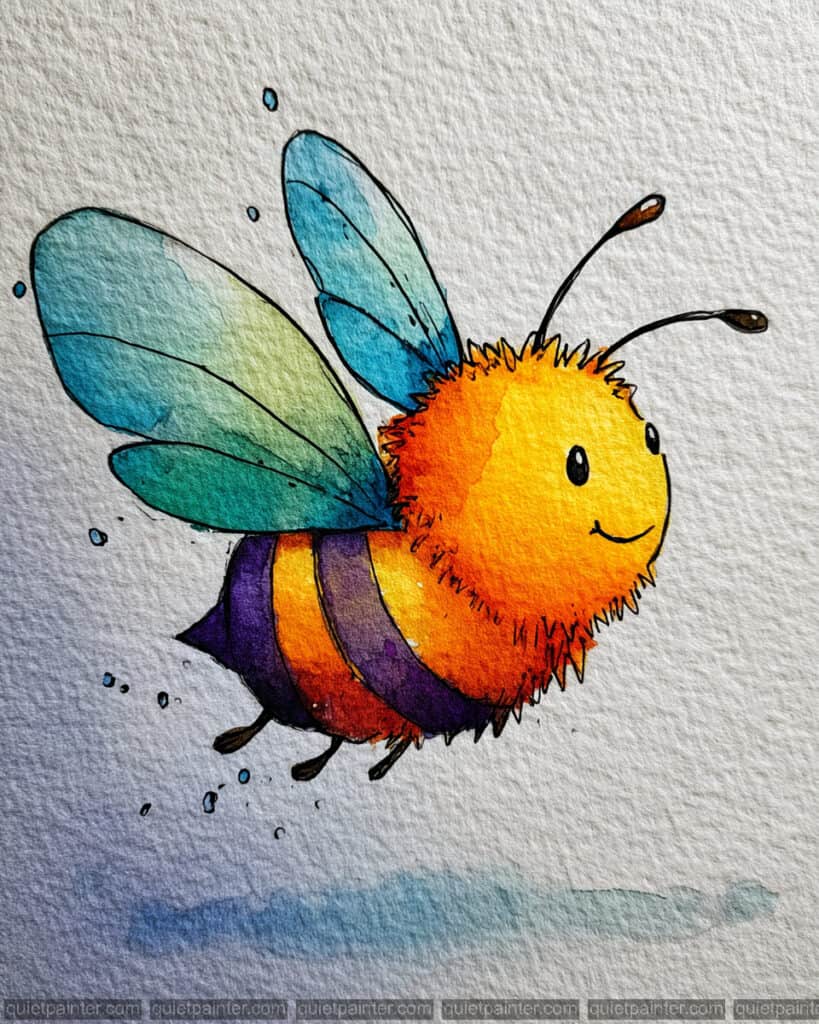
To capture the energy of this flight, start with a light-handed wet-on-wet technique for the background and wings. Apply a pale sky-blue wash around the character, then immediately flick a loaded brush to create the dynamic droplets that suggest movement. For the body, drop in a high-saturation Lemon Yellow and Transparent Orange while the paper is damp, allowing the colors to bloom outward to create that signature fuzzy, soft-edged silhouette that makes the bee look so huggable.
Once your primary washes are dry, switch to a wet-on-dry method for the structural elements. Use a rich Dioxazine Violet for the stripes, as this cool tone will make the surrounding warm oranges pop with more intensity than a standard black. Use a fine-liner or a size 0 round brush to add the crisp, smiling facial features and the thin, dainty legs. For the wings, add very delicate, pale green veins to suggest transparency without overwhelming the soft blue base.
Watercolor Palette
- Lemon Yellow: For the bright, sunny focal point of the face and upper body.
- New Gamboge: To create a rich, warm transition into the orange sections.
- Transparent Orange: For the saturated mid-tones that provide depth to the fuzzy body.
- Dioxazine Violet: A vibrant alternative to black for the stripes and dark details.
- Cobalt Turquoise Light: For the airy, translucent wings and the energetic background splashes.
- Phthalo Blue (Red Shade): Used sparingly to deepen the shadows on the underside of the body.
- Payne’s Gray: For the sharpest details in the eyes, smile, and antennae.
The Stately Stag Beetle
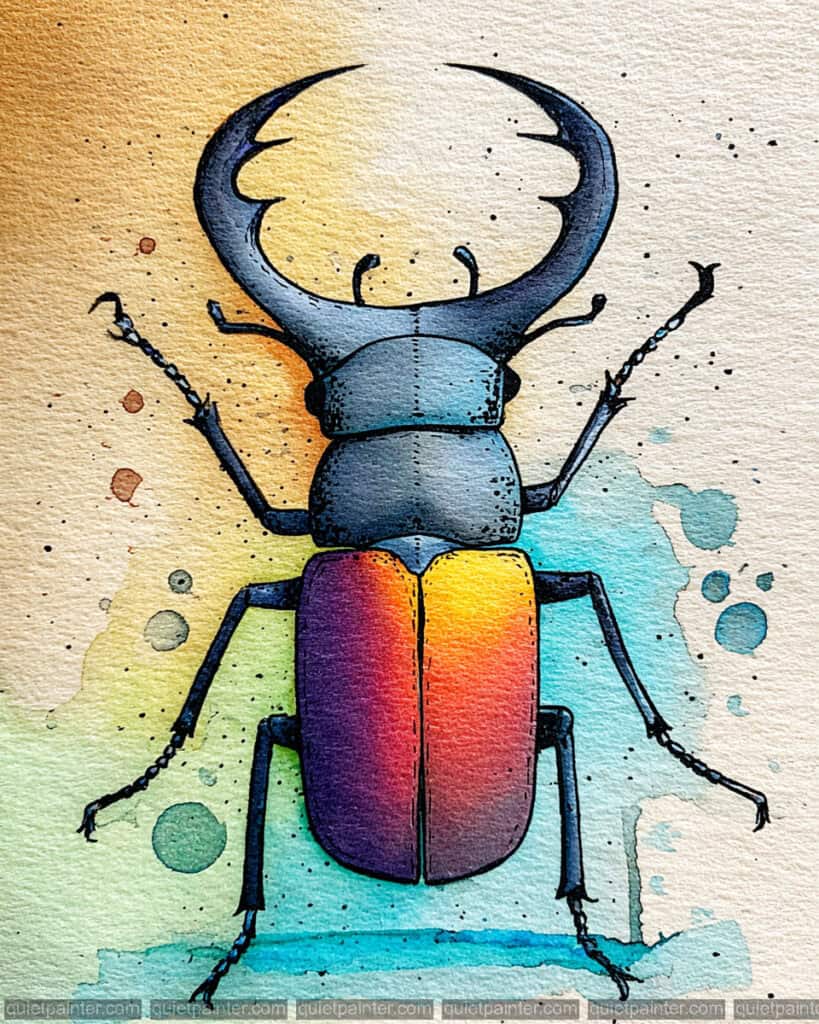
To begin this piece, focus on the top-down symmetry and the soft background atmosphere. Apply a wet-on-wet variegated wash for the background, dropping in earthy ochres and refreshing teals while the paper is damp to create that beautiful, diffused splatter effect. For the beetle’s lower shell, use a controlled gradient wash, starting with a bright yellow highlight in the center and bleeding outward into deep violets and magentas to suggest a curved, iridescent surface.
Once the background and base layers are completely dry, use the dry-brush technique to define the beetle’s powerful mandibles and segmented legs. The top half of the beetle requires a heavy, saturated application of cool indigos to contrast against the warmth of the lower shell. Use a fine-liner or a size 0 synthetic brush to add the delicate, spiky textures on the legs and the fine stippling on the head, which provides that characteristic matte, shell-like finish.
Watercolor Palette
- Hansa Yellow Medium: For the central, glowing highlight on the lower shell.
- Quinacridone Magenta: To create the rich, reddish-purple transition on the elytra.
- Dioxazine Violet: For the deepest, darkest shadows on the purple half of the shell.
- Indanthrone Blue: The primary pigment for the cool-toned head, mandibles, and legs.
- Yellow Ochre: Used in the background to create a warm, earthy contrast.
- Cobalt Teal: For the refreshing blue background splatters and accents.
- Payne’s Gray: For the sharpest anatomical details and the fine, spiky leg textures.
The Symmetrical Prismatic Stag Beetle
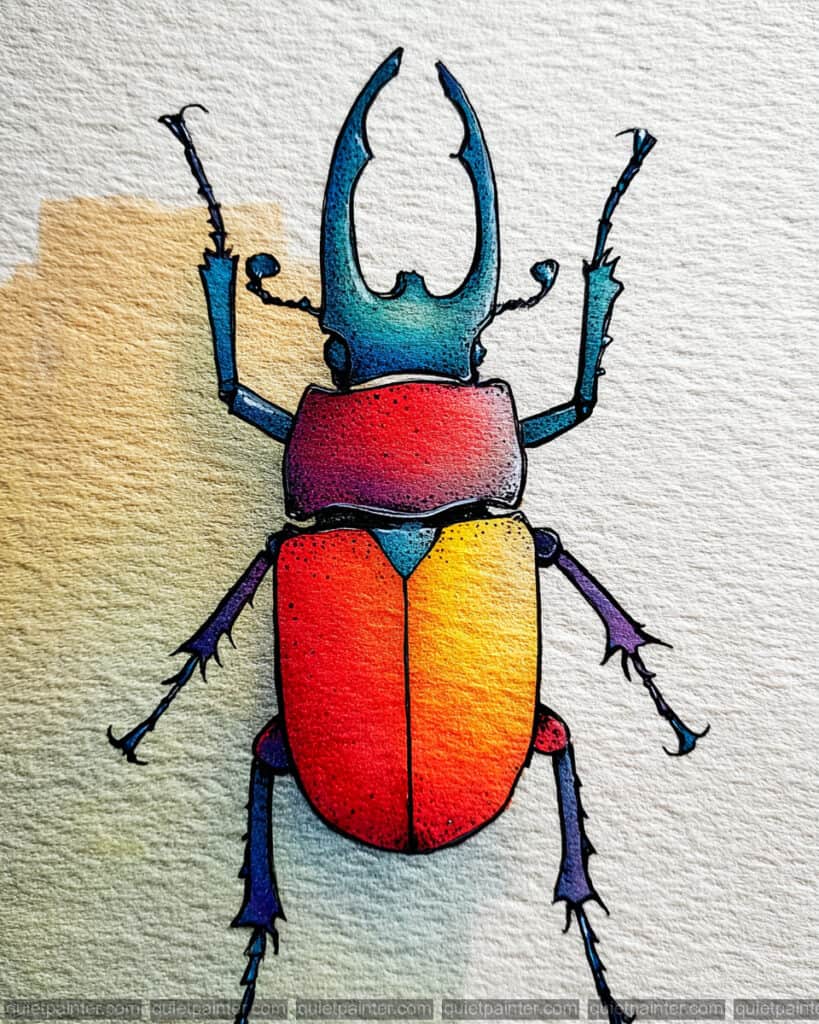
To begin this symmetrical composition, establish a precise central axis to ensure your pencil sketch is perfectly balanced. Apply a large, graduated wet-on-wet wash for the entire central body, starting with bright Hansa Yellow in the middle and immediately bleeding outward into Pyrrol Orange and then Permanent Alizarin Crimson, allowing the pigments to mingle on the paper for a smooth, fiery transition. For the outer sections and the powerful mandibles, use a wet-on-dry technique with a saturated mix of Cobalt Teal and Dioxazine Violet to keep the blues and purples distinct and cool, creating a stark contrast to the warm, red center.
Once the primary color washes are bone dry, transition to the illustrative phase to add texture and depth. Use a very fine liner brush and highly concentrated Payne’s Gray or Neutral Tint to create the crisp, black outlines that define each segment and joint. Implement subtle cross-hatching to create illusory textures on the shell and use a slightly damp “thirsty brush” to lift pigment from the top edges of the segments to suggest a strong, directional light source. Finally, apply a soft, granulated wash of Buff Titanium to the upper background to enhance the texture of the paper and ground your masterpiece.
Watercolor Palette
- Hansa Yellow Medium: The luminous central point for the main body’s fiery glow.
- Transparent Orange: For the warm, glowing transitions on the thorax and abdomen.
- Permanent Alizarin Crimson: To achieve the deep, saturated red tones at the base of the central body.
- Cobalt Teal: For the brilliant, cool primary color of the powerful mandibles and outer segments.
- Dioxazine Violet: To provide the rich purple depth in the lower abdomen and leg segments.
- Indanthrone Blue: For the dark, sturdy joint accents and the coolest part of the outer segments.
- Buff Titanium: Diluted heavily for the soft, neutral, textured background wash.
The Radiant Rainbow Dragonfly
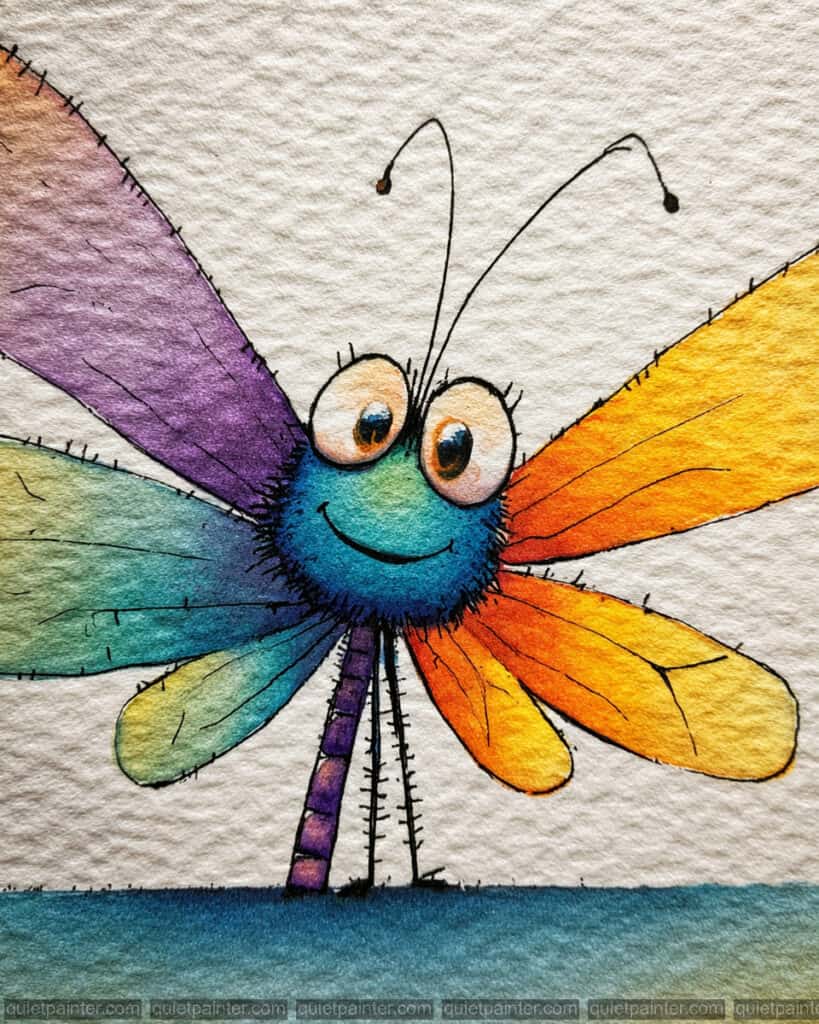
To begin this vibrant creature, start with a precise sketch of the central body and the four radiating wing sections. Use a wet-on-wet technique for the wings, applying pure pigments—purple, turquoise, yellow, and orange—into separate damp sections to allow for soft internal gradients while keeping the outer edges defined. For the fuzzy head, drop a saturated Phthalo Blue into a wet circular area, letting the pigment bloom outward slightly to suggest a soft, tactile texture.
Once the initial wing washes are bone dry, use a very fine-tipped brush or a technical pen to add the delicate veins and the spiky illustrative outlines. Focus on the eyes by layering a warm amber glaze over a pale base, leaving a small sliver of white paper for a sharp catchlight to give the character life. Finalize the piece with a deep, cool-toned horizontal wash at the bottom to ground the dragonfly and provide a strong color contrast to the warm orange wings.
Watercolor Palette
- Phthalo Blue (Green Shade): For the vibrant, fuzzy center of the head and the cool wing sections.
- Quinacridone Magenta & Dioxazine Violet: To create the rich purple tones in the upper-left wing and the segmented tail.
- Hansa Yellow Deep: For the bright, sunny highlights in the eyes and the transition areas of the wings.
- Transparent Orange: To provide the intense, glowing warmth of the right-side wings.
- Hooker’s Green: Mixed with blue for the soft, mossy background wash at the base.
- Indanthrone Blue: For the dark, needle-like legs and the deepest parts of the eye pupils.
- Burnt Sienna: To add earthy detail to the thin antennae and the wing vein accents.
The Vibrant Jumping Spider
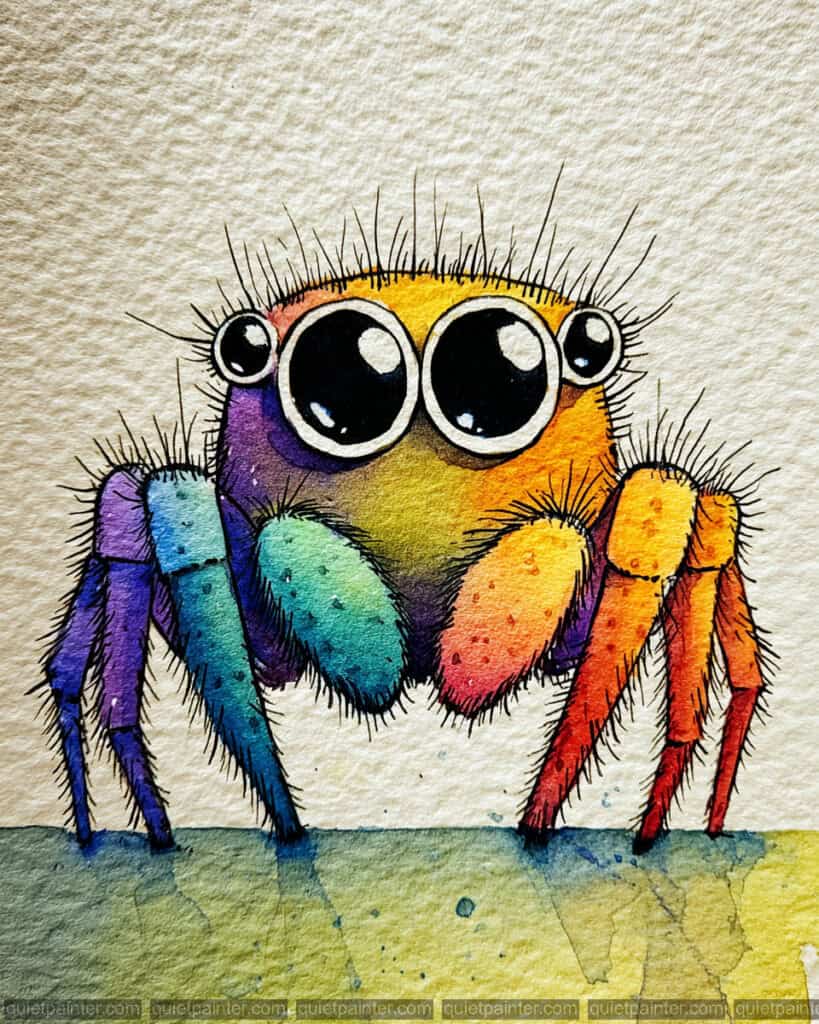
To master this complex character, begin with a light, precise pencil sketch, focusing on the symmetrical placement of the four eyes. Use a wet-on-wet technique for the main body and each individual leg, dropping in pure pigments from violet to red to create a seamless rainbow transition while the paper is still glistening. This initial underpainting serves as the soft, fuzzy base; be sure to leave the large circular highlights in the eyes as pure white paper to ensure they retain a glassy, reflective quality.
Once the colorful base is bone dry, transition to the dry-brush and detail phase to bring the spider to life. Use a very fine liner brush (size 000) with highly concentrated dark pigment to create the thousands of tiny “hairs” that radiate outward from the body and legs, giving it a soft, tactile feel. Finish by deepening the pupils with a rich, velvety black glaze, ensuring the edges are crisp against the colorful face to maximize the intensity of the character’s expression.
Watercolor Palette
- Quinacridone Rose & Pyrrol Scarlet: To create the warm, fiery tones on the right-side legs.
- Hansa Yellow Deep: For the brilliant, sunny transitions on the face and mid-legs.
- Sap Green & Cobalt Teal: To achieve the cool, refreshing gradients on the left-side limbs.
- Ultramarine Blue & Dioxazine Violet: For the deep, regal tones on the far-left legs and head shadows.
- Lunar Black or Neutral Tint: Essential for the intense, dark pupils and fine-line hair details.
- Buff Titanium: A touch added to the background to complement the heavily textured paper.
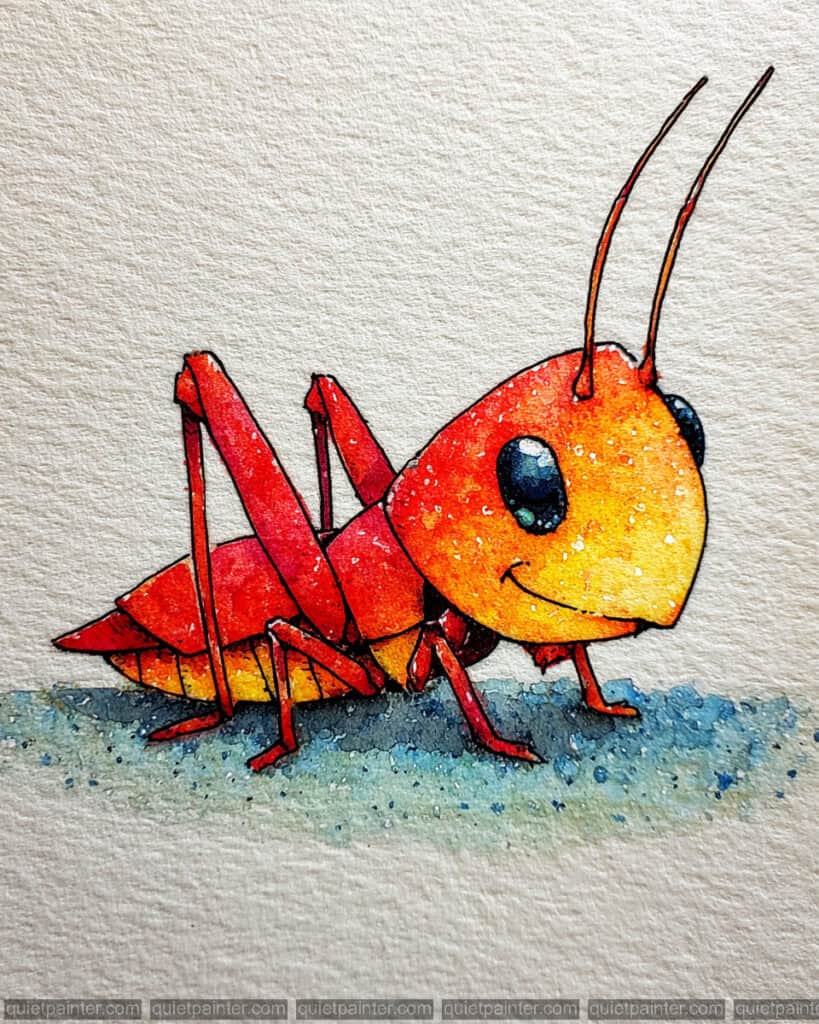
The Wide-Eyed Little Grasshopper
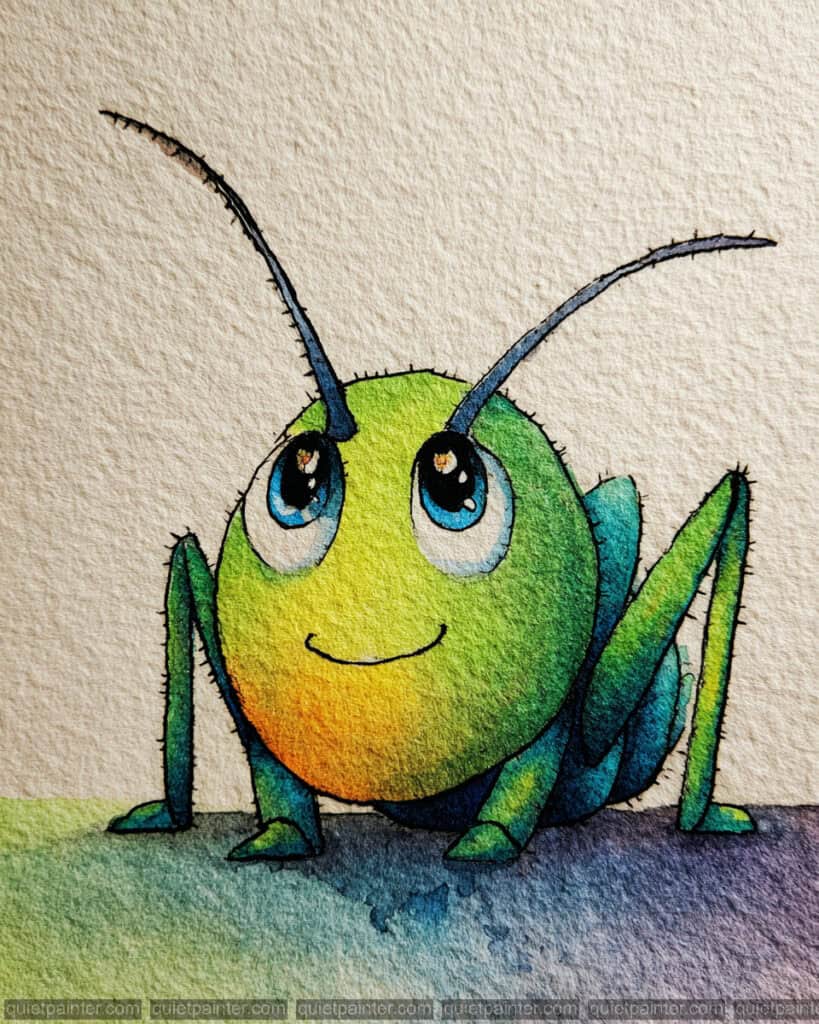
To capture the roundness of the grasshopper’s head, begin with a soft wet-on-wet variegated wash. Start with a bright Lemon Yellow at the base of the chin and move upward into a vibrant Sap Green, allowing the pigments to mingle on the paper to create a smooth, glowing transition. For the eyes, leave small, crisp circles of white paper to serve as highlights, then apply a pale Cerulean Blue wash to the iris area while keeping the edges soft to suggest a glassy, reflective surface.
Once your base layers are completely dry, use a wet-on-dry technique to add the structural details of the legs and antennae. Use a fine-tipped rigger brush or a technical pen to apply the delicate, spiky hairs along the limbs and the expressive curve of the smile. To create depth and ground the character, apply a cool Dioxazine Violet and Ultramarine glaze to the shadow side of the body and the ground beneath, which will make the warm yellows of the face pop even more intensely.
Watercolor Palette
- Hansa Yellow Light: For the bright, sun-kissed glow on the lower half of the face.
- Sap Green: The primary mid-tone for the grasshopper’s leafy body.
- Phthalo Green (Blue Shade): To create the deeper, cooler green tones on the legs and wings.
- Cerulean Blue: For the soft, soulful color within the large iris.
- Dioxazine Violet: Mixed with blue for the deep shadows on the body and the ground.
- Ultramarine Blue: For the cool-toned cast shadow that grounds the character.
- Neutral Tint: For the sharp, dark details of the pupils and the fine illustrative outlines.
The Luminous Night Firefly
To capture the firefly’s magic, start with a wet-on-wet technique for the surrounding atmosphere. Apply a halo of bright Lemon Yellow around the tail, then immediately surround it with a deep, granulating blue-gray, allowing the colors to bleed softly into each other to create a glowing effect. For the firefly’s body segments, use a variegated wash to transition from a cool violet on the head to a warm, fiery orange on the mid-section, ensuring the tail remains the brightest point of the composition.
Once the background and base layers are dry, focus on the translucent quality of the wings by using a very light, diluted Phthalo Green glaze. Add the illustrative details, such as the spindly legs and the long antennae, with a fine-liner or a size 00 synthetic brush for precision. Finalize the piece by using a dry-brush or stippling technique with concentrated yellow paint to create the tiny floating “embers” or light particles around the character, which adds a sense of movement and enchantment to the scene.
Watercolor Palette
- Lemon Yellow: For the primary light source and the intense glow of the tail.
- Transparent Orange: To provide the warm, glowing mid-tones on the body segments.
- Dioxazine Violet: For the cool, shadowy tones on the head and thorax.
- Phthalo Green (Blue Shade): Diluted heavily to create the translucent, light-catching wings.
- Payne’s Gray: For the moody, granulating night sky and the grounding cast shadow.
- Indanthrone Blue: To add depth to the darkest parts of the background and the legs.
- Burnt Sienna: For the fine, warm lines of the antennae and limb segments.
The Rainbow Rhinoceros Beetle
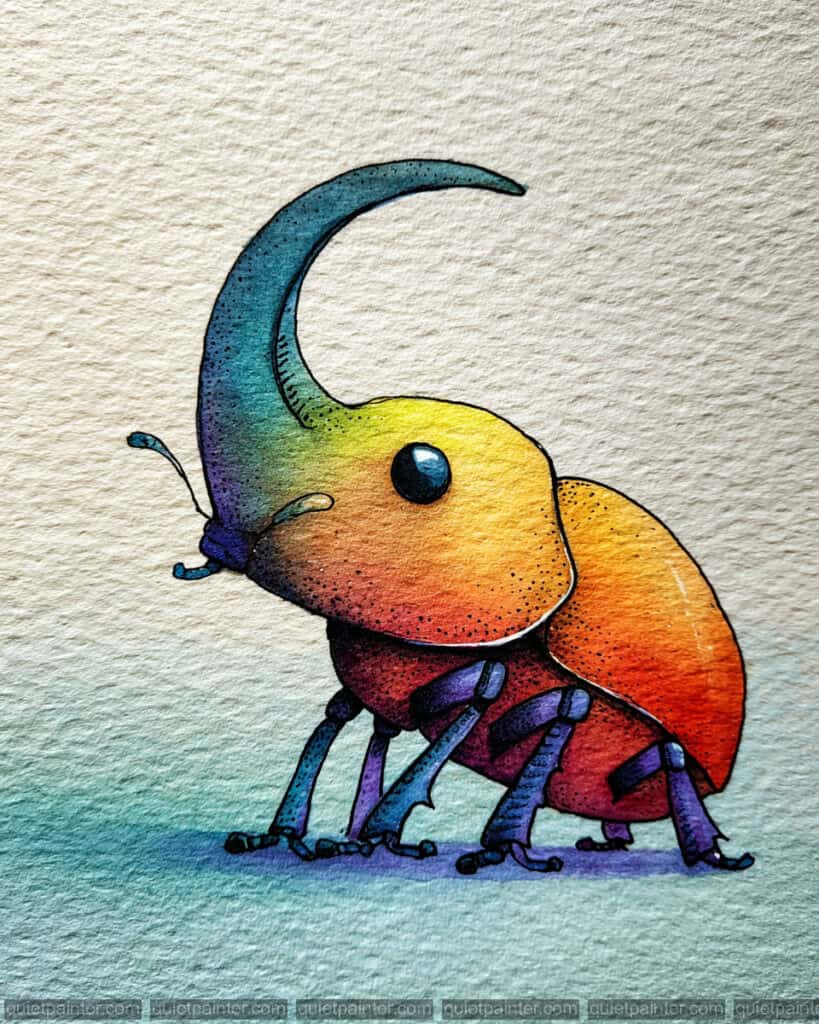
To begin this majestic creature, apply a vibrant wet-on-wet variegated wash across the main body and the impressive horn. Start with a cool Phthalo Blue at the tip of the horn, bleeding it into a bright Hansa Yellow at the head, and then transitioning into a fiery Pyrrol Orange and Permanent Alizarin Crimson for the shell. This initial layer creates a seamless “rainbow” effect, so ensure your paper remains evenly damp to avoid unwanted hard edges or “blooms” during the color shifts.
Once the base wash is fully dry, focus on defining the beetle’s sturdy anatomy and character. Use a concentrated mix of Indanthrone Blue and a touch of Dioxazine Violet to paint the segmented legs and the lower thorax, providing a heavy, cool-toned anchor to the warm shell. Add fine-line details using a rigger brush or a fine-liner to accentuate the texture of the horn and the curious, large eye. A final touch of white gouache or leaving the paper white for the eye reflection will give the beetle a lifelike, inquisitive stare.
Watercolor Palette
- Phthalo Blue (Red Shade): For the brilliant, cool tip of the horn.
- Hansa Yellow Medium: The central “light” color that bridges the cool and warm sections.
- Transparent Orange: To create the rich, glowing mid-tones on the beetle’s face and shell.
- Permanent Alizarin Crimson: For the deep, saturated red tones at the back of the shell.
- Dioxazine Violet: To add depth to the joints and the transition area under the head.
- Indanthrone Blue: A dark, velvety blue perfect for the legs and the darkest part of the eye.
- Cobalt Teal: For the soft, energetic background splatter or a light ground wash.
The Azure-Horned Beetle
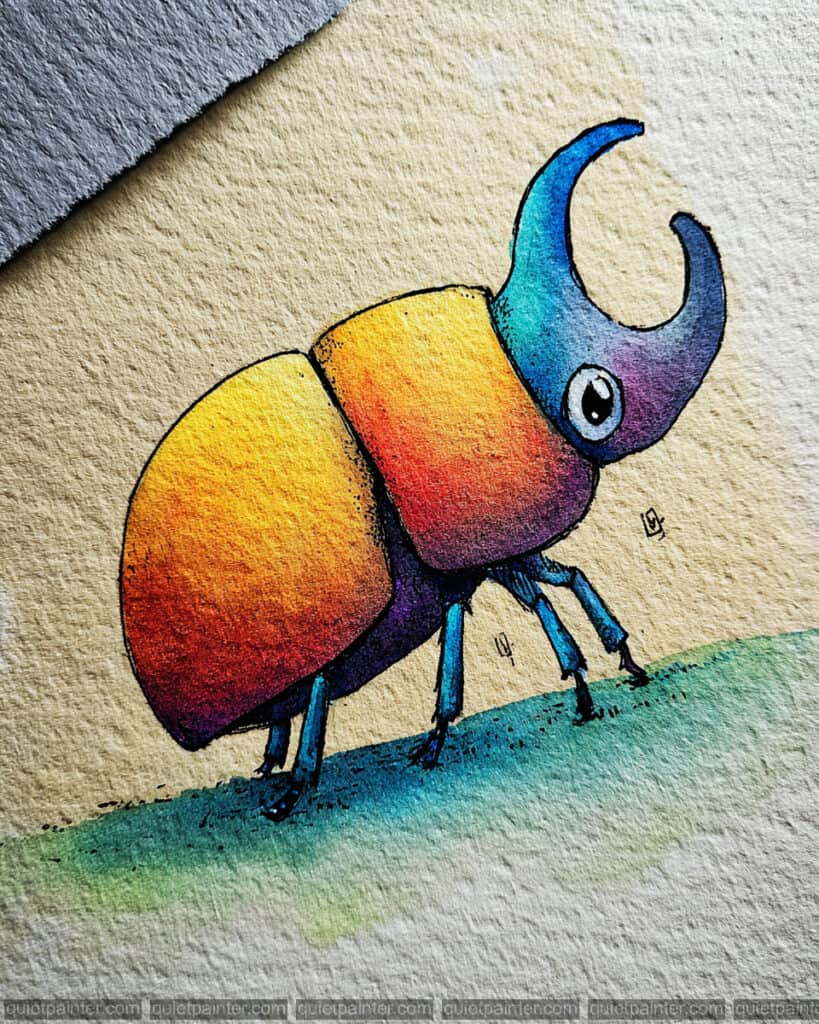
For this illustration, begin with a wet-on-wet underpainting to establish the bold color transitions across the shell and horn. Start with a bright Lemon Yellow at the highest points of the back, dropping in Transparent Orange and Pyrrol Crimson toward the bottom to create a rich, glowing gradient. While the paper is still moist, introduce a vibrant turquoise to the horn, allowing it to naturally bleed into a deep violet where the head meets the body, creating a soft, atmospheric transition between cool and warm tones.
Once the initial washes have dried, use a wet-on-dry technique to define the beetle’s structure and anatomy. Use a concentrated mix of Indigo or Ultramarine Blue to paint the thin, jointed legs, ensuring the lines are crisp to contrast with the soft gradients of the body. Finalize the piece by using a fine-liner or a small detail brush to add the cross-hatched textures along the edges and the single, bright “catchlight” in the eye, which instantly gives the character its curious and friendly personality.
Watercolor Palette
- Cobalt Turquoise: For the primary, vibrant glow of the curved horn.
- Hansa Yellow Medium: To create the bright, luminous highlight on the shell’s peak.
- Quinacridone Coral: For the warm, transitionary mid-tones on the body.
- Pyrrol Crimson: To achieve the deep, saturated red at the base of the shell.
- Dioxazine Violet: To bridge the cool blue of the head with the warm red of the torso.
- Indanthrone Blue: For the dark, sturdy legs and the deep shadows of the underbelly.
- Phthalo Green (Yellow Shade): Diluted for the soft, grassy wash at the beetle’s feet.
The Wide-Eyed Tiny Ladybug
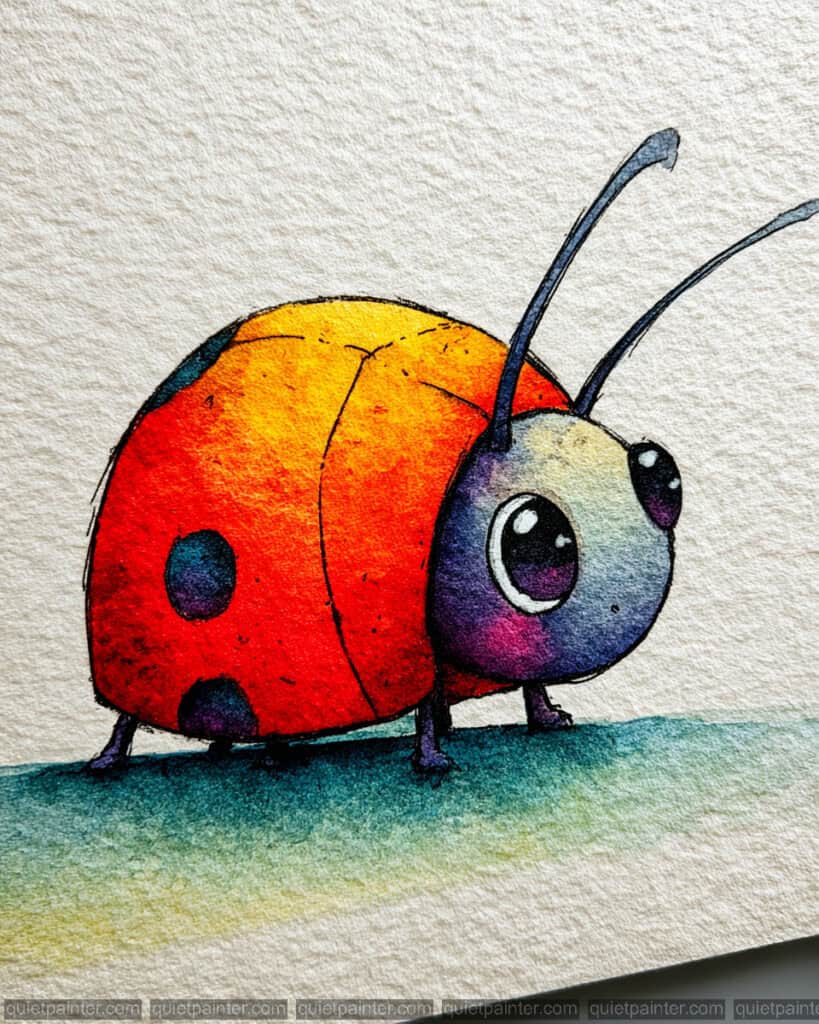
For the initial stage, focus on the large, curved shell by applying a wet-on-wet wash that transitions from a bright, sunny yellow at the top to a deep, saturated red at the base. While this area is still damp, you can drop in tiny amounts of purple near the bottom edge to hint at a reflected shadow, ensuring the colors mingle naturally without harsh lines. For the head, use a very diluted, pale blue wash, leaving circular “white of the paper” spots for the eye highlights to maintain maximum brightness and “sparkle.”
In the second phase, wait for the shell to dry completely before painting the black spots with a wet-on-dry technique to keep the edges crisp and sharp. For the eyes, use a deep violet mixed with black, creating a gradient within the iris to give them depth and a “glassy” appearance. Use a fine liner brush to add the delicate antennae and the tiny legs, then finish with a soft, granulated green wash for the ground to provide a stable, earthy base for your character.
Watercolor Palette
- Hansa Yellow Light: For the luminous glow on the upper part of the ladybug’s shell.
- Pyrrol Orange: To bridge the transition from the yellow highlight to the red body.
- Permanent Alizarin Crimson: For the deep, rich red tones of the shell’s base.
- Ultramarine Violet: Used for the dark spots and the deep shadows within the eyes to add color complexity.
- Cerulean Blue: For the soft, subtle shading on the white portion of the face.
- Viridian or Phthalo Green: Diluted heavily for the soft, textured ground beneath the ladybug.
- Neutral Tint: For the sharpest details in the pupils and the fine lines of the antennae.
The Chill Little Roach
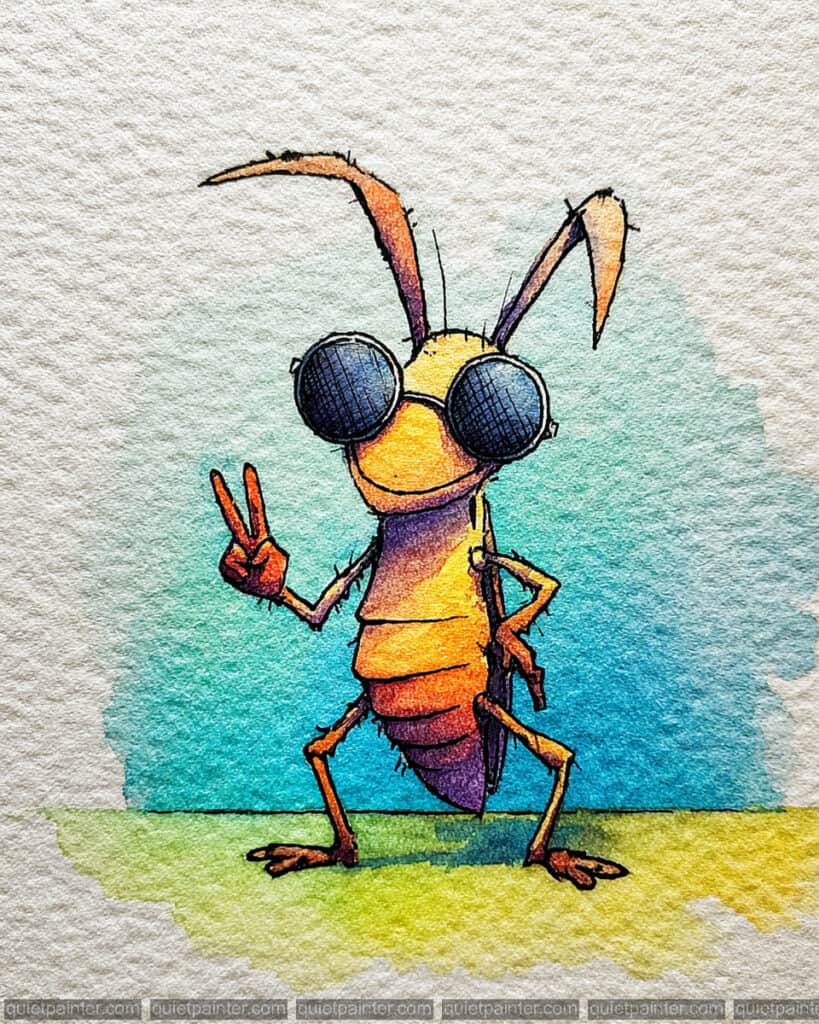
To begin this illustration, apply a wet-on-wet variegated wash for the background using a mix of turquoise and pale yellow to create a soft, out-of-focus environment. For the character’s body, use a wet-on-dry method to layer warm yellows and oranges on the torso, allowing each segment to slightly blend into the next while the paint is still tacky. This technique establishes a solid, three-dimensional form with a natural internal glow that mimics the reflective shell of an insect.
Once the primary washes are dry, focus on the illustrative details using a fine-liner or a size 0 round brush for the dry-brush texture on the limbs and antennae. Use a deeply saturated indigo or violet for the sunglasses, leaving a thin, unpainted white sliver or using white gouache for the lens reflection. To create depth, apply a light purple glaze to the lower segments of the body and add a crisp, horizontal shadow beneath the feet to ground the character firmly in the scene.
Watercolor Palette
- Yellow Ochre: For the natural, earthy base tones of the head and upper body.
- Transparent Pyrrol Orange: To create the vibrant, warm transitions in the mid-section segments.
- Cobalt Teal Blue: The perfect pigment for the bright, airy background wash.
- Quinacridone Violet: Used to glaze the lower abdomen and legs for rich, colorful shadows.
- Indanthrone Blue: A deep, non-granulating blue for the dark lenses of the sunglasses.
- Burnt Umber: For the thin, spindly legs and the fine texture of the antennae.
- Green Gold: To blend the transition between the yellow ground and the teal sky.
The Grumpy Little Bumblebee
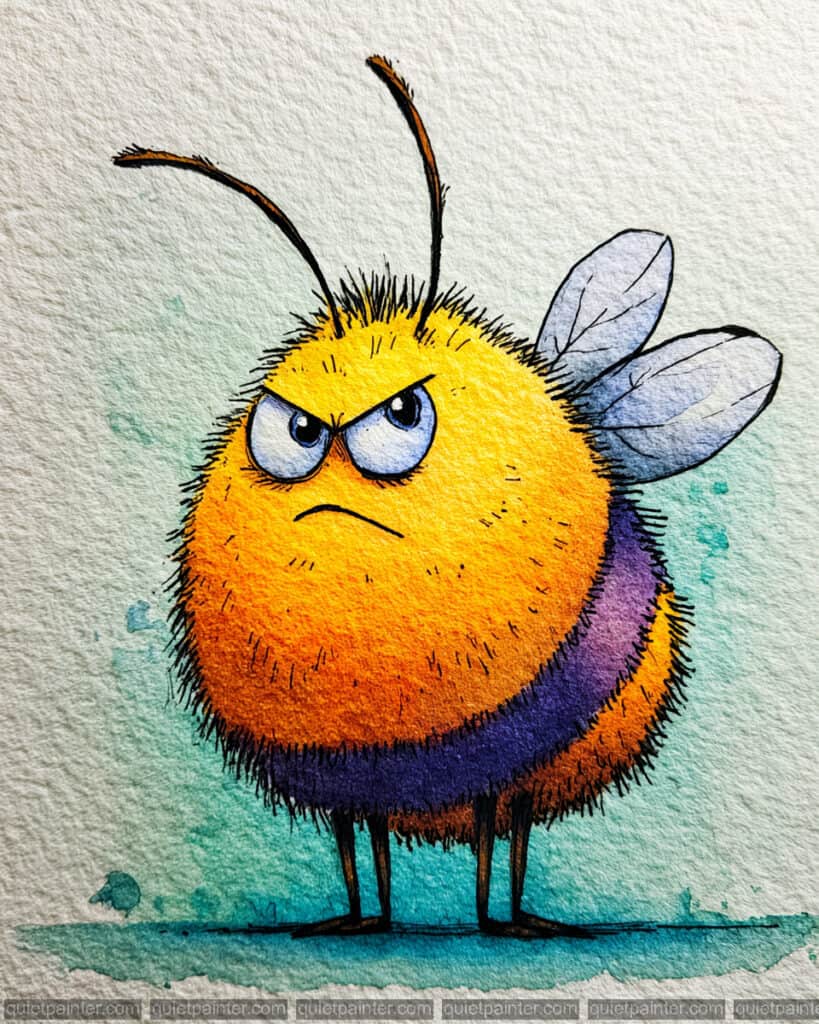
To capture the “fluffy” essence of the body, start with a soft wet-on-wet application of warm yellows and oranges, allowing the colors to bleed slightly past your intended borders. While the paper is still damp, use a damp “thirsty brush” to lift some pigment from the center, creating a rounded, volumetric highlight that gives the bee its orb-like shape. For the background, apply a very pale turquoise wash and use a flick or splatter technique with a loaded brush to create those energetic droplets that suggest a natural environment.
Once the initial body wash is bone dry, the magic happens with dry-brush and detail work. Use a dark violet or deep indigo for the stripes instead of plain black to keep the colors vibrant and rich. With a very fine, split-bristle brush or a sharp rigger, add a multitude of tiny, quick strokes along the edges of the body to simulate the fuzzy texture. Finally, use a high-contrast glaze for the eyes and eyebrows, ensuring the linework is crisp to emphasize the character’s grumpy expression against the soft body.
Watercolor Palette
- Aureolin (Cobalt Yellow): For the brightest, most luminous parts of the bee’s fuzzy coat.
- New Gamboge: To provide a rich, warm transition into the orange mid-tones.
- Quinophthalone Orange: For the deeper, saturated orange shadows near the stripes.
- Dioxazine Violet: Mixed with a touch of blue for the intense, dark stripes (more lively than black).
- Cobalt Turquoise Light: For the soft, splattered background and the delicate wing veins.
- Ultramarine Blue: To create the cool shadows on the white of the eyes and the ground.
- Payne’s Gray or Neutral Tint: For the sharpest details in the pupils and the thin legs.
The Radiant Little Ant
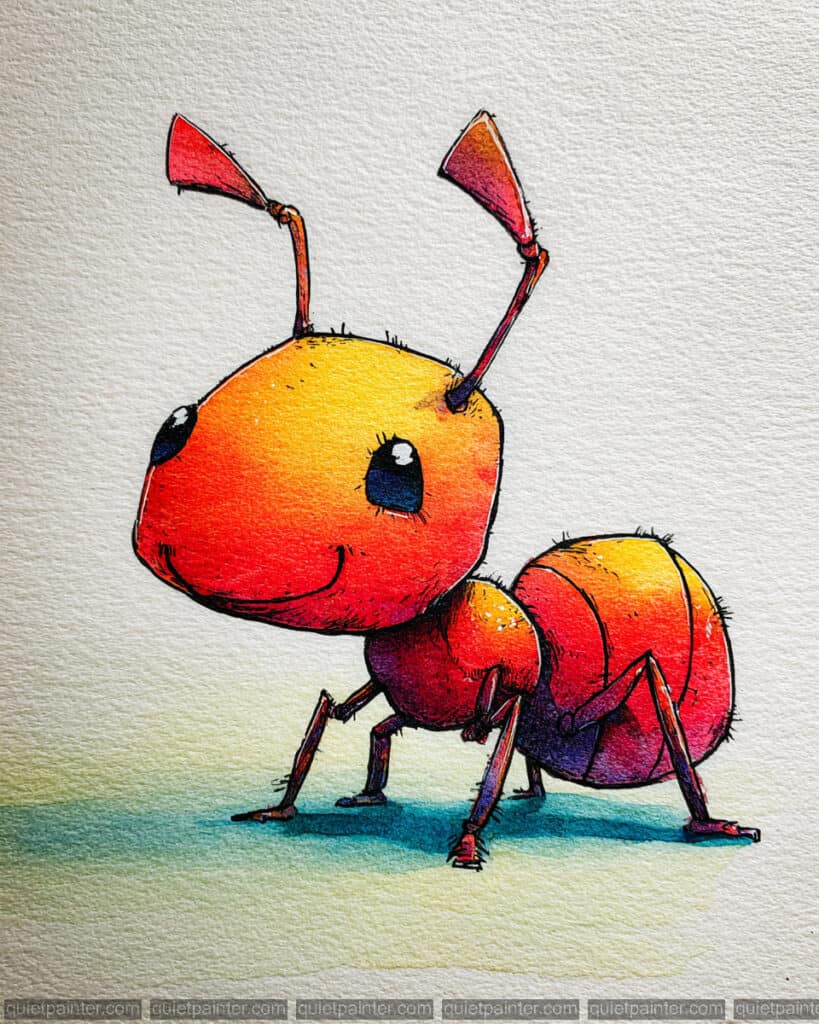
To achieve this vibrant glow, start by laying down a high-saturation wet-on-wet wash across the main body segments. Begin with a bright yellow at the top of the head and abdomen, quickly dropping in warm oranges and deep reds while the paper is still glistening to ensure a seamless, soft gradient. This underpainting acts as the light source, so be careful to leave small, unpainted patches of paper for the sharpest highlights on the roundest parts of the ant’s body.
Once your base layers are bone dry, use a fine-tipped brush or a technical pen to apply the delicate cross-hatching and expressive outlines. Focus on the underside of the abdomen and the thorax, layering cool purples or deep indigos over the red to create anatomical depth and shadow. Finalize the piece by adding the tiny “hairs” along the silhouette and the catchlights in the eyes using a concentrated black or a dark neutral tint to give the ant its curious, lifelike expression.
Watercolor Palette
- Hansa Yellow Medium: For the brilliant, glowing highlights at the top of the head.
- Transparent Orange: To bridge the transition between the yellow and deep red tones.
- Pyrrol Scarlet: The primary mid-tone pigment for the ant’s warm, red body.
- Quinacridone Violet: Used in the transition areas to move from warm reds to cool shadows.
- Carbazole Violet: For the deepest shadows on the legs and the underside of the segments.
- Phthalo Blue (Red Shade): To create the soft, cool cast shadow on the ground.
- Neutral Tint or Lamp Black: For the intense, dark centers of the eyes and the fine-line detailing.
The Studious Little Caterpillar
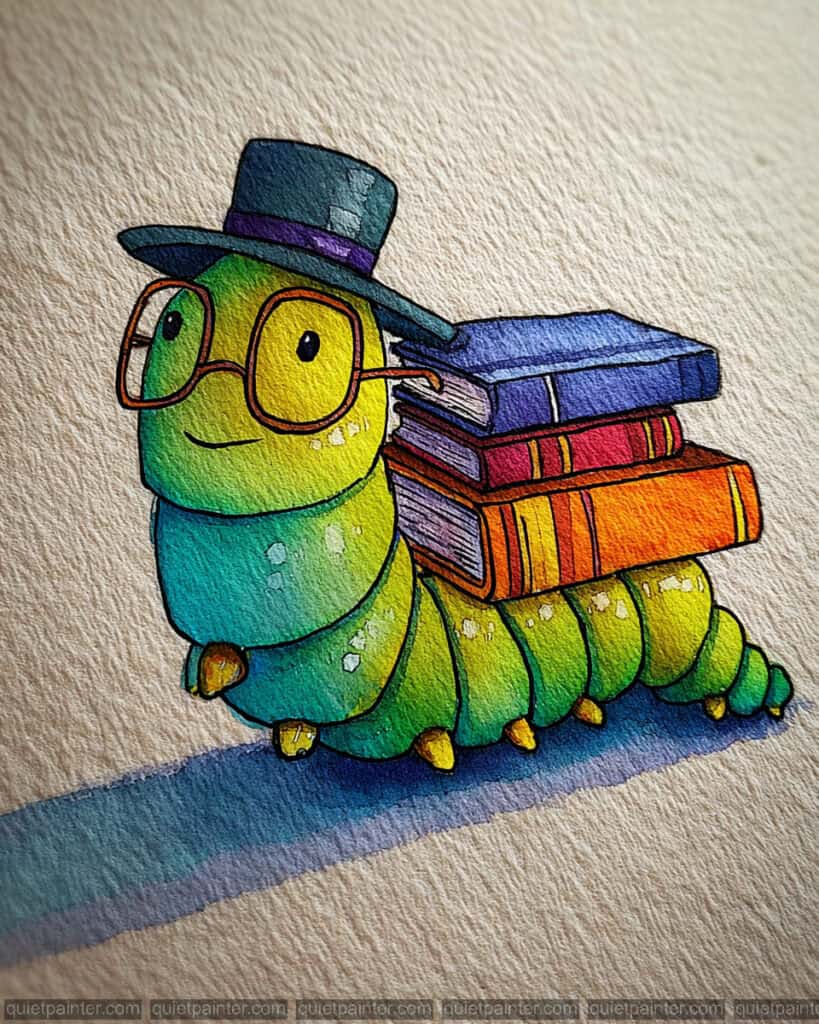
To begin this piece, start with a light graphite sketch to define the segments and the stack of books, ensuring the perspective remains playful. Begin your underpainting with a wet-on-dry technique for the body segments, using a variegated wash to transition smoothly from bright yellows to deep teals. This initial layer establishes the base luminosity and sets the temperature for the entire character.
Once the base layers are completely dry, use a fine-liner or a very small rigger brush to define the bold, expressive outlines. Create depth by adding secondary glazes to the underside of the caterpillar and the shadows beneath the books to ground the subject. Use concentrated pigment for the book covers and delicate, stippled highlights on the skin to suggest texture and light reflecting off the surface.
Watercolor Palette
- Sap Green: For the primary mid-tones of the caterpillar’s body.
- Lemon Yellow: To create those bright, sun-kissed highlights on the face and segments.
- Phthalo Blue (Green Shade): Perfect for the deeper shadows and the cool teal tones on the lower body.
- Indanthrone Blue: For the dark, velvety texture of the top hat and the darkest book cover.
- Pyrrol Scarlet & Quinacridone Magenta: For the vibrant red and pink tones of the middle book.
- New Gamboge or Indian Yellow: To capture the warm, golden glow of the bottom book and the glasses.
- Payne’s Gray: For the soft, diffused cast shadow on the ground.
The Determined Dung Beetle

Start by lightly sketching the dung beetle and its ball to establish the composition on cold-press watercolor paper. Apply an initial wet-on-wet wash of warm yellow to the beetle’s face and a base layer of light brown to the dung ball, allowing them to blend slightly. Once dry, build the beetle’s darker, iridescent body with thin, layered washes of dark blue and purple.
To add texture, dab a slightly drier brush with a mix of Sienna and Umber onto the dung ball to simulate its coarse surface. Use a fine-point brush with intense, opaque black for the final details: the beetle’s legs, antennae, and distinct facial outline. Finally, paint the stylized green patch of grass and cast shadows with transparent washes of green and blue-grey.
Professional Color Palette
- Quinacridone Gold: To create that warm, sun-kissed glow on the top-left of the dung ball and the beetle’s face.
- Burnt Umber: For the rich, organic mid-tones and the “crunchy” texture of the sphere.
- Indanthrone Blue: Perfect for the beetle’s primary body color, providing a deep, velvety base for the shell.
- Cobalt Teal Blue: To capture the bright, iridescent highlights on the beetle’s head and the cool reflected light on the path.
- Sap Green: For the vibrant, transparent mid-tones of the grassy path beneath the beetle.
- Perylene Maroon: For the deepest, darkest crevices of the dung ball to give it physical weight and shadow.
- Lamp Black: Specifically for the crisp, illustrative linework on the legs, antennae, and facial features.
- Payne’s Gray: For the soft, cool-toned cast shadows on the ground to ground the subject.
The Gentleman Beetle’s Debut
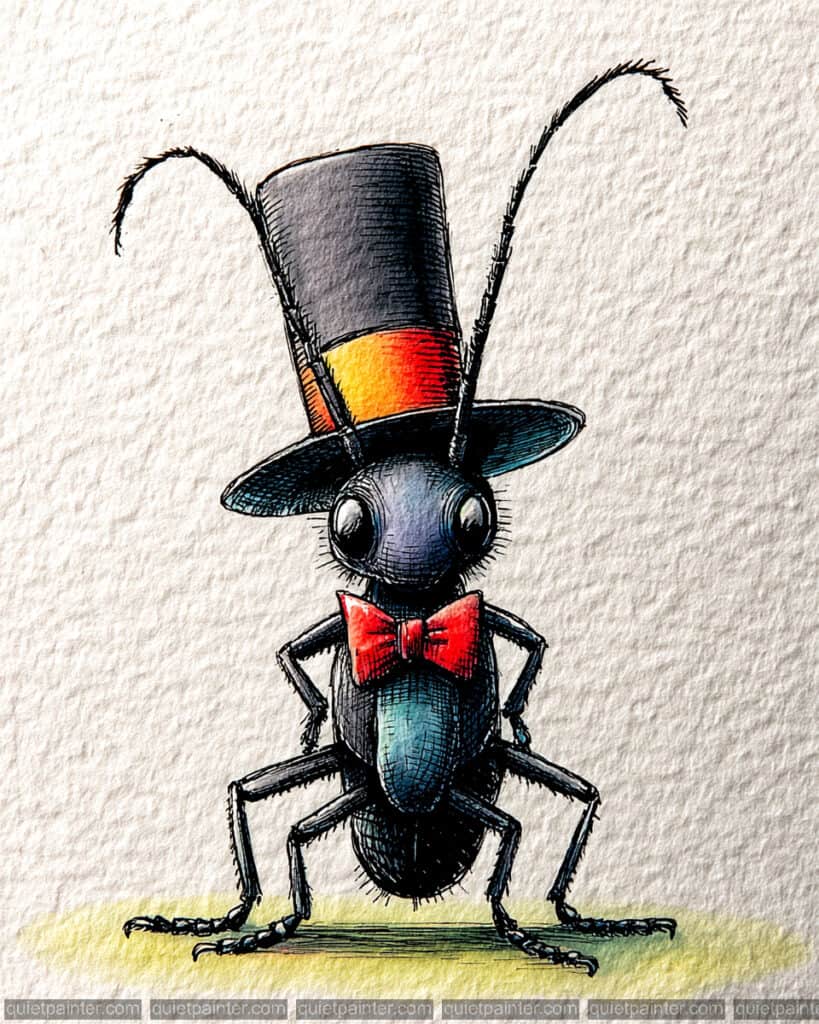
Begin with a detailed pencil sketch, paying close attention to the symmetry of the top hat and the jaunty angle of the bow tie. Use a fine-liner waterproof pen to create the dense cross-hatching on the body and hat, as this will provide the structural “bones” of the piece and allow your colors to pop. Apply a very pale, watery wash of yellow across the ground and the center of the hatband to establish a warm light source before moving to the darker areas.
Once the ink is completely dry, layer your pigments in thin, transparent glazes to avoid obscuring the delicate line work. Focus on the vibrant red of the bow tie and hatband using a high-chroma scarlet, keeping a small “white of the paper” highlight for a silky sheen. Finish by adding a cool teal glaze to the beetle’s belly and a soft, diffused shadow beneath its feet to ground the character in space.
Professional Color Palette
- Pyrrol Scarlet: To create the bold, eye-catching red of the bow tie and the vibrant hatband.
- Indanthrone Blue: For the deep, velvety shadows on the top hat and the beetle’s outer shell.
- Cobalt Teal Blue: Perfect for the luminous, iridescent highlight on the beetle’s abdomen.
- New Gamboge: To capture the glowing golden center of the hatband and the warm light on the ground.
- Neutral Tint: Ideal for building the soft grey gradients on the hat and body without making them look muddy.
- Payne’s Gray: For the cool-toned, subtle cast shadow appearing directly beneath the beetle’s feet.
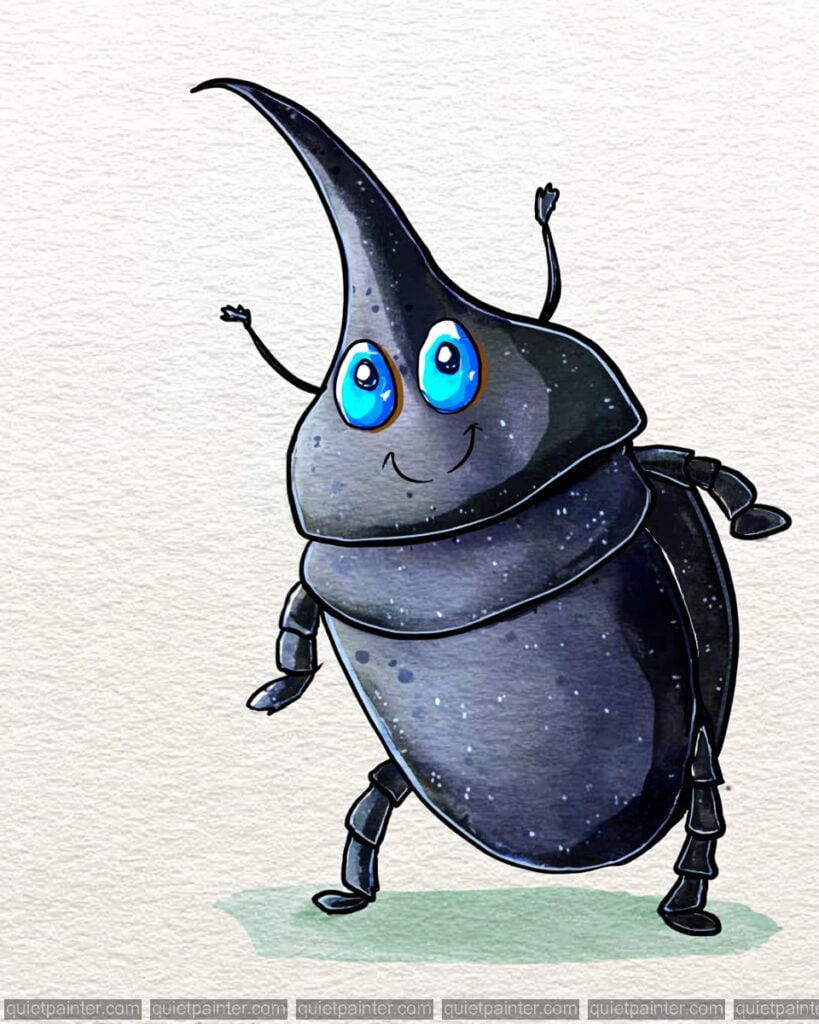
The Rhinoceros Beetle Star-Gazer
For the beetle in the top hat, begin with a waterproof ink under-drawing to establish the dense cross-hatching, which creates the shadows and form. Once the ink is dry, apply a pale New Gamboge wash for the glow on the hat and ground, then glaze the red areas with a high-pigment scarlet. Keep your washes thin to ensure the intricate ink lines remain visible, acting as the primary source of depth and texture.
For the rhinoceros beetle, focus on a wet-on-dry technique to create the smooth, dark body segments, leaving small white gaps for the “starlight” speckles. Use a saturated blue for the eyes and a soft gray for the body highlights to give it a rounded, 3D appearance. Finish by using a dry-brush technique on the grassy base to provide a subtle, organic contrast to the beetle’s polished shell.
Professional Color Palette
- Pyrrol Scarlet: To create the vibrant, punchy red found in the gentleman’s bow tie and hatband.
- Indanthrone Blue: For the deep, near-black tones of the beetle shells and the top hat’s shadows.
- Phthalo Blue (Green Shade): Perfect for the glowing, electric blue eyes of the rhinoceros beetle.
- New Gamboge: To capture the warm, golden light on the hatband and the sunny patch of ground.
- Cobalt Teal Blue: Used as a thin glaze for the iridescent teal highlights on the gentleman beetle’s belly.
- Sap Green: For the soft, simple green washes that ground both characters.
- Payne’s Gray: To build soft gradients and subtle cast shadows beneath the feet.
- White Gouache: (Optional) To add extra crispness to the tiny white star-speckles on the rhinoceros beetle.
Conclusion
I hope these cheeky little critters inspire you to embrace a playful spirit and experiment with your favorite watercolor techniques. There is something truly therapeutic about focusing on the humor and charm found in the smallest details of nature.
If you’re ready to skip the sketching and jump straight into the color, don’t forget to grab the printable coloring pages. I can’t wait to see the vibrant, funny characters you create as you bring these whimsical bugs to life!